Shortcut Beef Rendang Sauce for Biang Biang Noodles

RendangNoodles1.JPG

Lunar New Year is coming up, and for the occasion, we Chinese folks eat long noodles to symbolize longevity. Well, there is no longer type of noodle than a biang biang noodle! In some restaurants, bowls of biang biang noodles are served up where the entire dish comprises of one super long noodle. I’m not THAT good at noodle stretching yet, but I am pretty proud of how long I can get the biang biang noodles I make at home, and I believe you can make those super long noodles at home too! You can find my easy recipe for how to make them here!

Even though biang biang noodles famously come from the Xi’an area of China, they are a glorious blank canvas for any sort of sauce. For this batch of biang biang noodles, I was in the mood for something inspired by the Malaysian flavors that are a big part of my heritage. Malaysian curries and stews are so loaded with flavor—usually a mix of chilies, spices, lemongrass, and coconut—and the wide, chewy noodles always go great balanced with punchy flavors like these. For this fusion dish, I took inspiration from fellow Malaysian-Chinese food enthusiast Jun Loh and his Rendang Rigatoni. Rendang is an iconic Malaysian stewed beef dish, simmered in coconut milk until the solids separate from the oil and get caramelized and sticky, acting as glue to encase the tender pieces of meat with spices. It’s usually eaten with rice. If you’ve seen my goulash-inspired spaghetti and meatballs recipe, though, you’ll know that I love converting beef stew gravies into pasta sauces, so Jun’s idea of turning rendang into a twist on bolognese really spoke to me. I’ve made Jun’s recipe before and it was awesome, a combination of two of my great loves (pasta and Malaysian food).

When I make the noodles from scratch, though, I tend to get lazy with the sauces. So, much like my version of cumin lamb noodles, this vague sauce recipe leans heavily on a storebought paste to make easy work of getting those rendang flavors. I like using this rendang paste; I can find it at most large Asian supermarkets in my area. Give it a taste and decide how much of it you want to use. For sauces like this, listening to your tastebuds is more important than following an exact recipe. The ingredients described below go great together and are tried and true combinations in Malaysian cooking, so you really can’t go wrong throwing them together in different quantities. Don’t expect a very “wet” sauce though; much like how rendang is thick and paste-like, you should aim for something that just coats the noodles and doesn’t weigh them down.

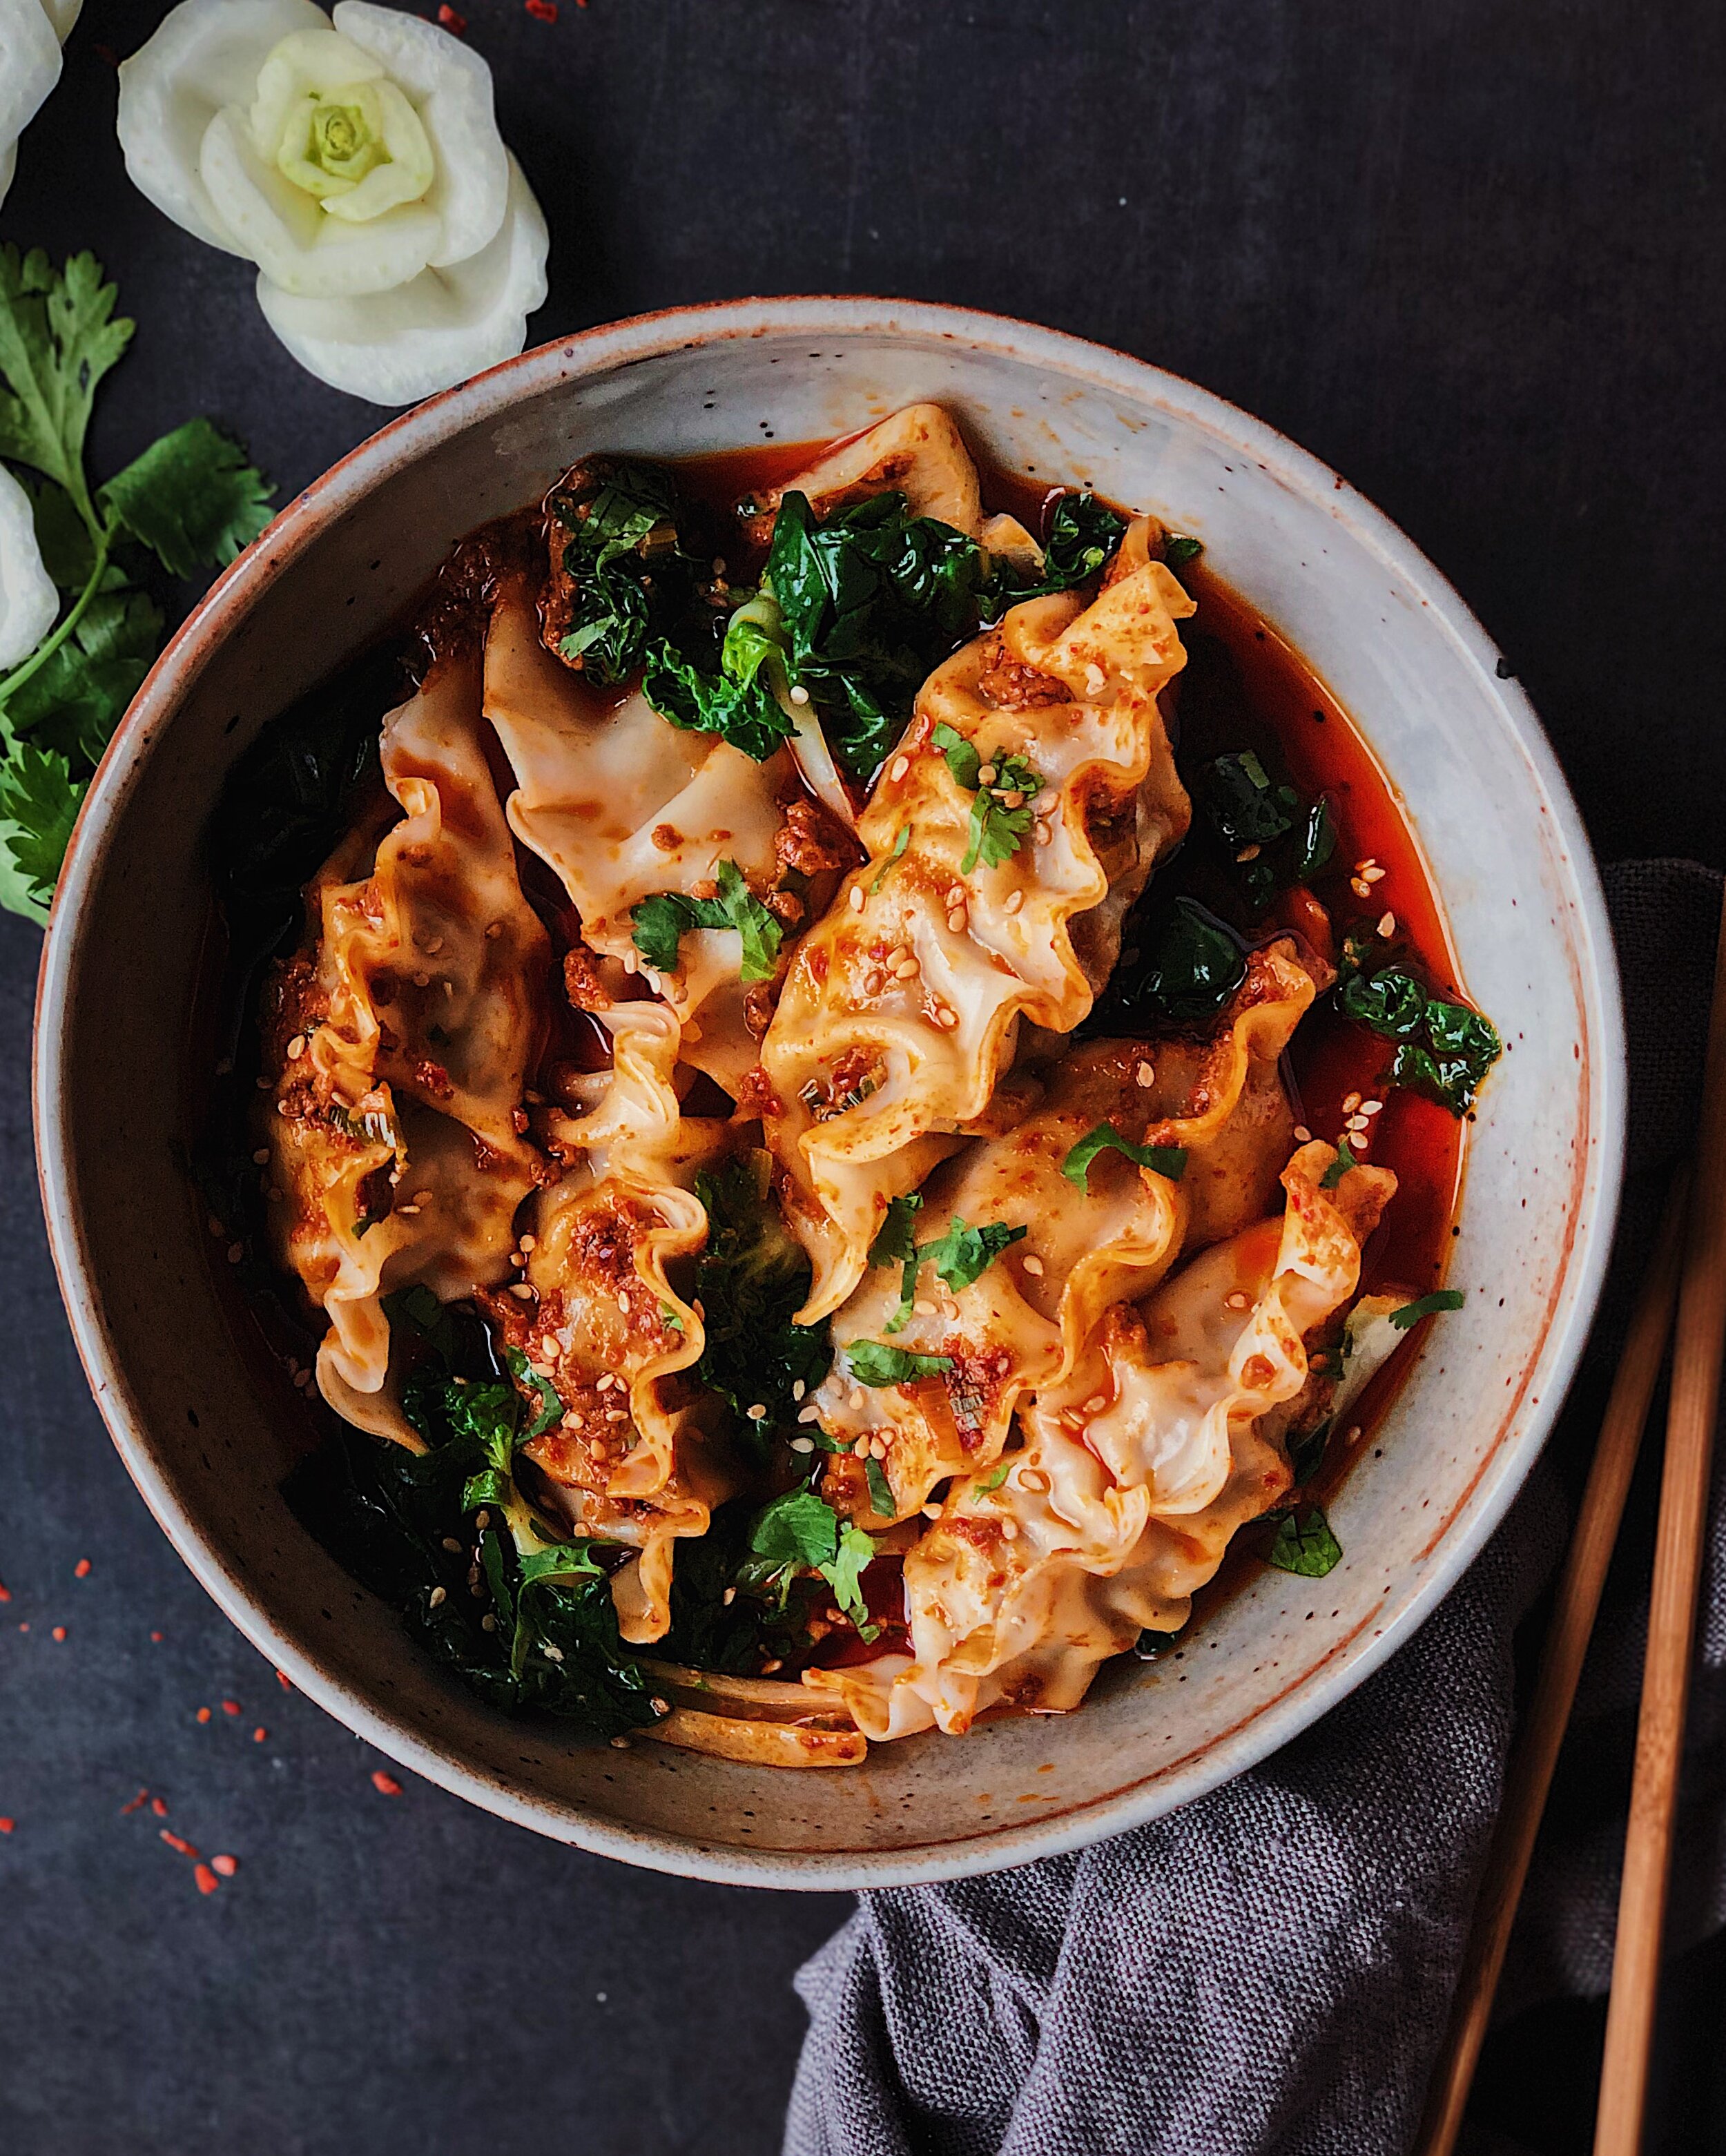
I admit that this noodle dish isn’t the prettiest, so especially if you are serving it for Lunar New Year, I recommend you make some pickled red chilies to go on top! In Malaysia, pickled green chilies are served as an accompaniment to wonton mee, but I like to pickle red Fresno chilies (especially when I grow them in my backyard in warmer months). I always keep a jar in my fridge, made loosely based on this recipe.

RendangNoodles2.JPG

Awkwardly Vague instructions for Beef Rendang Noodles

Ingredients

3/4 lb ground beef
1/4 onion, finely diced
2 cinnamon sticks
lots of chopped garlic
1 tsp cumin
1 tbsp Chinese or Korean chili flakes
pinch of salt
~ 1/2 cup Malaysian rendang curry paste (like this one)
1/2 cup coconut cream
1/2 pandan leaf, finely shredded (optional)
juice from 1 lime
coconut oil
Thai basil, for garnish
cilantro, for garnish
pickled red chilies
raw hand-pulled noodles

Procedure

Prepare your large pot of boiling water for the noodles.

In a wok, heat oil and stirfry onions. Add cinnamon stick and stirfry until fragrant. Add beef and garlic. Season with cumin, chili flakes, and salt. Continue to stirfry until beef looks just about cooked. Add curry paste and stir to combine. Mix in coconut cream and pandan leaf. Mix in lime juice. Simmer on low.

Cook biang biang noodles as described in the noodle recipe.

Add cooked noodles directly on top of sauce mixture. Toss to coat the noodles and add extra salt if necessary, to taste.

Garnish with Thai basil and cilantro. If desired, add pickled red chilies on top.

Recipe: Spaghetti and Meatballs Paprikash

LilyMorello_SpagMeatballsPaprika_01b.JPG

When I was growing up, having spaghetti for dinner was the ultimate treat. There was nothing fancy involved at all—just dry boxed pasta, sauce directly from a jar, and copious amounts of that powdered parmesan from the green can—but it was just so different from the Chinese home cooking that was the norm in my household, that the joy I felt on those nights is probably akin to the level of joy that most kids felt when getting to go to Disneyland. I even remember my dad joking at some point that I would marry an Italian person because my love for pasta was so strong (which somehow actually ended up coming to fruition—hence, why this Malaysian-Chinese-American girl sports an Italian last name at the top of this website).

Those beloved spaghetti nights didn’t even involve meatballs, so growing up, the fabled “spaghetti and meatballs” seemed like something that only existed in cartoons. And despite it not being a tangible entity in my childhood, as an adult, I can’t help but attach the stigma of spaghetti and meatballs being a kid’s dish. However, I think I have come up with a different version of spaghetti and meatballs, fit for an adult making up for lost time.

LilyMorello_SpagMeatballsPaprika_04.JPG

Since paprika goes gorgeously with tomatoes, I decided to use this as my key to making a really special version of spaghetti and meatballs. I associate paprika with a couple of really awesome tomatoey beefy dishes out there. Goulash, native to Hungary, but adapted to various other cuisines, is a true celebration of paprika; the old Hungarian origins were a soup/stew in which herdsmen relied on the beauty of sweet paprika to bring flavor to the beef, but modern versions have since been enhanced with the addition of tomatoes. I love the Viennese derivative, a thick dark gravy of paprika and tomato paste, sweetened by caramelized onions, that clings to its fellow plate inhabitants. I also thought of the meatballs that get served as Spanish tapas, so snackable in part because of their tomato sauce flavored with smoky paprika. These dishes were all points of inspiration for my spaghetti and meatballs.

The end result is a smoky, sweet, thick tomato sauce—somewhat resembling a gravy—that coats every meatball and spaghetti strand that gets tossed in it. The meatballs are light and bouncy to balance with the dense sauce. I based my sauce recipe mostly on the Viennese version of goulash, but I used Spice Tribe’s lovely Spanish Pimentón de la Vera to bring a more smoky umami flavor. This gorgeously fragrant paprika is one of my favorites from Spice Tribe’s single origin line because a little sprinkle on top of anything really transforms the aroma of any dish and makes my mouth water before I even take the first bite. But here, I really let it be the star, resulting in a sweet, smokey, rich version of spaghetti and meatballs—universes away from those old childhood days of longing for the tomato sauce from the jar.

LilyMorello_SpagMeatballsPaprika_03.JPG

I’m calling this recipe my “Spaghetti and Meatballs Paprikash”. Paprikash is derived from the Hungarian word for paprika and is used to describe those paprika-based Hungarian stews that seem to be the origin of all the goulashes around the world that followed. Though there is really not much Hungarian at all about this pasta dish, the name is meant to be a nod to what are possibly some of the oldest paprika-appreciation meals.

LilyMorello_SpagMeatballsPaprika_02.JPG

How to Make Spaghetti & Meatballs Paprikash

Ingredients for the Meatballs

1/2 cup panko breadcrumbs
1 egg
1 tbsp milk
1 lb ground beef
2 cloves garlic, minced
1/2 tsp Spice Tribe Pimentón de la Vera
2 tbsp parsley, chopped
1/2 tsp salt
neutral cooking oil

Ingredients for the Sauce

3 tbsp butter
2 large yellow onions, thinly sliced
4 cloves garlic, minced
2 tsp caraway seeds, toasted and ground
2 tbsp fresh marjoram, finely chopped
3 tbsp tomato paste
3 tbsp Spice Tribe Pimentón de la Vera
2 tbsp red wine vinegar
1 tbsp worcestershire sauce
1 tbsp sugar
1 cup high-quality bone broth
1 cup beef broth
1 14-oz can crushed tomatoes
salt, to taste

For the Final Dish

1 lb dry spaghetti
salt
fresh marjoram or parsley, for garnish
grated parmesan cheese (optional)

Procedure

To make the meatball mixture, beat together the egg and milk in a small bowl, then add the panko breadcrumbs. Allow the panko to soak up the moisture while prepping the other ingredients. In a separate mixing bowl, combine ground beef, garlic, Spice Tribe Pimentón de la Vera paprika, parsley, and salt. Fold together or mix with hands to combine, then add the panko mixture and mix again just until homogenous. Chill in the refrigerator while you start the sauce.

For the sauce, combine butter, onions, and a couple generous pinches of salt in a large dutch oven set on medium heat. Cook, stirring regularly with a wooden spoon, until the tips of the onions start to brown, about 5–7 minutes. Lower the heat to medium-low and cook until all of the onions are soft and completely golden brown, about 20–25 minutes more. 

Add garlic, caraway, marjoram, and tomato paste; stir together and allow these new ingredients to become fragrant, about 1–2 minutes. Then add Spice Tribe Pimentón de la Vera paprika, vinegar, worcestershire sauce, and sugar. Scrape off anything stuck to the bottom of the pot, then add bone broth. 

Turn the heat back up to medium and cook, stirring, until the mixture holds together and is thick enough to leave a clean trail when the spoon glides against the bottom of the pot. Turn off the heat and carefully transfer the mixture to a blender. Add half of the beef broth to help cool the mixture and blend until smooth (please exercise caution when blending hot liquids).

Return the mixture to the pot and add the remaining beef broth, plus crushed tomatoes. Simmer with the lid slightly ajar on low for 30–45 minutes until the sauce starts to thicken and cling to the spoon.

In the meantime, roll the chilled meatball mixture into 1-inch balls (about 18–20 balls). Heat a small amount of oil in a nonstick skillet, and add the meatballs. Sauté until the meatballs are slightly browned all around their exterior. Transfer the meatballs to the sauce and discard the rendered fat. Bury the meatballs in the sauce and continue to cook, covered, on low until the meatballs are cooked through and the sauce reaches the consistency of thick gravy, about 15 more minutes.

While the meatballs finish cooking in the sauce, bring a large pot of water to a boil. Salt generously and cook spaghetti according to package instructions. Add cooked pasta directly to the sauce and toss everything together. Garnish with fresh herbs, and serve with freshly grated cheese, if desired.

Thank you so much to Spice Tribe for sponsoring this recipe! Check them out on Instagram here or visit their website to purchase high quality spices and unique small-batch spice blends.

Recipe: Mala Chili Oil Fried Egg

chilioilfriedeggbagel.jpeg

Lately, I have been really into frying eggs in Sichuan pepper chili oil. Why fry an egg in regular, flavorless oil when you can have a fried egg whose every crag and crispy edge is filled with a hint of something numbing spicy?

The inspiration for this was a video I saw of a hawker stall in Malaysia that serves up eggs fried in sambal. (Sambal is a term used in Southeast Asia to refer to various chili sauces and pastes, typically made with pulverized fresh red chilies of some sort.) I’ve tried making this a couple of times but couldn’t get it to look aesthetic enough. It was also horribly messy (and sometimes slightly painful) because the bits of chili and aromatics in the sambal would splatter everywhere once the oil was hot. But it was from this concept that I thought of the idea of frying my eggs in something other than plain ol’ oil. I realized that if I made an infused oil but strained out all the spices, it would essentially be like using regular oil to fry an egg, with no particles to splatter crazily out of the pan.

My mala chili oil fried egg is shown above with a black garlic and scallion cream cheese and the classic Lao Gan Ma chili crisp**, on an everything bagel.

How to Make a Mala Chili Oil Fried Egg

Ingredients For the chili oil

2 tbsp coarse Chinese or Korean chili flakes
4 tsp pink Sichuan pepper
2 star anise
1/2 cup high smoke point neutral oil

You’ll also Need

1 egg (or more)
coarse kosher salt

Procedure

Add chili flakes to a heat-safe bowl. In a small saucepot, combine oil, Sichuan pepper, and star anise. Heat on medium-low heat until the lighter interior parts of the peppercorn husks begin to turn brown, about 4 minutes. Turn off the heat and wait for the pepper to turn fully dark brown, about 1 more minute. Carefully pour oil through a fine mesh strainer over the chili flakes. Mix together and transfer to a jar when cooled. Allow the chili to infuse with the oil overnight for best results. Then, use this chili oil to fry eggs, or as a base for a dumpling or noodle sauce!

To fry the egg: Skim 1 tablespoon of clear oil from the top of the jar (or pass the contents through a strainer). It is important to only use the oil as any other solids will splatter out of the pan when frying.

Heat the oil in a small nonstick pan, then add the egg (I like to crack the egg into a small bowl first). Spoon some of the hot chili oil over the egg whites to help them cook, and/or cook egg to your preference! Hit it with a little sprinkle of salt (or a drizzle of LGM chili crisp!).

Recipe: Dan Dan Dumplings

DanDanDumplings1.JPG

I love to experiment with taking the components of an existing dish and reimagining them in the form of a dumpling filling. If there’s a tried and true combination of ingredients already, then stuffing all of those flavors together into a one-bite dumpling format for most efficient delivery to the tastebuds will obviously result in something awesome. The trouble is that it’s hard to really celebrate those brilliant fillings in photo form. (Or, at least I personally struggle with that.) Dumplings are plenty cute-looking whole, but what makes them delicious is hidden inside.

But I finally had an idea for a dish-within-a-dumpling combo that I thought was worth photographing, because the sauce is just as important and sexy-looking as the dumplings. Presenting: Dan Dan Dumplings.

This idea builds off of this existing recipe that I developed for Bibigo USA, as a moreish way to serve their frozen mandu. I am super obsessed with Sichuan pepper and mala (numbing-spicy) foods and as part of that recipe, I developed my own version of mala chili oil! If you have never experienced them before, Sichuan pepper husks are super unique in that they contain a molecule that causes a tingling sensation on your tongue. It is not a burning heat, like eating a spicy chili, but rather a numbing sensation like when your foot “falls asleep”. I know it sounds a little unsettling when put that way, but it is honestly a delightful experience when eating in conjunction with flavorful, spicy foods. The combination of Sichuan pepper and spicy chilies is known in Chinese cuisine as mala, which translates to numbing-spicy.

chilioilingredients.JPG

Dan dan noodles have become an iconic mala dish associated with Sichuan cuisine in Chinese-American restaurants, and they are the inspiration for these dumplings. Dan dan refers to the carrying pole that OG street food vendors would use to transport their ingredients as they walked around. Since I’m not carrying my ingredients around on a pole, technically these aren’t “dan dan dumplings”, but I am gonna call them that because they are meant to be the dumpling version of dan dan mian. The dish usually has 3 major components: 1) an oily sauce that is a little numbing, nutty (from sesame paste), and spicy; 2) bouncy noodles; 3) a topping made of ground pork and preserved greens and sometimes a blanched Chinese vegetable. Instead of wok-frying the ground pork mixture, I stuffed it inside the dumpling wrappers, ditched the noodles, and went heavy on the chili oil in the sauce, in a similar vein to chili oil wontons.

I used the recipes for dan dan noodles by Woks of Life and Omnivore’s Cookbook as references for developing this dumpling recipe. One slight road bump that I ran into when replicating the flavors of dan dan noodles was the type of pickled vegetable used in the pork mixture. Both reference recipes call for a specific Sichuan-style preserved vegetable called sui mi ya cai. After staring at the shelves of pickled vegetable packets for quite some time at my local Asian supermarket, one of the uncles working at the store offered to help, but said they didn’t have it. This “preserved mustard green (chili)” is what I used instead.

DanDanDumplings4.JPG
DanDanDumplings2.JPG
DanDanDumplings3.JPG

Because the chili oil sauce is such a key component to this dish, I wanted to use a dumpling fold that would allow the sauce to really stick to the dumplings. What better way to accomplish this than to turn the dumplings themselves into little cups? Apparently this is known as the “rose bud” dumpling fold, but I received overwhelming feedback that this fold is quite reminiscent of the hats from The Handmaid’s Tale. It is super easy—just place a little scoop of filling on one half of the dumpling wrapper, fold in half and seal with some water, then overlap the two sides of the semicircle. You can see a video of how to do it here.

I obviously went very heavy on the chili oil in these photos. You can add it to your taste, but I was quite happy eating these as they were.

DanDanDumplings5.JPG

How to Make Dan Dan Dumplings

Ingredients For the chili oil

2 tbsp coarse Chinese or Korean chili flakes
2 cloves garlic, minced
1 scallion, thinly sliced
4 tsp pink Sichuan pepper
2 star anise
1/2 tsp salt
1/2 cup high smoke point neutral oil

Ingredients for the Dumplings

1/2 lb ground pork
2 tsp hoisin sauce
2 tsp shaoxing wine
1 tsp kecap manis (or 1/2 tsp dark soy and 1/2 tsp brown sugar)
1/2 tsp five spice powder
1/4 tsp ginger powder
a pinch of toasted and ground Sichuan pepper (optional)
1 2.5 oz packet spicy preserved mustard greens
about 24–26 dumpling wrappers

Ingredients for the Sauce

4 tsp Chinese sesame paste, stirred
2 tsp honey
1 tbsp soy sauce
2 tbsp black vinegar

For Garnish

1 scallion, sliced
1–2 tbsp roasted unsalted peanuts, chopped
cilantro (optional)

Procedure

In a heat-safe bowl, combine chili flakes, garlic, scallions, and salt. In a small saucepot, combine oil, Sichuan pepper, and star anise. Heat on medium-low heat until the lighter interior parts of the peppercorn husks begin to turn brown, about 4 minutes. Turn off the heat and wait for the pepper to turn fully dark brown, about 1 more minute. Carefully pour oil through a fine mesh strainer over the ingredients in the bowl. Stir everything in the bowl together and allow to sit for at least 10 minutes (more is recommended) to let the flavors integrate and the garlic cook through.

To make the dumpling filling, combine the ground pork, hoisin sauce, shaoxing wine, kecap manis, five spice, powdered ginger, and ground Sichuan pepper (if using) in a bowl until mixed evenly. Fold in the preserved mustard greens. Stuff inside dumpling wrappers and seal shut as desired (see notes above for rose bud fold). Place folded dumplings on a tray dusted with flour to prevent sticking.

In a separate bowl, whisk together sesame paste and honey. Whisk in soy sauce and black vinegar at a gradual drizzle to prevent the sesame paste from clumping.

Bring a large pot of water to boil, then carefully add the dumplings. Remove them as they float to the surface and transfer them to a bowl or tray with a little bit of oil.

Add about 2 tablespoons of the hot cooking water to the sesame sauce and whisk to combine. Then add 2 tablespoons of the chili oil and whisk again.

To serve, spread a generous layer or the sesame sauce in the bottom of each bowl. (You may still have a little bit left over.) Divide the dumplings into each bowl, then drizzle chili oil over the dumplings to taste. (You may still have some chili oil left over too, but I didn’t because I like it numby and spicy!) Garnish, and then mix dumplings in the sauce and oil before devouring.

My Basic Jook Recipe

porkbellycongee.JPG

There are plenty of recipes out there for rice porridge, commonly known as congee, or what my Cantonese family calls jook. I am mostly recording this basic jook recipe down for myself, because I know how I like to make it but I sometimes forget things like: How much was the right amount for our 2-person household? How much water did I start off with? How far in advance of dinner do I need to start it, again…? Getting old sucks, and one of the worst things about it for me so far has been forgetting all the simple little things that used to be so easy for me to recall.

To me, a good basic jook has a silky feel to it. Something that goes down easy without a lot of chewing but isn’t a completely homogenous puree either. Some people like theirs as more like a soupy water with cooked rice floating in it, but that’s not for me. I also like making sure that there is a pleasant mild flavor to it when eating it all on its own, even though a variety of toppings is an absolute must for eating jook in my household. Pickled vegetables, white pepper, and soy sauce where the most common toppings from my childhood. But instead of those, I really went all-out in the photo above to lure you in— And it worked, right?

The jook in the photo features red braised pork belly that I made using Omnivore’s Cookbook/Maggie Zhu’s recipe here. There’s also a poached egg, radish shoots, pea shoots, chopped scallions, crushed chicharrones, and some slices of red Fresno chili. I also served it with a side of you char kueh/youtiao/Chinese donut, which I buy at the Asian supermarket and always keep stashed in my freezer. The best part of eating jook is tossing in a few slices of the fried dough, letting them get soggy, and then eating a big scoop of the soggy donut and jook all at once.

How I Make Basic Jook/Congee

(Makes 2 dinner portions)

Ingredients

1/2 cup jasmine rice
2 cups bone broth
2-4 cups water
2 inches ginger, peeled
2 tbsp shaoxing wine
2 tbsp fish sauce
salt

Procedure

Combine rice, bone broth, and 2 cups of water in a large pot and turn heat on high. Finely grate ginger directly into the pot so it catches all the juice. Add shaoxing wine and fish sauce. Stir everything together.

Bring to a boil and then reduce heat to low. Cover and simmer for 1 hour, stirring occasionally to make sure nothing sticks to the bottom. If jook looks too dry, add water 1/2 cup at a time along the way. Continue simmering until jook reaches desired consistency. Season to taste.

Serve with yummy accompaniments.

Need a faster recipe? Check out my shortcut Chicken Jook with Ginger-Scallion Oil recipe, using storebought cooked rice and rotisserie chicken (sponsored recipe).

Regrets About My Kitchen Renovation

I mentioned in my Instagram stories the other day that there were a couple of things I regret about my kitchen renovation 8 years ago. A few people asked for me to share my reflections on the experience, so they don’t make the same mistakes. It’s all super minor things, but I’ve collected my thoughts here in case it is helpful for anyone considering a kitchen remodel.

8C453864-7130-4FFE-96BC-E9CFF405AAAC.jpg

We bought our house back in 2012. When we had started looking at homes the year prior, real estate was pretty reasonably priced in the Bay Area compared to how things are nowadays. Prices started to rise during that year of house hunting, so by the time we managed to nail something down, it was nowhere near perfect and we didn’t have much budget left for renovations. The one thing we knew we HAD to change was the kitchen, which we hated. The footprint of the kitchen was so tiny that there was basically nowhere to stand in it when the oven was open; it certainly couldn’t have fit more than one person actively cooking at once. (“If we didn’t renovate that kitchen, we’d be divorced by now,” we still joke.) We ended up hiring a contractor to knock down the wall that divided the kitchen and dining room, and gut the entire thing.

Things I regret:

  • Not getting electrical outlets installed in the kitchen island. The extra electrical work would have required our contractor to apply for more permits with the city, so we passed on this idea and had our small kitchen island placed on caster wheels instead. Since I use the island as my main work surface for all my prep, it would have been nice to also be able to use small appliances on it.

  • Choosing an overmount sink verses mounting it under the countertop. We opted for a drop-in sink (like this) that has a thin metal lip extending over the countertop to hold it in place. Crumbs sure have a way of getting wedged under this lip when we are trying to wipe down the countertops; very annoying!

  • Not getting an ice maker installed in our freezer. Would have been convenient for all those iced home cafe drinks I made this past year!

  • Inspecting things more carefully each day while the work was in progress. For the most part, we really liked our contractor. He was friendly, communicated well, and made some great suggestions along the way. But there are little missed details (weirdly aligned cabinet legs, crooked light fixture) that we didn’t notice until after the project was over.

Here are some before, during, and after photos, in case you’re curious!

66609_10101946813521903_1612234202_n.jpg
531419_10101767528650223_1988979383_n.jpg
530734_10101802442048493_561334800_n.jpg
480306_10101946813736473_631140447_n.jpg
554944_10101946813696553_358258544_n.jpg

Recipe: Bibigo Mandu in Sesame Chili Oil

DandanMandu1.JPG

Unfortunately, the Bay Area is back in lockdown again and we have been advised to limit leaving our homes except for essential outings like buying groceries. So, I guess it is back to hoarding the essentials again* which for me means loading up my freezer with my favorite frozen dumplings: Bibigo Beef & Vegetable Mandu. I have absolutely no shame in incorporating these super convenient and legitimately delicious frozen dumplings into my pantry meals; they are comforting and satisfying. And this recipe may be my favorite way to jazz them up so far!

chilioilingredients.JPG
bokchoy.JPG

For this recipe, I developed my own Sichuan-inspired chili oil! I really really love that numbing sensation that comes from the Sichuan peppercorns, so my chili oil is a reflection of that love. You will feel a lingering tingling sensation in your tongue for sure! If you are not used to this mala experience, you may want to cut down on the amount of peppercorns in your chili oil. Also, you will want to incorporate the chili oil into the sesame sauce to your taste. I used almost the full recipe of oil to a full pack of mandu, but it is possible that you will have some chili oil left over, which you can store an air-tight jar to spice up other noodles or dumplings later.

* Remember: hoard dumplings, NOT toilet paper. Trust me, you’ll be happier.

Lily_Dec2_Social_v1.JPG
Lily_Dec2_Social_v2.JPG

How to Make Mandu in Sesame Chili Oil

Ingredients For the chili oil

2 tbsp coarse gochugaru
2 cloves garlic, minced
1 scallion, thinly sliced
4 tsp Sichuan peppercorns
2 star anise
1/2 tsp salt
1/2 cup avocado oil

Ingredients for the sesame sauce

2 tbsp Chinese sesame paste, stirred
2 tsp honey
2 tbsp soy sauce
1 tbsp black vinegar

And to assemble

16 Bibigo Beef & Vegetable Mandu
2–3 baby bok choy mui, bases removed
1 tbsp cilantro, roughly chopped
1 tsp sesame seeds, toasted

Procedure

In a heat-proof bowl, combine gochugaru, garlic, scallions, and salt. In a small saucepan, combine oil, Sichuan peppercorns, and star anise. Heat on medium-low heat until the light parts of the peppercorns begin to turn brown, about 4 minutes. Turn off the heat and wait for the peppercorns to turn fully dark brown, about 1 more minute. Carefully pour oil through a fine mesh strainer over the ingredients in the bowl. Stir together and allow to sit for at least 10 minutes to let the flavors integrate and the garlic cook through.

In a separate bowl, whisk together sesame paste and honey. Whisk in soy sauce and black vinegar at a gradual drizzle to prevent the sesame paste from clumping. Then gradually whisk in half of the chili oil mixture. Taste, then continue to add chili oil mixture as desired. (I used almost the full recipe because I like it really numbing spicy!)

Bring a large pot of water to boil, then cook mandu according to the package directions, remove from pot, and set aside. Add baby bok choy mui to the same boiling water and blanch for 1 minute. Remove boy choy and plunge in cold water.

Transfer mandu and bok choy to a serving dish. Stir sauce together again and add 1 tablespoon cooking water if desired to make the sauce smoother. Pour sauce over the mandu. Garnish with cilantro and sesame seeds.

Lily_Dec3_Banner_v2.JPG

Thank you so much to Bibigo USA for sponsoring this recipe! For more recipe ideas and to learn more about their products, visit their website!

Recipe: Chajang Rabokki

rabokki1.JPG

I think that some of the world’s greatest dishes are ones where the names make it obvious that two awesome things were combined to make one even more awesome and delicious thing. Take rabokki for example. The word is a combination of ramyeon (Korean instant ramen noodles) and tteokbokki (stir-fried rice cakes). Carbs on carbs, essentially, but two very different textures. The rice cakes provide chew, as well as big surface area to get some extra flavor from the frying, while the noodles are a conduit for all the sauce.

The more common form of rabokki that I have seen is the kind in the typical red spicy-sweet tteokbokki sauce that can be found from street vendors. It’s often served with cheese and boy is it indulgently delicious.

But there’s also the super umami-y chajang rabokki. You may be familiar with chajang and not realize it. Perhaps you picked up a packet of instant Chapagetti to make your own chapaguri (known as “ram-don” if you’ve only read the English subtitles) after watching the movie Parasite. The cha- in Chapagetti or chapaguri is a reference to the chajang sauce (also spelled jajang). The defining ingredient in this sauce is black bean paste, giving the noodles and rice cakes, and everything it touches, that rich dark color that you just know is going to taste good.

For this version of chajang rabokki, I took combining carby things to an even more extreme level by adding Bibigo Chicken & Vegetable Steamed Dumplings into the mix. I mean, they also add some protein, and I think the lovely pleated dumplings add a lot visually, so why not? I refrained from adding cheese this time, but that wouldn’t be a bad idea either. In fact, add whatever odds and ends you have in your fridge or freezer because it will all be good coated in that deep black bean sauce.

Lily_Dec1_Banner.JPG

How to Make Chajang Rabokki

Ingredients

1 cup Korean rice cakes, or tteok
5 tsp Korean black bean paste, or chunjang
4 tsp Bibigo Hot & Sweet Go-Chu-Jang Sauce
1 tbsp gochugaru
1 tsp sugar
1 1/2 cups bone broth
1/4 onion, thinly sliced
1 scallion, thinly sliced
2 cloves garlic, minced
1 cup Korean fish cakes, or eomuk, cut into bite-sized pieces
1 package Bibigo Chicken & Vegetable Steamed Dumplings
1 package instant noodles


Procedure

If rice cakes are frozen, soak in cold water for 10 minutes to thaw. Skip this step if rice cakes are fresh.

Mix together black bean paste, Bibigo Hot & Sweet Go-Chu-Jang Sauce, gochugaru, and sugar together in a small bowl to make the sauce.

In a wide, shallow pot, combine the broth with onions, garlic, and whites of the scallions, reserving the green parts for garnish. Bring to a boil. Then add sauce, dumplings, rice cakes, and fish cakes. Cook for 2 minutes on medium-high heat.

Add the noodles to the pot and continue to boil until noodles are cooked and the dumplings are heated through, about 2–3 minutes.

Remove from heat and toss together to make sure everything is coated with sauce. Plate and garnish with the remaining green scallions.

Thank you so much to Bibigo USA for sponsoring this recipe! For more recipe ideas and to learn more about their products, visit their website!

My Best 9 of 2020

I rounded up my best 9 photos from 2020 on Instagram—not based on the greatest number of likes received, but the photos that I was the most proud of this past year. Here’s a little more detail about the dishes in the photos I chose.

Gochujang Fried Chicken Bao

gochujangbao.jpg

You can get ready-made lotus leaf bao at Asian supermarkets. I always have some handy in my freezer, and when I want to use them, I place them on pieces of parchment paper and steam them in my bamboo steamer.

To make the spicy fried chicken, I cut chicken thighs into small pieces and then coated them in a mixture of beaten egg and soy sauce, and then rolled them in corn starch. After deep frying, I tossed the crispy chicken pieces in this bottled sauce*, tucked them into the steamed bao, and garnished with sesame seeds and sliced scallions.

*This was a client’s product but this recipe was not sponsored.

Avocado and Burrata Toast

avoburratatoast.jpg

I made these celebratory toasts to mark the 2-year anniversary of my Instagram account. I used four-grain sourdough from an awesome little local bakery called Fox and Lion Bread. I topped them with:

  • sliced avocado

  • gobs of burrata

  • pickled carrot ribbons (recipe here)

  • curly scallions (slice scallions lengthwise and soak in iced water)

  • pea shoots

  • everything seasoning

  • edible flowers from my backyard garden

Viet-Cajun-Inspired Vermicelli Bowl

vietcajunnoodlebowl.jpg

Frozen shrimp became a stable in my freezer during lockdown, and I always keep rice vermicelli in my pantry. You can tell that I made this when I was really trying to limit my grocery trips and had run out of fresh garlic, because my nước chấm dressing features a last-resort use of bottled fried garlic that really was not the same. To assemble the rest of the bowl:

  • Soak rice vermicelli in boiling water for 5 minutes. Rinse in cold water and drain.

  • Pat shrimp dry and toss in cajun spices and a bit of brown sugar. Sear in a cast iron skillet on both sides to get that namesake blackened shrimp look.

  • Prep your choice of herbs and greens. All of mine were grown in my garden! I used: mint, red shiso, sorrel, chard, mixed microgreens, and scallions.

  • Add other produce odds and ends that you have on hand! I used cucumbers and pickled carrot ribbons (recipe here) because I had them.

Vegan Jackfruit Tacos & Homemade Pink Tortillas

jackfruittacos.JPG

To make corn tortillas from scratch, I simply follow the ratios from the tortilla recipe on the bag of Maseca brand masa harina**. For 8 pink tortillas, I combined 1 cup of white masa harina, 2/3 cup hot water, a pinch of salt, and a little bit of beetroot powder; kneaded it together; and rested under a damp towel for 20 minutes before I divided them evenly into 8 balls. I cut open a gallon-sized ziplock bag to use to prevent the dough from sticking to my tortilla press. This is the cast iron tortilla press I use**; I usually press and then rotate the dough a couple of times to get a nicely rounded, thin tortilla. Then I cook them on a super hot griddle pan.

Canned green jackfruit in brine or water is a common item in Asian supermarkets, but lately it has become so popular as a vegan shredded meat substitute that they even have it at Trader Joe’s. I don’t think it tastes like meat, but it does have a nice texture for tacos and holds on to seasonings well. I squeezed out the liquid, simmered with a mole-inspired sauce, and shredded it up.

Make Your Own Fresh Spring Rolls Night

springrollplatter.JPG

This was one of my ideas for turning dinner into an interactive experience during lockdown. You can get rice paper sheets in various sizes at Asian supermarkets; I like to get the smaller ones so each roll is just a couple of bites. Serve at the table with a big platter of boiled shrimp, fresh veggies and herbs, and rice vermicelli…or whatever you have lying around that is fresh and easy to roll up! Take turns soaking the rice paper briefly to soften it, roll up your fillings, dip, and eat! I found that my leftovers of homemade Korean ssamjang made for an awesome dipping sauce for fresh rolls, even though that’s obviously not a traditional accompaniment to these Vietnamese-inspired rolls. Get the recipe for my ssamjang here.

Easy Semi-Homemade Donuts

flowerdonuts.jpg

My mom taught me how to make these semi-homemade donuts out of canned biscuit dough when I was a kid; I have no idea where she got this brilliant idea because she did not grow up with access to this type of canned product. But all you do is cut or poke a hole in the middle of each raw biscuit, then deep fry. Just keep the oil temperature a little lower than you would for other deep-fried foods because the dough can burn fast! I love that this dough is more on the savory side than normal donut dough, so it balances well with the glaze.

To make the glaze, I used this recipe by my friend Kristina. Then I slowly took my time decorating with chopped pistachios and edible flowers collected from my backyard garden.

Roasted Root Vegetable Roses on Toast

halloween_toast.jpg

For Halloween, I made this toast and styled the photo inspired by Miss Havisham from Great Expectations (or maybe the “Helena” music video by My Chemical Romance?). The spread is a mix of miso and black sesame tahini and the roses are thinly sliced roasted beets and sweet potatoes. The original idea and recipe for the roses is by Amiee Twigger, and can be found here—I love how realistic and pretty they turned out! The chard leaves came from my garden.

Malaysian Snack Platter

malaysianplatter.jpg

I was given the opportunity to participate in a sponsored campaign where home chefs shared dishes that celebrated their heritage. Getting to partner with a company that encourages bloggers to stay authentic and share stories from diverse cultures is such a big deal, and felt especially significant this past year. I made this platter where I reimagined Malaysian classics in mini, bite-sized form, inspired by nasi lemak and other memories from my visits to the country where my parents were born. I included:

  • acar, or Malaysian-style turmeric pickled vegetables

  • mini chicken satay on cocktail picks; recipe for my satay marinade here

  • peanut sauce; instructions for how to make it using leftover satay marinade here

  • coconut rice balls; you can find my coconut rice recipe here, but omit the butterfly pea tea and mold into bite-sized balls

  • sliced onion, green beans, and cucumber

  • shrimp chips, red skinned peanuts, and salted egg fish skin

  • fried anchovies and sambal ikan bilis

  • dragonfruit and rambutan

  • boiled 6.5-minute egg

Pumpkin-Shaped Pretzel Buns

pumpkinpretzelbuns

In 2020, I overcame my intimidation from yeast-based dough recipes and got really into make pretzels of different shapes and sizes. You can find my recipe for these pumpkin-shaped pretzel buns here.

Thank you so much for supporting my content this past year!
What type of content to you want to see more of in 2021?

Downloadable Carby Dream Wallpapers

My Christmas present to you: these wallpapers to capture your most carb-iest of dreams. Mashed (whipped) potatoes with black garlic and truffle oil. Ricotta gnocchi rolled on my sweet little new gnocchi board that I am absolutely in love with, by Facture Goods. Sharing these just for fun—and because they make me hungry looking at them!

Save the images to your phone to use them as your wallpaper (these are sized for the iPhone X).

Please note that these are for personal use only and not to be used for any commercial purposes. All copyright of these images is retained by me, Lily Morello.

My 2020 Favorites

cozyvibesmatcha.JPG

I think we can all agree that 2020 was a turd of a year. The kind of thing that we’ll tell future generations about and they’ll partially listen in mostly disbelief, convinced that we are exaggerating about how bad it was. But IYKYK.

To memorialize the positive, though, here are the little things that brought small sparks of joy to my days…through 10 months of lockdown and those 2 normal-ish months at the beginning that seem like a lifetime ago.

Cooking & Food Photography Favorites

5qt Stand Mixer from kitchenaid

I bought this on Black Friday in 2019 and almost returned it after it sat in the box for about 2 months. I’m not big on baking cookies and I was super intimidated by working with yeast, so I began to question why I bought it in the first place other than out of envy. But that changed when I made my first focaccia (a pre-lockdown coincidence!) and boy was I glad to have it in the months that followed. It turned out that I didn’t need (knead?) to be intimidated by working with yeast at all, I just needed to learn to be patient. I never got on the sourdough train, but this was so handy for kneading quicker, simpler doughs for everything from soft pretzels and biang biang noodles. My quality of life was definitely higher in lockdown because of it. Yes, it’s a bit splurgy, so I recommend waiting for a big sale before buying and getting a color that brings happiness to your eyes. Mine is Buttercup colored and I got it for $224 from Bed Bath and Beyond.

TL;DR: Worth the price if you find it hella on sale, and you hate arm workouts.

Beer Can Style Glasses

dim sum at Sun Hing

I got these glasses from Crate and Barrel. This past year, I would try to create a little “home cafe” experience in the middle of the afternoon as much as I could, to help break up the monotony of the workday. Having a distinct set glasses of reserved specifically for making special cafe-inspired drinks seems trivial but any little way to create separation from regular home life made a difference for me. I loved experimenting with making iced matcha lattes, tea sparklers, smoothies, salted cremas, and more, and these chic glasses really brought some extra joy to the experience.

Tabletop Induction Cooktop

budaejjigae.JPG

Having one of these really helped turn weekend dinners into fun activities; the ability to cook at the dining table really helped with recreating those interactive restaurant dining experiences at home. We spent many Friday and Saturday nights chowing down on hot pot, budae jjigae, and Korean BBQ. And if you don’t care about aesthetics, you really don’t need special cookware to do these. I make my hot pot in an old secondhand Dutch oven and I sear up my KBBQ meats on a big skillet. Just be careful with heavy-bottomed/cast iron cookware on the induction cooktop because it apparently may scratch the surface (which I have not experienced).

I have this one**, which has worked well but has quite a loud fan. I also would have preferred if the cord was longer. So, while I wouldn’t necessarily recommend this one, I do think it is worth it to have some sort of tabletop cooktop to create these experiences at home!

Kitchen Linens from Granit

granitlinen.JPG

These are my favorite photography props for filling in space and creating a naturally disheveled look in my photos. I often get questions about these and unfortunately, they are not available in the US. I bought them from a Granit store when I was in Norway last winter. (EU and Scandinavia folks, lucky you!) I have amassed quite a collection of kitchen linens and I have found these to be the softest and easiest to shape of the ones I own; I wish I bought more!

Unsweetened Cold Brew Black Tea Concentrate from Trader Joe’s

This was my overall favorite Trader Joe’s find for 2020, and my favorite thing to use for those home cafe drinks I mentioned before. It was super convenient to have an unsweetened concentrated black tea that I didn’t have to brew myself, on busy days when I knew having a cafe-like beverage would help me focus on my work but I didn’t have time to make anything fancy. I found that mixing this with some hot water and condensed milk made for a great fast Hong Kong style milk tea and it also went really well with Korean citron and ginger tea syrups.

Local Favorites

Ground Domestic Wagyu from The Butcher Shop by Niku

wagyuburger.JPG

My go-to for when I want to treat myself to an amazing homemade burger. At around ~$10/pound, their reasonably-priced ground domestic wagyu is the best low key luxury meat and I’ve been raving about it all year. While I still like my fast food burger now and again, I don’t think I’ll ever try to order a “nice” burger from a restaurant anymore—that’s how confident I feel about my homemade burgers when I get my meat from here.

Frozen Lobster Tails From New England Lobster Market and Eatery

lobstergarlicnoodles.JPG

Despite the name, this awesome seafood market is located in the Bay Area suburb of Burlingame in a random ass area near the airport. (It’s next to one of the major kitchens from which I assume bad airline food is produced.) I used to love eating out on their huge front patio picnic area, but this year most of my visits involved going through their drive-through to order frozen lobster tails to cook with at home (including making the lobster garlic noodles pictured here!). Reasonable prices, friendly staff, succulent lobster meat. What’s not to love? Their lobster corn chowder is also amazing, but it’s just not the same having it at home, so I’m going to wait to have that until I can dine there again.

Fresh Oysters from Sun Fat Seafood Company

oysters.JPG

This small seafood market in the Mission has a wall lined with buckets of fresh oysters at unbelievably low prices. They always seem to have my favorite varieties too—like Fanny Bays and Miyagis. The staff is always kind enough to check the oysters before bagging them up to make sure they are fresh and in good condition. Get good at shucking at home and you can have yourself a real oyster feast; this was something we treated ourselves to on special occasions a few times this past year.

Honorable mention favorite: Spouse’s shucking skills.

Random Quick-Fire Covid-Life Favorites

Current Favorite YouTube Channel: How to Drink. I don’t make cocktails at home very often, but I aspire to? I don’t know, I just find this dude entertaining and I like his sense of humor.

Current Favorite Bubble Tea Drink: Cookie Butter Hong Kong Milk Tea from Urban Ritual

Favorite Netflix Binge of the Year: The Umbrella Academy, Season2

Favorite Mask: I love the yellow one I got from Lilo & Len on Etsy because it fits me well and I can breath comfortably despite having a tiny nose. Sadly it doesn’t look like they are making masks anymore, but they have some cool Joe & Kamala fan merch (for my favorite president and vice president elect of 2020!)

Thanks for reading! Let me know some of your favorites for 2020 in the comments or DM me on Instagram to let me know what categories you’d like to see in the next Favorites roundup!

Recipe: Apple Streusel Muffins with Maple Glaze

AppleMuffins5.JPG

I don’t know how many times I have been disappointed in muffins from cafes. I think muffins (and scones for that matter) are baked goods that you are really rolling the dice on when purchased—some are great but there is always the risk of them being chalk dry, or just plain bland. My spouse almost always inevitably chooses poorly because he is trying to be “healthy” by going for the bran raisin muffin or something obviously gross like that.

Well, these muffins are most definitely NOT trying to be healthy. But you can still tell yourself it’s a muffin and not a cupcake, and it’s chock-a-block full of apples…those are healthy, right?

When I was in college I kept a hand-written notebook full of recipes that I still have today. I would go home during breaks and go through my mom’s cookbooks and cooking magazine subscriptions and hand-copy things I wanted to try to make. Eventually I realized this was painfully inefficient and started either typing them up or just finding recipes on the internet! But I would print them out and tuck the papers into that notebook. One of those recipes is the original version of these apple streusel muffins—a printout of a recipe that had been typed into a Word document, from I-don’t-remember where, with extra annotations written in the margins by Past Me. So I thought it was time to immortalize the recipe on the internet.

AppleMuffins3.JPG

This time around, I also added some crushed chicharrones into the streusel mixture, because I am a savory-loving weirdo like that. This is not a critical ingredient, and I’d like to put out there that streusel doesn’t need a strict recipe anyway. (You’ll notice my recipe has some unconventional measurements.) I’d encourage you to add your own mix-ins for whatever you want your streusel topping to be; oats, chopped nuts, panko breadcrumbs, and desiccated coconut are just some of the other ideas I had. The recipe presented will produce a softer streusel topping rather than a crunchy one.

For extra luxury and Instagram-worthiness, I also did a maple glaze drizzle adapted from this donut glaze by Sally’s Baking Addiction. If you are into smokey flavors like I am, I highly recommend using Tippleman’s Barrel Smoked Maple Syrup** for this part. It’s quite a splurge, but I have been buying it for years because it is unlike any other maple syrup; it is incredible in this glaze because the smokiness adds a whole other dimension of flavor that takes these far beyond humble fruit muffins.

One last component I want to call out is the type of apple to use. Use whatever you want, really! I personally find that this is a good way to even use up an apple that has gone mealy. In this particular instance though, I used Lucy Glo apples, which are naturally red inside!

AppleMuffins1.JPG

I just started noticing these popping up in stores this year; I’ve purchased them from Trader Joe’s and Sprouts. I think they look very cool, but obviously they still taste like regular apples. I love that you can see a little bit of red peaking through the streusel on the tops of some of these muffins, obviously because the apples I used had red flesh. But! A couple days later, the apples inside had a blue tint to them; I learned this was because of a reaction with the baking powder I used and I am not sure if this would have happened with a more neutral colored apple or not. The taste was not affected.

Disclaimer: Not all the apples in these images are Lucy Glo, which has a pale yellow exterior skin. I had quite the apple collection as I was shopping for this shoot, and an eager human and dog waiting for to help eat them.

AppleMuffins4.JPG
AppleMuffins2.JPG

How to Make Apple Streusel Muffins with Maple Glaze

(Makes 6 muffins)

Ingredients for the muffins

1 cup apples, peeled and cut into 1/4-inch dice
1 cup + 1 tbsp AP flour
1/2 tsp baking powder
1/4 tsp baking soda
1/4 tsp salt
1/4 cup unsalted butter, at room temp
heaped 1/3 cup sugar
1 egg
1/2 tsp vanilla extract
1/4 tsp pumpkin spice or ground cinnamon

Ingredients for the Streusel Topping

2 1/2 tbsp butter
1/6 cup packed brown sugar (eyeball with your 1/3 cup measure)
1 1/2 tsp sugar
1/4 tsp ground cinnamon
1/3 cup AP flour
2 heaped tbsp crushed chicharrones, or some other fine mix-in

Ingredients for the Maple Glaze

1/2 tbsp butter
4 tsp maple syrup
1/4 cup confectioners sugar
1/4 tsp AP flour

Procedure

To make the streusel, melt butter in the microwave for 30 seconds or until completely melted. Whisk together brown sugar, sugar, and cinnamon in a small bowl. Mix in butter. Then add flour and your fine-textured mix-in and use a folding and pressing motion with a spoon or spatula to combine everything together into a big flat disk. Set aside.

Preheat the oven to 375°F and line 6 muffin tins.

To make the muffin batter, start by transferring about 1/4 of your chopped apples into a small bowl and mash with a muddler or pestle.

In a separate bowl, whisk together the dry ingredients for the muffins: flour, baking powder, baking soda, salt.

In a larger bowl, beat together butter, sugar, egg, vanilla, and cinnamon. Gradually add in the dry ingredients and mix until just incorporated. Fold in the chopped and crushed apples, and any juice released. (Mixture’s consistency will be more like a cookie dough texture than a muffin batter. Do not be alarmed by this.) Divide evenly into the muffin tins.

Use your hands to break up the clump of streusel topping and crumble over the muffins. Press it in gently. Bake muffins for 22–25 minutes, or until a toothpick inserted in the center comes out clean. Allow the muffins to sit for 5 minutes before transferring to a cooling rack.

Sift together the confectioners sugar and flour for the maple glaze. Combine the butter and maple syrup in a small sauce pan on very low heat. When the butter is melted, whisk thoroughly and remove from heat. Whisk in the flour and confectioners sugar and immediately drizzle on the muffins. (I used by mini whisk as my drizzling wand.) You may need to return the glaze to the heat and keep whisking after each muffin to return the glaze to a thinner consistency for drizzling. (A little tricky, but worth it!)

Recipe: Gochujang Hot Cocoa Cookies

GochujangCookies1.JPG

It has been a great ambition of mine to develop a savory cookie recipe. Even though I don’t have much of a sweet tooth, I love the IDEA of cookies…especially chewy ones. When Chris Morocco’s miso almond butter cookie recipe blew up during quarantine, I thought that the work had already been done for me and I could peacefully retire that goal. I made his recipe, but it was way too salty for my liking. Still very tasty but, like, needed to drink half a gallon of water after. In fairness, I probably used the wrong kind of miso, but I think it is problematic that the recipe doesn’t specify; there are a lot of miso varieties out there and they can be super different from one another! Anyway, the quest for good savory cookie was back on.

And then I had to develop a holiday recipe for a client using their gochujang-based sweet and spicy condiment, and I thought—here’s my chance to work on that savory cookie recipe. I was really happy with how that recipe turned out, and when I shared it in my Instagram stories, I got a lot of intrigued members of Team Savory wanting to know more! I was certainly pleased to know that 1) people did not think I was out of my mind for making a cookie with gochujang (Korean hot pepper paste) and 2) there are other people who like the idea of a cookie that teeters into the realm of savory!

That recipe revolves around having a very specific product from that particular client, but I decided to also make a spinoff that uses more generic ingredients, since the product isn’t available everywhere. This time, I also worked in a little bit of cocoa powder, because I love that combination of chili and chocolate! The result is a soft, almost cake-like cookie that hits a little salty upon first bite, then evolves into sweetness with a quiet chili burn, and leaves a faint cocoa-y memory thereafter. Appearance-wise, I like to think of them as a distant sassy Korean relative to the Pfeffernüsse cookies that popular in Germany at Christmastime, but the flavors are VERY different.

GochujangCookies3.JPG

I will confess I only tested this with one tub of gochujang: this one. Other than the spiciness (which can be selected to your taste) there is less variation among these rectangular tubs of gochujang from the Korean market than there are types of miso but I will caution that if the gochujang you have is super salty you may want to dial back on adding salt to the dough. Also, I find that the texture and moisture content of gochujang changes the longer the tub sits in your fridge, so I would recommend making sure your gochujang is somewhat fresh, or whisking it together with a small splash of water if it’s been a while since the last time the tub saw the light of day.

Eager to buy mooncake molds to be extra prepared for the next Mid-Autumn festival but also very against kitchen uni-taskers, I was happy to learn that this cookie dough is great for taking on pressed designs. (This is the mooncake set I have.) After portioning out the dough for the cookies and rolling them into balls, I simply pressed the dough down using the plates from my mooncake mold set to shape and flatten them. The dough sticks to the mold but is strong/firm enough to then be gently peeled off without losing its shape or pressed pattern. The almond butter in this recipe is more of a structural component than a flavor contributor, but you can always to the classic peanut butter cross hatch design on these if you don’t have a mooncake mold. I obviously loved how they turned out with the mooncake molds, though, because I took a ton of photos!

GochujangCookies6.JPG
BiangBiang3.JPG
GochujangCookies2.JPG
GochujangCookies5.JPG

How to Make Gochujang Hot Cocoa Cookies

(Makes about 18 cookies)

Ingredients

7 tbsp unsalted butter
1/3 cup raw creamy almond butter, stirred
1/4 cup gochujang (like this one), at room temperature
3/4 cup brown sugar, packed
1 egg
1 1/3 cups all purpose flour
1/2 tsp baking soda
1/4 tsp salt
3 tbsp unsweetened cocoa powder
Sparkling sugar


Procedure

Place butter in a large mixing bowl and melt in the microwave for 30 seconds, and then for additional 10-second increments until completely melted. Working quickly while the butter is still hot, drizzle in almond butter and whisk thoroughly to combine. Then add gochujang and whisk thoroughly again to combine.

Whisking vigorously after each additional ingredient, add the brown sugar, egg, then cocoa powder to the mixture. (All this whisking is what will help give the cookies their airy yet cakey texture.)

In a separate bowl, whisk together flour, baking soda, and salt. Gradually add the dry ingredients to the wet mixture, using a spoon or spatula to incorporate everything together into a thick dough.

Roll dough into 1- to 1 1/4-inch balls and place them 2 inches apart on a parchment lined baking sheet. Chill them in the refrigerator for 10–15 minutes.

Meanwhile, preheat oven to 350°F.

Use plates from a 100-gram mooncake mold to press designs into the cookies while flattening them. (I found that it worked best to place the ball in the center of the mooncake plate, and then carefully turn them both over onto the baking tray, and press down on the plate until the edges of the cookie dough are almost spread to the edges of the plate.) If necessary, tap the molds in some flour to prevent sticking in between cookies, but make sure there are no clumps of flour on the mold. If you do not have mooncake molds, press a crosshatch pattern into the dough balls with a fork. After pressing all the cookies, sprinkle some sparkling sugar on the tops.

Bake for 9–10 minutes or until bottoms are browned. Remove from the oven and allow to set for 3 minutes before transferring to a rack to cool completely.

Recipe: My 90-Second Chocolate Mug Cake

MugCake1.JPG

My disclaimer (or testament) for this recipe is that I don’t like chocolate cake—most of the time. But like any breathing human, I do get a craving for them now and again. In times like those, it can perhaps be argued that the taste of instant gratification is the sweetest of them all. I sometimes wonder if the reason I like mug cakes so much has less to do with the quality of the cake and more to do with my fascination for the microwave’s awesome and terrifying power to transform basic pantry ingredients into the semblance of a baked confection in 90 seconds.

And yet my spouse—a professed great lover of chocolate cakes—can attest that this chocolate cake sure does tick a lot of the boxes: moist, fudgy, not too cloyingly sweet, yummy. The things I’d want in a chocolate cake, somehow achievable in a mug in less than 3 minutes if you include the time it takes for me to dig the ingredients out. I’m not trying to win any pâtisserie awards any time soon, but I am trying to win over my spouse’s heart (again) and perhaps yours, too.

Some things to note about this recipe:

  • Trust me on the amount of sugar. It seems like a lot for such a small amount of other ingredients, but I tried it a few times with less sugar and it just didn’t taste right. I hate overly sweet things, and this doesn’t turn out overly sweet. I’d say it turns out more like an Asian style dessert, that strives to not be cloying or sugary tasting.

  • Use a big mug. The mixture will puff up in the microwave and you don’t want spillage.

  • The images with the stenciled sugar were done with the ‘gram in mind. I didn’t do the last step of adding extra chocolate chunks, and instead, I dusted powdered sugar on top. Here is a photo of what the mug cake will look like if you follow my usual recipe, as presented below:

MugCake3.JPG

If you want to make the powdered sugar version, skip the step about adding chocolate chunks on top, and just microwave the cake batter for the full 90 seconds. I used a laser-cut wood snowflake ornament from Cost Plus World Market as a stencil. I placed the ornament on top of the cake, dusted the powdered sugar through a fine mesh sieve, and then carefully lifted off the ornament.

This recipe was adapted from a recipe by user safinabakes1231 on Allrecipes.

One last stray comment, for those who got lured here from my Instagram post—yes, the green on the mugs in those images was Photoshopped! #doitforthegram

MugCake2.JPG

How I Make a Chocolate Mug Cake

Ingredients

1/4 cup AP flour
scant 1/4 cup sugar
1 1/2 tbsp* unsweetened cocoa powder
1/8 tsp baking soda
1/8 tsp table salt
4 tbsp oat milk
3 tbsp good extra virgin olive oil
~ 1 tsp date syrup
~ 1 tsp raw almond butter
a few chocolate chips, chocolate chunks, or marshmallows (optional)

(* I know, a half-tablespoon is not a very standard measurement, but just eyeball it! 2 teaspoons (2/3 tablespoon) would be too much though.)

Procedure

Add flour, sugar, cocoa powder, baking soda, and salt to a large microwave-safe mug and whisk to combine.

Stir in oat milk and olive oil.

Add date syrup and almond butter to the top of the cake batter and use a butter knife or toothpick to create a marbled swirl on the top (this sometimes turns out pretty after cooking, and other times it gets lost, but I do it every time).

Microwave mug for 1 minute.

Add chocolate or marshmallows on top, if desired. Microwave for 30 more seconds. Allow to cool a bit (if you can wait!) before eating out of the mug with a spoon. (Would be amazing with vanilla ice cream!)

Recipe: Spicy Almond Butter Cookies

BibigoCookies1.JPG

For this recipe, I partnered with Bibigo USA to use their Bibigo Hot & Sweet Go-Chu-Jang Sauce to make a giftable holiday treat. Cookies may be the classic homemade gift for the holidays but when working with savory Korean sauces and marinades, transforming them into cookies may not be the first idea that comes to mind. These cookies are pretty out there—but in my opinion, in a good way. If you’ve read my other blog posts, you will know by now that I am a diehard lover of savory over sweet, so I thought this would be a cool opportunity to develop a cookie recipe that teetered between the two taste realms.

When you look at Christmas cookies, spiced confections seem to be pretty rooted in the flavors of the season but this typically means cinnamon, nutmeg, and the like. Well, these cookies are spiced all right—as in spicy! Bibigo Hot & Sweet Go-Chu-Jang Sauce is a sweeter, lighter take on gochujang, a Korean red chili pepper paste. I was so pleased with how that flavor came across after getting baked into a cookie. These cookies are slightly sweet and a touch salty; instead of spicy kick, I’d describe the spice of these as a mellow burn. If you love gifting cookies but you’ve got someone in your life who is always looking for unusual spicy things, I hope you will consider giving this recipe a try.

This recipe was adapted from a recipe by Katiebird Bakes.

BibigoCookies2.JPG
BibigoCookies3.JPG

How to Make Spicy Almond Butter Cookies

(Makes about 15 cookies)

Ingredients

6 tablespoons unsalted butter
1/3 cup raw creamy almond butter, stirred
1/4 cup Bibigo Hot & Sweet Go-Chu-Jang Sauce
2/3 cup brown sugar, packed
1 egg
1 1/3 cups all purpose flour
1/2 tsp baking soda
1/2 tsp salt
Sparkling sugar, optional


Procedure

In a large mixing bowl, melt butter in the microwave for 30 seconds, and then for additional 10-second increments until completely melted. While butter is still hot, slowly drizzle in almond butter and Bibigo Hot & Sweet Go-Chu-Jang Sauce while whisking. Whisk together vigorously until completely homogenous. 

Add brown sugar and egg to the mixing bowl and whisk mixture together until completely homogenous. 

In a separate bowl, mix together flour, baking soda, and salt. Add dry ingredients gradually to wet ingredients, mixing together with a spoon or spatula until thoroughly combined and a firm dough is formed.

Roll dough into 1 1/2-inch balls and place 2 inches apart on a parchment lined baking sheet. Chill cookie dough balls in the refrigerator for 10 minutes.

Meanwhile, preheat oven to 350°F.

Use a fork to press a crosshatch pattern into the dough balls and slightly flatten them. Sprinkle sparkling sugar on top of each, if desired.

Bake for 9–10 minutes or until bottoms are browned. Remove from the oven and allow to set for 3 minutes before transferring to a rack to cool completely.

Lily_Dec3_Banner_v2.JPG

Thank you so much to Bibigo USA for sponsoring this recipe! For more recipe ideas and to learn more about their products, visit their website!

Easy 5-Ingredient (ish) Festive Yogurt Dip

yogurtdip1.JPG

The truth is, I have no idea how many ingredients constitutes a 5-ingredient recipe. It can obviously mean literally 5 ingredients, but I have also seen “5-ingredient” recipes with way more than that because it’s 5 plus “pantry ingredients you’ll always have on hand.” Sure, everyone who cooks is probably going to have salt, pepper, and some kind of cooking oil, but I’ve seen ones where random vinegars aren’t getting counted, and that’s where it starts to get dicey—each type of cuisine has it’s own go-to vinegar, and each has such a distinctly different flavor.

So, this yogurt dip recipe has literally just 5 ingredients…but in a kind of cheating way because one of them is the “everything but the bagel” seasoning blend. And to be honest, it wouldn’t be that much harder to add a few more ingredients if say, you prefer things more heavily salted, or you want to introduce more complexity by chopping up 3 different herbs at the same time instead of 1. Personally, I don’t know why dips require recipes in the first place, since you can always taste as you go and keep adding stuff until you get something you like—but I wrote this recipe for another site where I am a contributor, so I thought I might as well post it here. Think of it as a guideline.

I think the takeaway is that if you have a ton of mint growing all crazily in your backyard like I do, then combining it with pomegranate seeds is a quick and easy way to throw together a festive looking topping for anything.

yogurtdip2.jpg

How to Make a Festive Yogurt Dip

Ingredients

~ 2 cups full-fat Greek yogurt
big handful of fresh mint leaves
~ 1/4 cup pomegranate seeds
extra virgin olive oil
everything seasoning

Procedure

Reserve a few mint leaves for garnish and roughly chop the rest.

Mix half of the chopped mint with the Greek yogurt (and salt, if desired) and transfer to a serving bowl. Use the back of the spoon to create swirls and texture on the surface.

Top with the remaining chopped mint, pomegranate seeds, and a generous sprinkle of everything seasoning. Drizzle olive oil over the top and add the final reserved mint leaves as garnish.

Serve with your favorite crackers or crudités.

Recipe: Poached Salmon Inari Sushi

LilyMorello_SalmonInariSushi_01.JPG

After eating a big, heavy Thanksgiving feast, I like to balance things out a bit by eating something lighter and healthier in the days that follow. Sushi is usually my go-to, and lately I have been loving making inari sushi at home.

Inari sushi is comprised of stuffed pouches made of bean curd/tofu skin that have been fried and then marinated (abura-age). You can find the marinated abura-age pouches at Asian grocery stores and they come either in a shelf-stable can or in the refrigerated section next to other tofu products. Inari sushi usually refers to the abura-age pouches being stuffed with just rice, and I often see this classic form served with the pouch upside-down and the rice hidden underneath. However, I love the look of these little flavorsome pouches being presented as little stuffed boats where you can see the various fillings inside.

LilyMorello_SalmonInariSushi_02.JPG

For this recipe, poached salmon seasoned with Spice Tribe’s Kissed by Binchotan spice blend is the star filling. I wanted to make something that was easy and approachable, even for those who don’t like raw fish or maybe just don’t have a trusted place to buy it. Although I topped mine with some salmon roe (ikura), that is a totally optional garnish because the spicy salmon on top of the rice is really all you need for these satisfyingly tasty bites. A salmon filet is gently poached to avoid overcooking and the seasoning is kept simple and classic by using Spice Tribe’s version of the Japanese shichi-mi tōgarashi spice blend. I love that Spice Tribe’s seasoning blends do not contain any salt, so the cook (i.e. me) stays in control of how salty the dish will be. I hope that with this recipe, you feel encouraged to step out of your cooking comfort zone and have fun making your spicy poached salmon pouches as simple or elaborate as you’d like them to be!

LilyMorello_SalmonInariSushi_04.JPG
LilyMorello_SalmonInariSushi_03.JPG

How to Make Poached Salmon Inari Sushi

Ingredients

1 salmon fillet, about 6–7 ounces
1 stalk of scallion, cut into chunks
2 tbsp mirin
1 tbsp soy sauce
2 cups water
2 tbsp Japanese mayonnaise 
3/4 tsp Spice Tribe Kissed by Binchotan seasoning
1 cup cooked rice, at room temperature
1/2 tsp rice vinegar
Salt, to taste
8 seasoned bean curd pouches/abura-age
1 cocktail cucumber, thinly sliced
1 tablespoon chives, finely chopped
Extra Spice Tribe Kissed by Binchotan seasoning, for finishing
Ikura/salmon roe, for garnish (optional)
Microgreens, for garnish (optional)


Procedure

In an 8-inch skillet, combine scallion pieces, mirin, soy sauce, and water. Bring to a boil, then reduce heat to low and add salmon, skin side up. Simmer covered for 2 minutes. Turn off the heat and keep covered for 3 minutes, or until salmon is just cooked through. Peel away the skin, place salmon in a medium mixing bowl, and break up into flakes.

Add Japanese mayo and Spice Tribe Kissed by Binchotan seasoning, plus 1 teaspoon of the poaching liquid. Add salt to taste and mix gently until combined, then set aside.

Combine cooked rice with rice vinegar and 1/2 teaspoon of the poaching liquid. Set aside.

Gently open one of the bean curd pouches. Fold the cut edge inward into the pouch, so the fold becomes the new rim for the pouch. Wet hands in cold water to prevent sticking, then scoop about 2 tablespoons of the rice mixture into one palm. Shape the rice into a small oval, then place the rice into the bean curd pouch and press rice down to fill the inside of the pouch, forming a stable base so the pouch sits upright. Repeat with the remaining bean curd pouches and rice.

Divide the salmon mixture evenly among the pouches. Garnish with cucumber slices and chives. Sprinkle extra Spice Tribe Kissed by Binchotan seasoning on top, to taste. Then top with salmon roe and microgreens, if desired.

Thank you so much to Spice Tribe for sponsoring this recipe! Check them out on Instagram here or visit their website to purchase high quality spices and unique small-batch spice blends.

Shortcut Mala Cumin Lamb for Biang Biang Noodles

BiangBiang5.JPG

To be clear, these are not your traditional or typical Xi’an cumin lamb noodles. If you are looking for a recipe for those, I am afraid you have come to the wrong place (especially since this is not really a recipe at all). I love those noodles too, and have very fond, special memories of trying them for the first time at Xi’an Famous Foods during a solo trip to New York, being blown away about how they somehow exceeded the hype.

But while this recipe is obviously inspired by those flavors, I personally don’t like the idea of trying to replicate a specific restaurant dish at home. Maybe that’s just me. Restaurant cookbooks are gorgeous to look at, but I never buy them. I am happy to accept the reality that the force of my home gas range is never going to replicate that of a restaurants, my 0 days of professional culinary training is not going to produce the same outcome as those who have studied and devoted their lives to the culinary arts. And anyway, I like (liked—before Covid) the idea of going to a restaurant to eat dishes that are wholly different from what I can cook myself at home.

So I am calling this my Cumin Lamb Noodles, but they are very different cumin lamb noodles from what you’ve likely to experienced in a restaurant before. They are a sort of hybrid of a Xi’an-inspired dish and the texture of bolognese but also heavy on the mala (numbing spicy) associated with Szechuan cuisine. Using ground lamb means not worrying about sliced meat getting tough and overcooked, and it almost becomes a part of the sauce—something that can cling to those wide swaths of noodles. I use this storebought mala hot pot mix (link) for the base of the sauce because I am not an expert at Chinese spice blends in the slightest and this is a shortcut recipe, after all.

I really do recommend that you make your own wide biang biang noodles for this (recipe here) but if you are too lazy or don’t have time, I totally get it. Due to their short-lived nature, I have never seen biang biang noodles sold at the Asian grocery store before, so if you are looking for a storebought alternative to use with this sauce, I recommend buying fresh pappardelle.

The recipe below is awkwardly vague because I really don’t believe in measuring when it comes to sauces for noodles. Let it guide you in your interest in making a Xi’an x Szechuan x bolognese hybrid, but be sure to adjust the seasoning to your taste.

BiangBiang7.JPG

Awkwardly Vague instructions for Ground Lamb Cumin Noodles

Ingredients

3/4 lb ground lamb
1/2 small onion, sliced
lots of chopped garlic
lots of cumin
salt
a squeeze of tomato paste
~ 1 oz Szechuan mala hot pot base (like this one)
a heaping tablespoon of gochugaru
avocado oil
cilantro, for garnish
raw hand pulled noodles

Procedure

In a wok, heat oil and stirfry onions. Add lamb and garlic. Season with pinch of salt, lots of cumin. Squeeze in some tomato paste and mix everything together.

Heat some oil (1/6 cup-ish) in separate pot until almost smoking.

At the same time, turn down wok to low heat and cook biang biang noodles in pot of boiling water as described in the noodle recipe.

Add cooked noodles on top of lamb.

Add Szechuan hot pot sauce and gochugaru. Pour hot oil on top of gochugaru.

Toss to combine. Garnish with cilantro.

BiangBiang4.JPG

Recipe: Biang Biang Noodles (Hand-Pulled Noodles)

07331D00-31AF-4958-9427-06161A606FB5.JPG

If you are here, you probably already know something about biang biang mian—delicious hand-pulled, hand-torn wide noodles that are delightfully chewy and a wonderful blank canvas to capture spicy mala flavors. Legend has it that the Chinese character for biang is the most complicated to write, and that it will break any kind of Chinese input method if you try to type it.

To be honest I am not an expert on biang biang noodles; all I know is how I personally like them, and I wanted to figure out a way to go about making them that was easy for me. For example, I wanted to be able to use my stand mixer for the kneading, especially since the dough is a little tougher compared to, say, a simple bread dough. I also wanted to produce a method that allowed me to have fun actually stretching the noodles by hand and banging (or bianging?) them against the counter. So I tested and tested until I got something I was happy with.

My version is adapted from Woks of Life and Strictly Dumpling, so I want to make sure to give them credit. And the image above was inspired by this photo by My Homestyle Life.

BiangBiang1.JPG
BiangBiang3.JPG

If you are looking for a sauce to accompany these noodles, might I recommend something with loads of chili oil and fragrant ground lamb? You can find out how to make that here.

BiangBiang4.JPG

How to Make Biang Biang Noodles

This recipe makes 2 large servings.

Ingredients

1 3/4 cup bread flour*
1/4 cup all purpose flour
1 tsp kosher salt
3/4 cup hot water
neutral oil

* I tested various combinations of bread flour + AP flour for this and found these ratios to produce my ideal texture for the noodles. Can you do all AP flour? Probably! But the noodles will not have the same chew that I like.

Procedure

Whisk together flours and salt in your stand mixer bowl. Fit the stand mixer with the dough hook. Turn on to the lowest speed and slowly add the water.

Knead dough on medium-high for 10 minutes, then check the texture. If the dough is very sticky, add 1/2–1 teaspoon AP flour. Continue kneading on medium-high for 10 more minutes. At this point, the dough should feel firm and should not be sticky at all. Try to pinch and pull away a small amount (see photo above). Dough should not snap right away, but should not feel totally stretchy either.

Knead a few times by hand to form a smooth ball. Return to the mixing bowl and cover bowl with a damp cloth (no greasing necessary yet). Allow to rest for 30 minutes.

Divide dough into 6 portions. Avoid handling each portion too much but shape it into a small log, about 4 inches long. Place logs on your largest baking sheet and pour some neutral cooking oil over them. Make sure each log is thoroughly coated in oil. Cover with plastic wrap and rest for 1 hour or until the dough feels soft and pliable.

(After one hour, I place a large pot of water on the stove to bring to a boil while I am stretching the noodles. If there is other prep work I need to do for the sauce, I do it all in this time too, so everything is ready to go the moment the noodles are cooked. Click here for the sauce recipe that you see in the photos.)

Work one log at a time, and keep the others covered. On a lightly floured surface, roll the log into a rectangle that is about 3 inches tall and 2 inches longer than a chopstick. Use a chopstick to press two perforations into the rectangle, dividing it into 3 even sections (see photo above). Grab each end and gently stretch the dough, occasionally whacking it into compliance against the counter top. The perforations made by the chopstick will begin to form tears in the dough as you stretch. When the dough is thin enough or you feel you can’t stretch any further, tear along these lines to make one long noodle. Drape the noodle over the oiled baking sheet and cover with plastic wrap while you make the other noodles.

Lower the noodles carefully into the water and then immediately start agitating them with extra long chopsticks to avoid them clumping together. Keep them moving in the water for 90 seconds (2 minutes if they feel on the thicker side) and then immediately transfer them to the sauce, and toss to combine.

If you want to make the noodles in advance, I recommend keeping the rested dough in log form, coated in oil and tightly covered. Store in the fridge and bring up to room temp before stretching. Once the noodles are formed, you don’t want them to sit for long, and they need to be served immediately after boiling.

Recipe: Pimento Club Sandwich with Gochujang-Glazed Bacon

clubsandwich2.JPG

I’m not sure if this is really humble or really basic, but turkey sandwiches are one of my favorite ways to use Thanksgiving leftovers. It might be because growing up, my parents (not knowing any better since they did not grow up with American school lunches) only ever bought the crappiest, grossest of sandwich meat for my school lunchbox lunches. Like, not the fancy deli-sliced stuff but more like the pre-sliced overly-sweet and overly-salty stuff in plastic hard-to-peel-open containers in the refrigerator case next to the Lunchables. I also remember getting a lot of sandwiches that consisted of sliced white bread (not toasted), margarine, and Kraft Singles.

Literally the only reprieve from this in terms of sandwiches was after Thanksgiving. I can still remember how incredible the combination of toasted bread, mayo, and REAL turkey meat tasted to me as a kid.

This club sandwich recipe was developed in partnership with Bibigo USA. They asked me to come up with an idea for Thanksgiving leftovers that also incorporated something left over from my Korean-inspired nibble board recipe, which you can find here. I thought a club sandwich, using the Gochujang Pimento Spread from the previous recipe, leftover turkey, and a spicy glazed bacon could not be more perfect for Thanksgiving leftovers with a Korean-inspired twist. Never in my wildest dreams as a kid could I have imagined a sandwich this legit.

Lily_Nov3_Banner.JPG

How to Make a Pimento Club Sandwich with Gochujang-Glazed Bacon

Ingredients

3 slices of bacon
3 slices of white bread
3 tbsp Bibigo Hot & Sweet Go-Chu-Jang Sauce
3–4 tbsp leftover Gochujang Pimento Spread, softened
2 slices of leftover turkey breast meat
2 slices of tomato
2 leaves of lettuce
Salt to taste


Procedure

To make the glazed bacon, preheat oven to 400°F. Line a baking tray with foil or parchment paper. Brush a thin layer of Bibigo Hot & Sweet Go-Chu-Jang Sauce on both sides. Bake for 10 minutes. Flip bacon and brush top with more sauce. Bake until color starts to darken, about 5 minutes. Brush with one more coat of sauce and bake to desired crispness, about 3–5 minutes. Remove and transfer to a plate. (Note: Bacon will get more crisp as it cools.)

Toast slices of bread as desired. 

Apply an even layer of Gochujang Pimento Spread onto one of the bread slices. Top with lettuce and tomato. Break apart bacon as necessary and layer on top of sandwich. Apply Gochujang Pimento Spread onto another slice of bread and place face-down over bacon. Add more Gochujang Pimento Spread evenly on top. Top with turkey. On the remaining slice of bread, apply an even layer of Gochujang Pimento Spread and place on top of turkey. (Alternatively, you could layer these ingredients however you like! This is just what I did to get what you see in the photos.)

Cut into triangles and hold together with long sandwich picks.

Lily_Nov1_Social_v1.JPG

Thank you so much to Bibigo USA for sponsoring this recipe! For more recipe ideas and to learn more about their products, visit their website!