Recipe: Scallion and Cheese Galette

scallion-galette.JPG

Lately I have been really into binge-watching old seasons of Guy’s Grocery Games on Hulu. The general premise is that Guy Fieri gives contestants a theme for a dish they have to create, and then some sort of challenging constraint that they have to work within (“I want you to make me a 5-star dinner, but you have to incorporate popsicles!”); they then have 30 minutes to race through “Flavortown Market”—a fantasy grocery story that seems to have everything from gas station to luxury grocery items—to grab their ingredients and make their dish for a panel of judges. I like thinking about what I would make if I were given those challenges, and I think it helps keep the culinary creativity juices flowing in my brain. In one episode, I saw a contestant make a cheat version of scallion pancakes with a frozen pastry dough, and that stuck with me as a great hack. That idea planted the seed for this scallion galette.

After my success with my Everything But the Bagel galette, I once again found myself with an extra sheet of Trader Joe’s pie crust dough in my freezer and thought about how I could turn it into something inspired by Chinese scallion pancakes. I started to think about other pastries that utilize an excess of scallions as a major flavor component too, and my thoughts drifted to those scallion and cheese buns at the Taiwanese bakeries, as well as shaobing—flatbreads encrusted with sesame seeds; at Taiwanese breakfast places I see them stuffed with scallions, pork floss, and other flavorsome delights. So, this galette is my fusion-y take on combining all those things into a fun brunch pastry.

scallion-galette-unbaked1.JPG
scallion-galette-unbaked2.JPG

The ingredient list for this is super minimal and it is so easy to put together! You will need:

  • a ready-to-go pie crust: I’m happy with the one from Trader Joe’s so that’s what I keep using. It comes pre-rolled into a nice circle that cracks and falls apart 100% of the time for me as I unroll it. But don’t worry—I squish it all together into a ball and roll it back out, and it still turns out light and flaky after baking.

  • lots of chopped scallions: I used 4 full scallions to stuff inside the galette, but sprinkled some more fresh ones on after baking as well. Feel free to go big; I think their flavor becomes quite mild after baking.

  • grated cheese: Use mozzarella if you want to call back to those Taiwanese buns from the bakery, but I used sharp white cheddar for a more complex flavor.

  • sesame seeds: Really pack them onto the crust for those shaobing vibes!

I think that this galette is simple and elegant as-is, but it can also be topped with what you would typically like to stuff inside your shaobing or other Taiwanese breakfast treats! After pulling it out of the oven, I topped mine with pork floss and some Lao Gan Ma chili crisp** before slicing up and serving.

scallion-galette-cut.JPG

How to Make a Scallion & Cheese Galette

Ingredients

1 sheet ready-made pie dough, room temp
6 oz mozzarella or white cheddar, grated
4 scallions, chopped
1 egg, beaten
~ 3 tbsp sesame seeds

Toppings (optional)

pork floss
chili crisp

Procedure

Preheat oven to 450°F. On a floured surface, roll out the pie crust to a 14-inch circle. Transfer to a piece of parchment paper.

Sprinkle the grated cheese evenly in the middle, leaving an empty 1-inch border all the way around. Top with chopped scallions.

Brush the border with beaten egg and fold small sections over the filling to form a galette-style crust. Brush the pleated crust thoroughly with egg, making sure to get it in all the folds and crannies. Generously sprinkle sesame seeds all over the crust. Slide parchment paper onto an inverted baking tray and bake for 20 minutes on the middle rack, rotating once halfway.

If desired, top with pork floss and chili crisp before serving.

Spam & Egg Fried Rice Tofu Pouches

SpamEggPouches_Vertical2.JPG

Aromatic garlic and scallion fried rice, creamy soft scrambled eggs, and savory fried Spam are stuffed inside sweet marinated aburaage pouches for a unique way to eat Spam and egg fried rice.

Spam and egg fried rice is very nostalgic to me; I even have memories of eating it on Thanksgiving. To me, it’s a comfort dish to be shared with family. Spam is one of those foods that seemed completely normal to me in my childhood and it wasn’t until I was older and had more conversations about food with Westerners that I learned that it was looked down upon. But then after that, I found out that many other Asian Americans felt that same nostalgia for it too; able to finally find our pride for those things that we were shamed for as children, I found a community that touted their love for their humble childhood foods and gratitude for what frugal immigrant parents put on the table. They all loved and grew up with Spam and eggs with rice.

So, I developed this recipe to try to change people’s perceptions about Spam and egg fried rice. To try to convince them that Chinese American food is not always the stuff that gets scooped into those 2-item combo takeout boxes. That even luncheon meat from a can is a meaningful ingredient to many. That many of the tropes that make them think of “elevated” food are just about presentation, and that any food can be presented that way and be worth appreciation. It’s Spam and egg fried rice—but made fancy.

This recipe has 4 components:

  • marinated aburaage pouches: These are deep fried tofu that have soaked up a sweet marinade. I have been able to find them at Asian supermarkets. This is the one I usually get.

  • fried rice: I kept this part really simple, seasoning with just a little soy sauce. white pepper, and salt, and adding just scallions and garlic as aromatics. I did not want to overwhelm the natural flavor of the eggs or have it be too salty when combined with the Spam.

  • fried Spam cubes: The flavor bombs of the dish. Lately I have been getting the Lite kind, but use your favorite variety.

  • soft scrambled eggs: I like to use the low and slow method, and gently push them into big curds for this recipe. I was genuinely impressed by the rich eggy flavor of Pete and Gerry’s Organic Eggs and definitely recommend their certified humane free range eggs for this recipe. These eggs will require no additional salt because they are naturally flavorsome on their own and have a nice creamy balance to the crisped salty Spam.

Click here to get the recipe on the Pete and Gerry’s site!

SpamEggPouches_Vertical1.JPG

Thank you so much to Pete and Gerry’s for sponsoring this recipe!

Recipe: Turkish Eggs with Charred Tomatoes & Sweet Peppers

LilyMorello_TurkishEggs_03.JPG

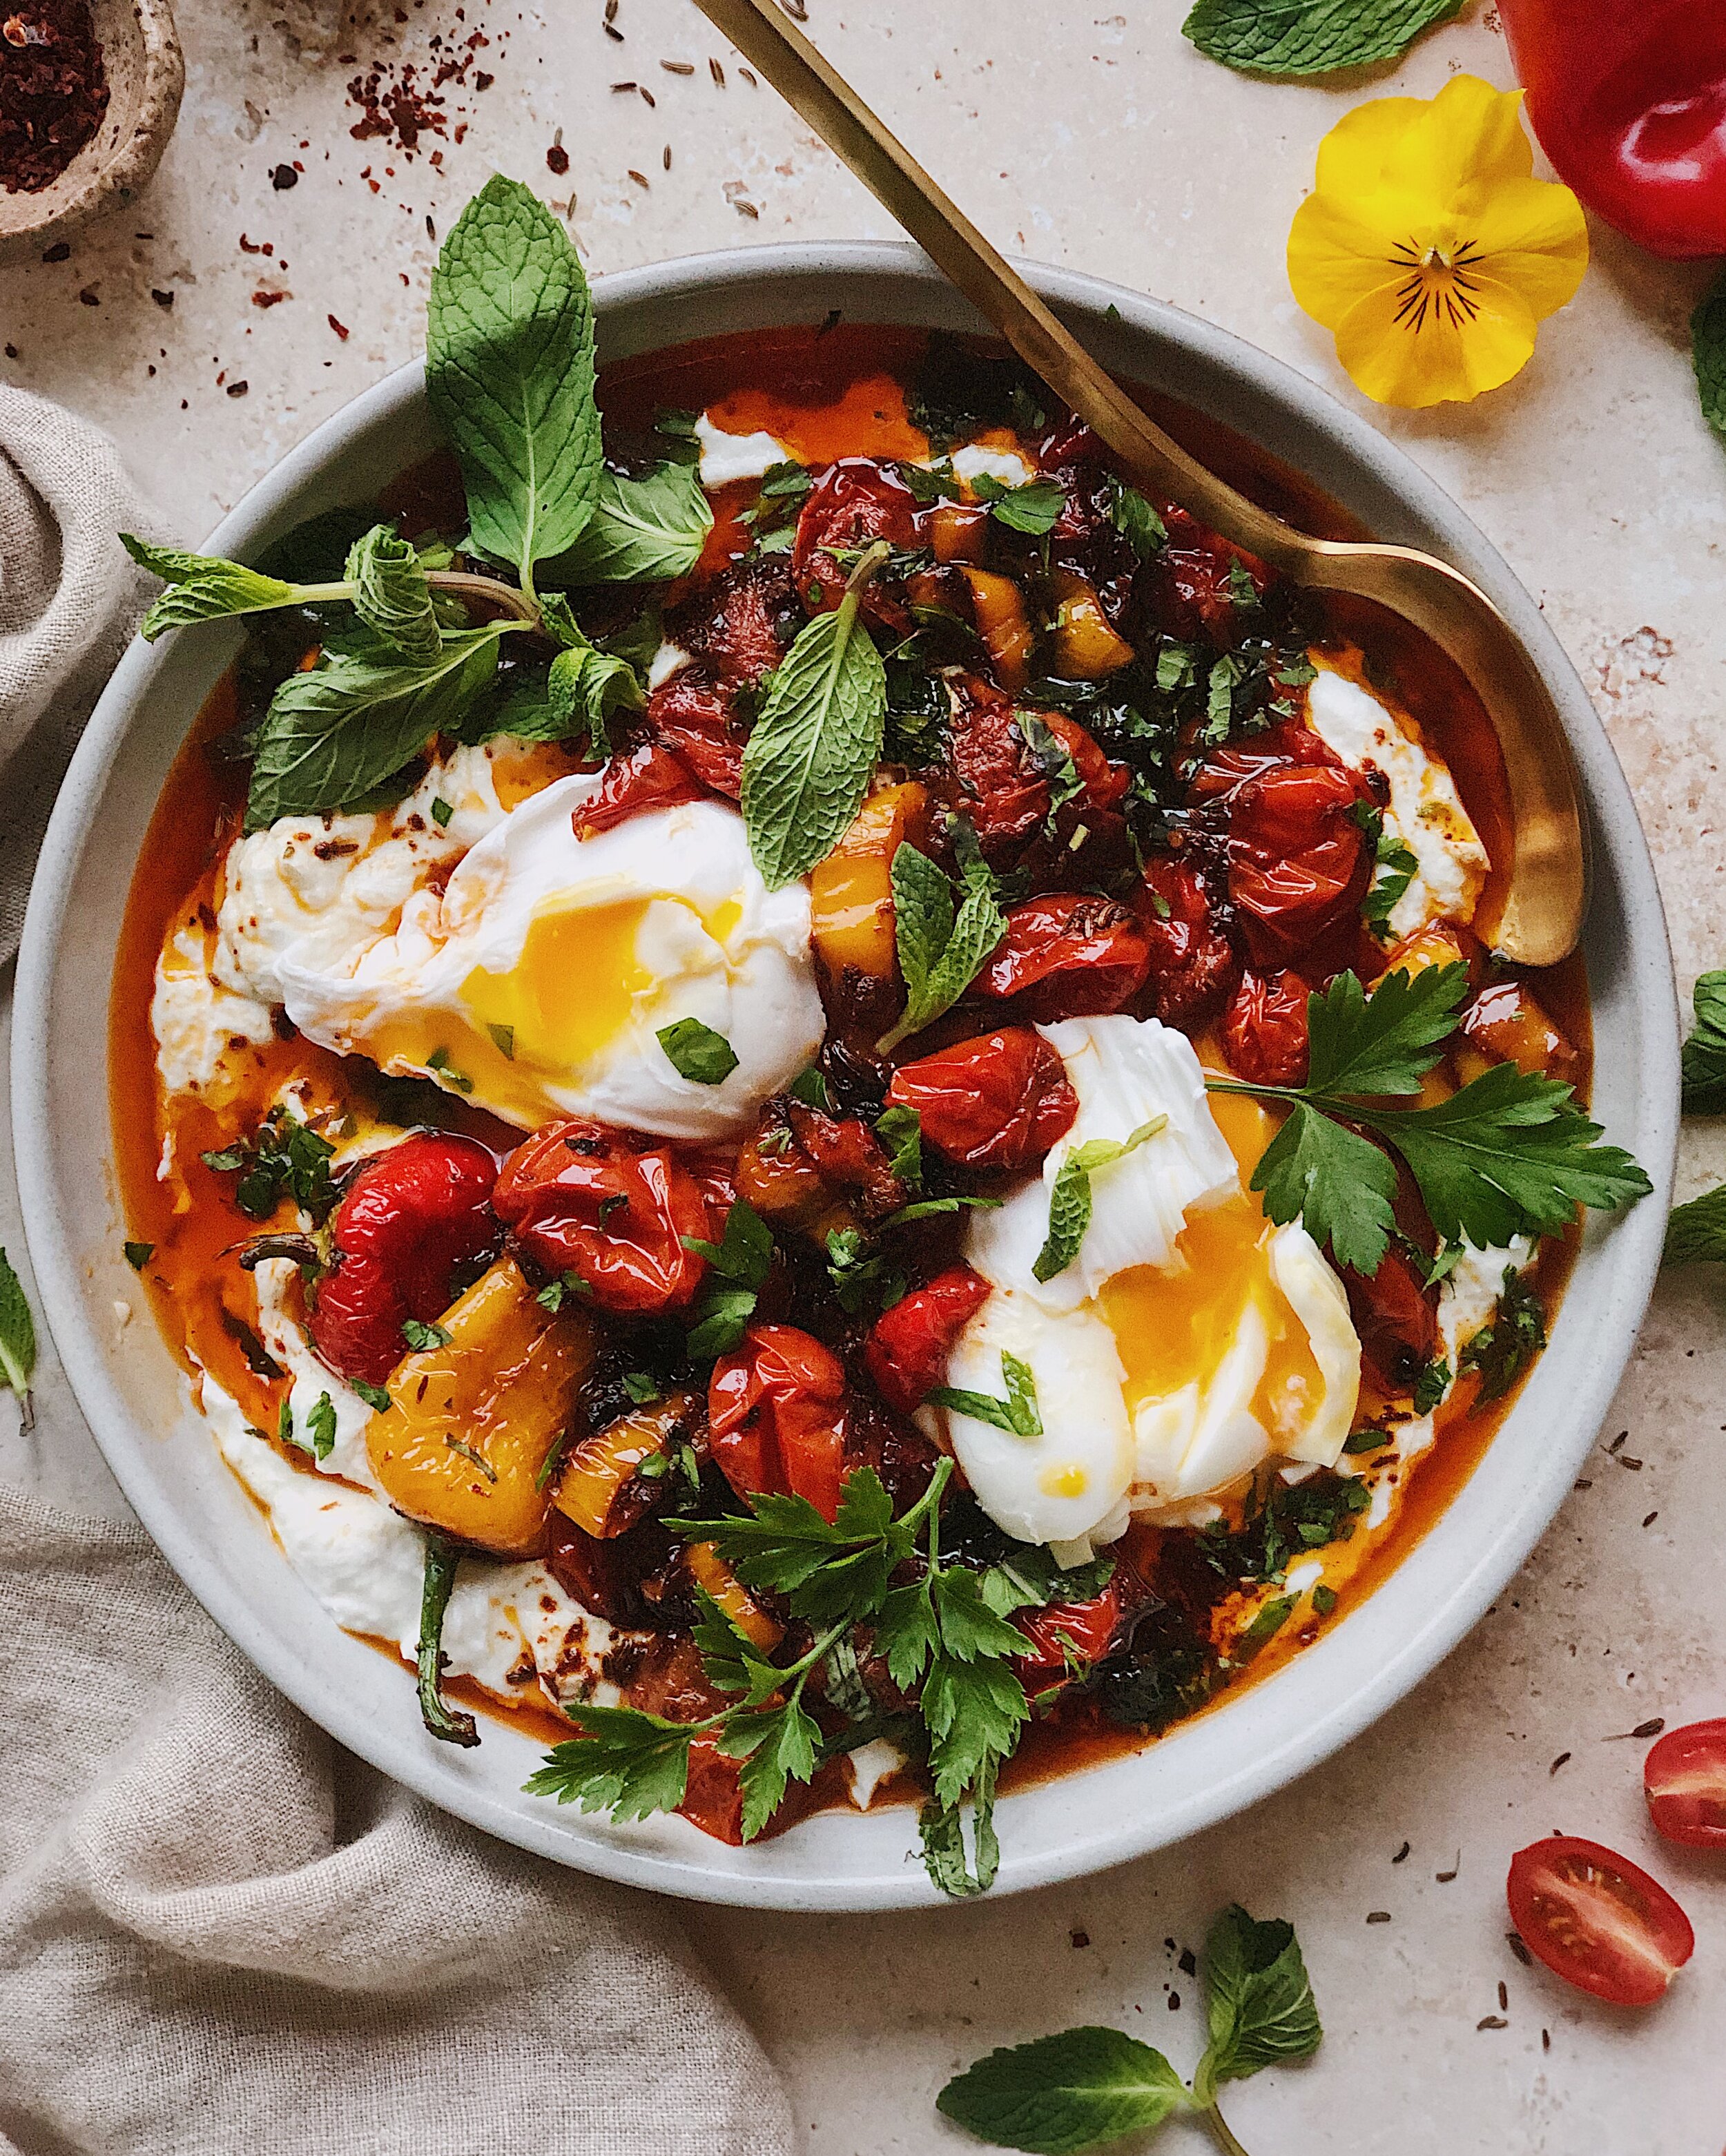
One of my favorite breakfast dishes of all time is çılbır—known in English simply as “Turkish eggs”. The first time I had this was not anywhere in Turkey, but in London, and I was in awe over how bold it was to combine three such indulgent things: creamy garlicky yogurt, runny poached eggs, spicy melted butter. I love all of those things individually, but together they were something else entirely—unapologetically, mindblowingly good.

For a while, I wasn’t sure if Turkish eggs was really a Turkish dish. My Kurdish friend who grew up in Turkey never heard of it. And, I had trouble finding it on menus when I was researching where to eat in the three different cities I visited in Turkey; (likely due to being unable to read Turkish,) the only place I was able to get it was at a super hipstery brunch place in Istanbul with major San Francisco vibes, where their riffed version came on a bed of wilted greens. But finally, I found this article by Maha Salah which talks about çılbır being considered a humble dish made from Turkish moms’ kitchen staples, and that’s why it’s not included in the flashy kahvalti spreads in the touristy areas I visited. (Although I also read that sultans of the Ottoman Empire enjoyed it for breakfast, too.)

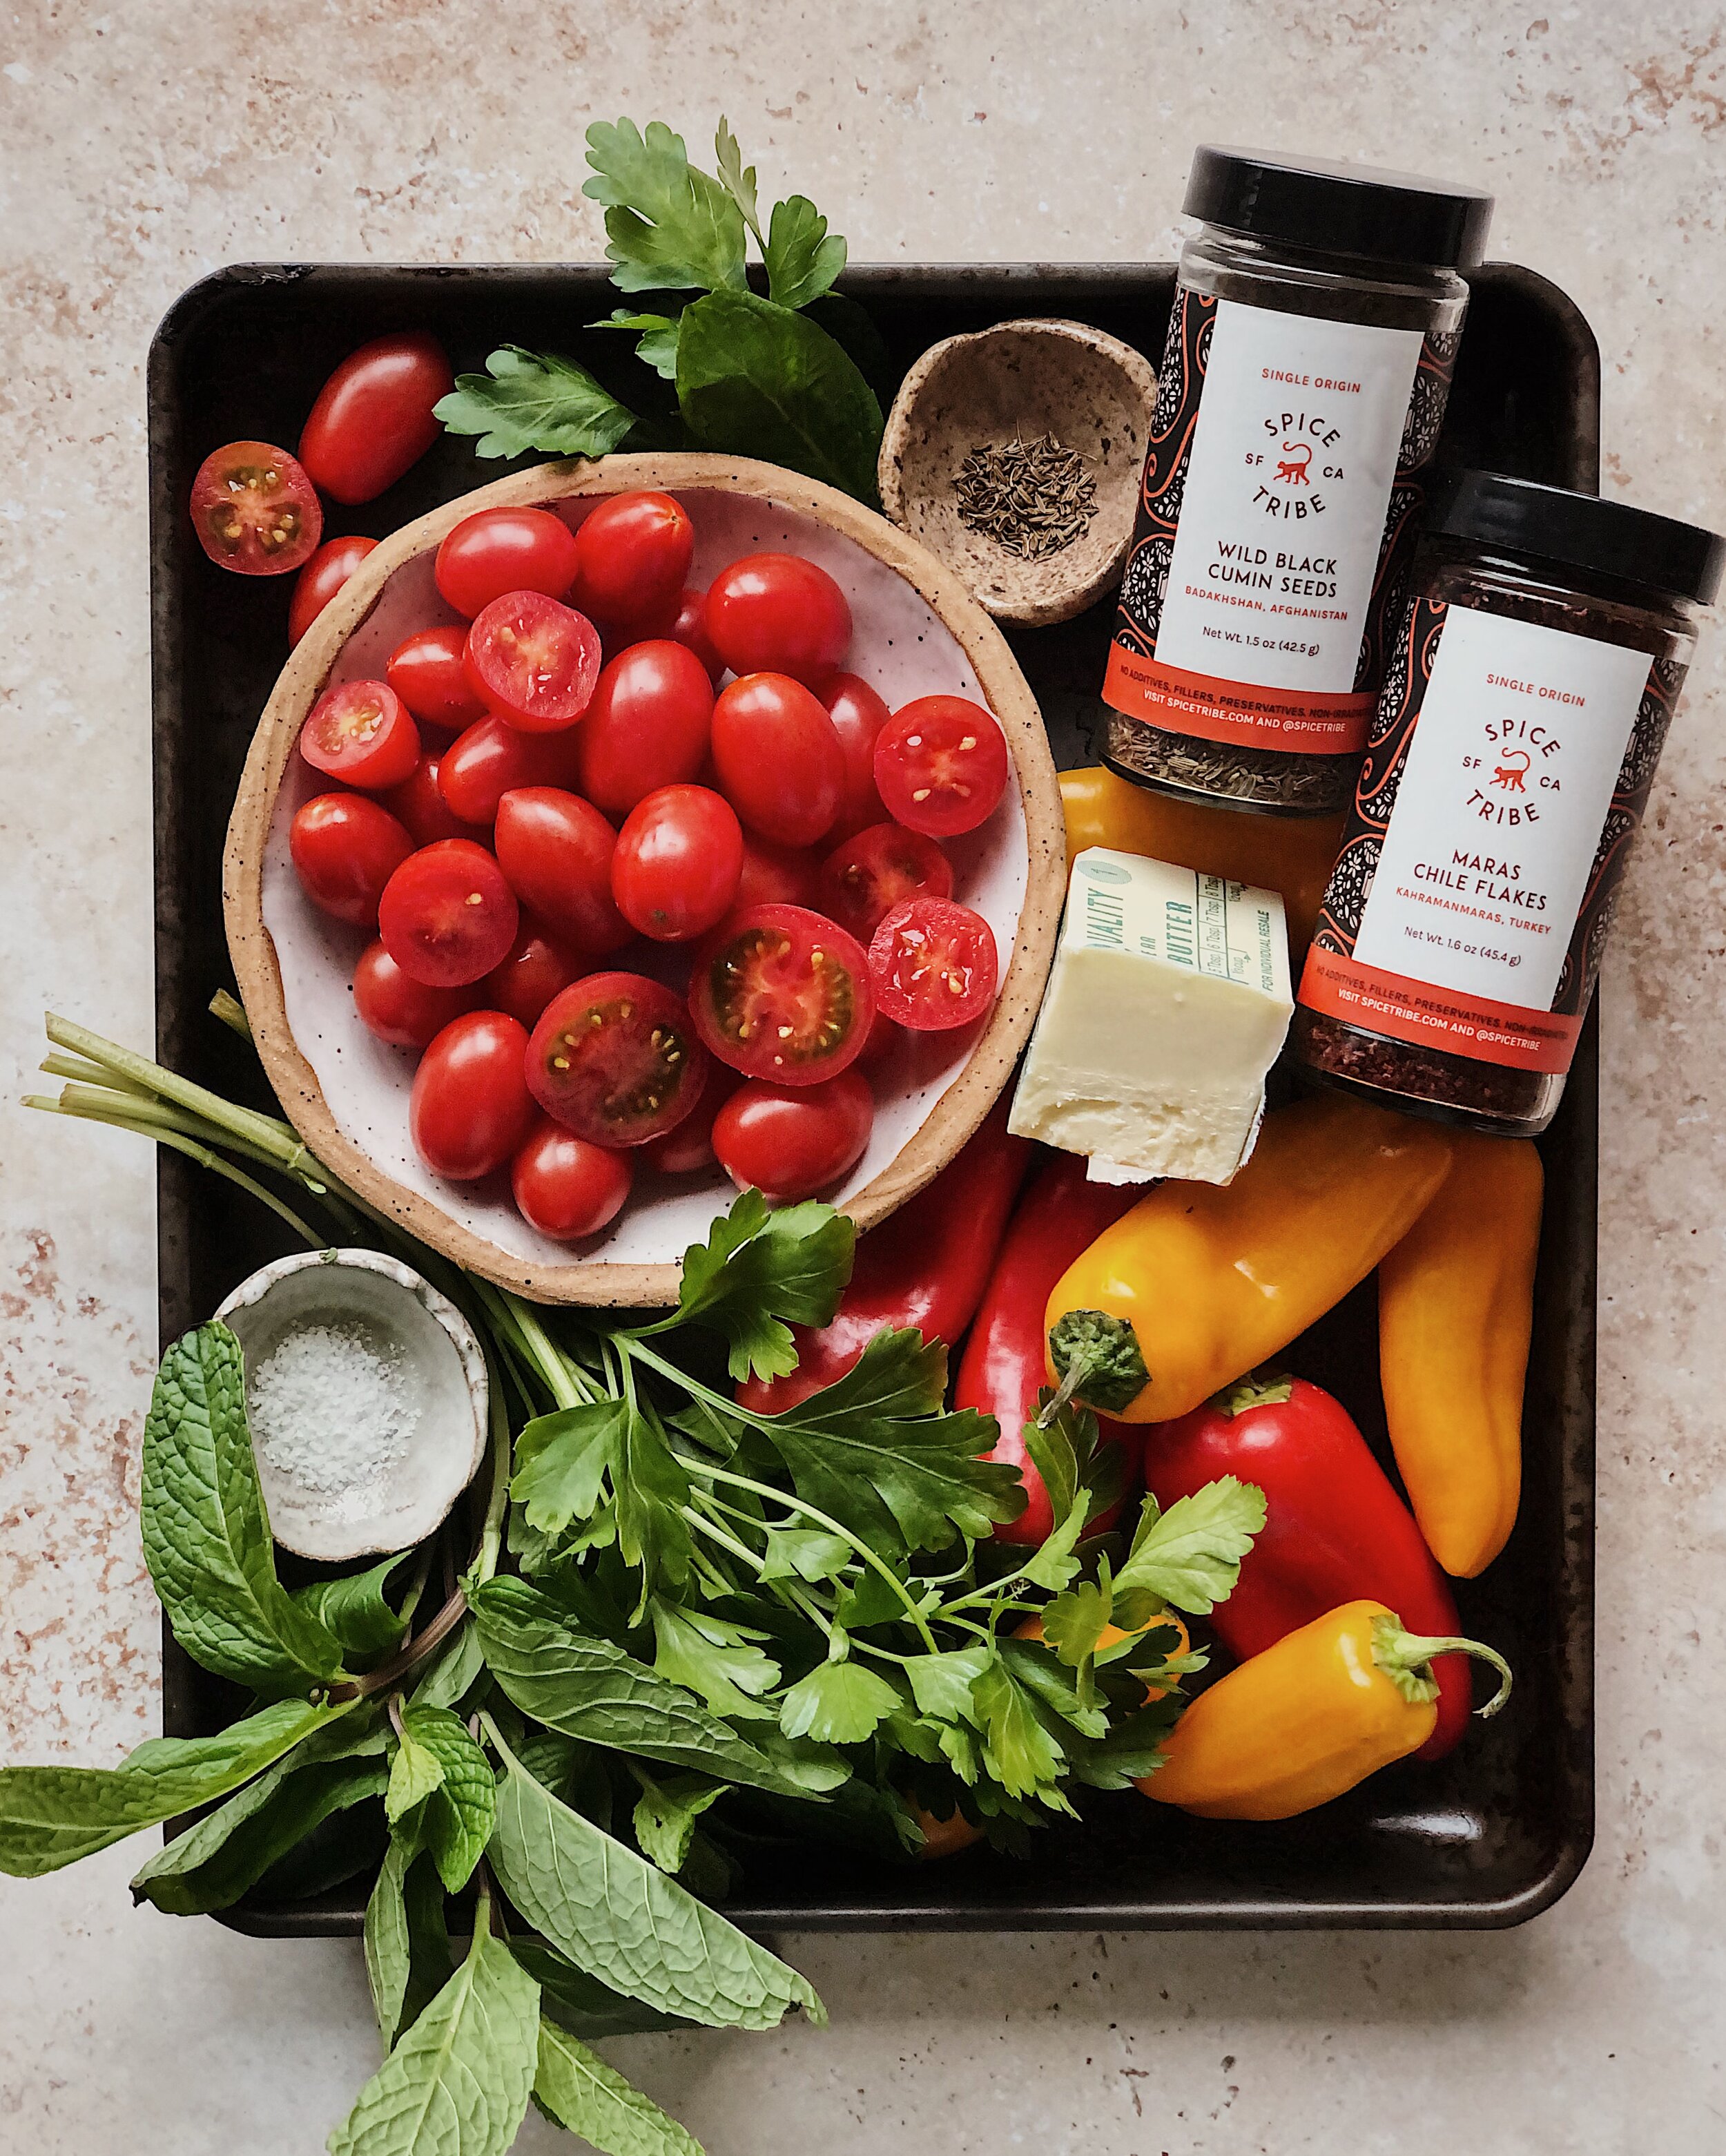
Because çılbır is one of my favorite breakfasts, whenever I see Aleppo pepper or Halaby pepper, my mind immediately goes to the glorious spicy melted butter that spreads over the yogurt like lava in this dish. When I started working with Spice Tribe, one of the products I was most excited to receive was their Maras Chile Flakes, which are the same pepper variety but sourced right from Turkey. I knew I had to use it in some sort of riff on Turkish eggs.

To be clear, çılbır does not need riffing. Its beauty comes from its simplicity, so I love that it’s a dish born from what people always had on hand. But I wanted to show off Spice Tribe’s Maras Chile Flakes while contributing some ideas that went beyond the basic recipes that were already out there, and in a way that continued to celebrate the beauty of simple ingredients without a whole lot of effort.

LilyMorello_TurkishEggs_01.JPG
LilyMorello_TurkishEggs_05.JPG

So here’s what I added to the mix:

  • Cherry or grape tomatoes: Cooked in a hot skillet until they burst, the juices from these flavor bombs bring a little freshness, and acid to complete that holy quaternity of salt, fat, acid, heat.

  • Sweet peppers: Apparently these are mini bell peppers, but I buy them in bags that are generically labeled “sweet peppers” at Trader Joe’s; they are similar in size to a jalapeño pepper but completely different in taste. The natural sweetness of these becomes even more pronounced when they get all soft and charred, and they add another dimension of flavor indulgence when they are swimming in that yogurt and butter.

  • Wild black cumin seeds: Bloomed in the butter as it melts, Spice Tribe’s Wild Black Cumin Seeds add a fragrance of cumin to the dish and a little bit of a nutty texture. When cooked whole, I find these black cumin seeds to smell and taste like a milder version of the ground spice I use in curries.

  • Fresh herbs: I couldn’t resist garnishing with some fresh herbs—in this case, parsley and mint. But I admit the motivation was mostly aesthetic; the dish will be still delicious without them.

Served with some crusty toasts or charred flatbreads to mop everything up, this dish is a delicious paradox of humble yet indulgent ingredients. Those extra add-ons really turn it into a full meal, so I would recommend enjoying this not just for breakfast, but any time of the day.

LilyMorello_TurkishEggs_02.JPG

How to Make Turkish Eggs
with Charred Tomatoes & Sweet Peppers

Ingredients

1 cup Greek yogurt
1–2 cloves garlic, pressed*
1/6 cup extra virgin olive oil
12 ounces cherry or grape tomatoes
8 sweet peppers, stems removed, sliced into 1/4-inch pieces
1/2 tsp Kosher salt, or to taste
1/4 cup salted butter
2 tsp Spice Tribe Maras Chile Flakes
1 tsp Spice Tribe Wild Black Cumin Seeds
2 eggs, poached
Fresh herbs, such as mint and parsley (optional)
Toast or flatbread, for serving

* If raw garlic is too pungent for your taste, substitute with 2–4 cloves of garlic confit or roasted garlic, mashed well.

Procedure

Mix together yogurt and garlic. Set aside to allow flavors to incorporate.

In a large nonstick skillet, heat the olive oil on medium-high until shimmering. Carefully add the tomatoes and peppers in one layer and season with salt. Reduce the heat to medium if the oil starts to smoke, but leave the tomatoes and peppers to char on one side before flipping over. (Note: As the tomatoes start to burst, there will be some oil splatter.) Cook the tomatoes and peppers until lightly charred on two sides, about 5–7 minutes total.

Move the tomatoes and peppers gently to one side of the pan, reduce the heat to medium-low,  and add the butter to the other side. As the butter starts to bubble along the edges, add the Maras chile flakes and cumin seeds. Stir the spices into the pool of melted butter and continue to cook until the butter starts to foam. Fold all the contents of the pan together.

Swirl the yogurt mixture onto the bottom of the serving dish(s), creating channels for the melted butter to flow. Tuck the poached eggs into the yogurt, spoon on the tomatoes and peppers, then pour the spiced melted butter over everything. Garnish with fresh herbs if desired. Serve with bread to scoop everything up.
Thank you so much to Spice Tribe for sponsoring this recipe! Check them out on Instagram here or visit their website to purchase high quality spices and unique small-batch spice blends.

Everything But the Bagel Galette

everything-galette.JPG

I’ve flattered myself into believing that this is the kind of novelty family-style menu item that people would wait in line to order at a cute brunch place—you know, back when that was a thing. But look at it! Can’t you see it too, if you use your imagination to think of a time when people were gathered on cute restaurant patios on sunny Sunday mornings sipping mimosas? A light, flaky galette encrusted with everything seasoning, filled with two kinds of creamy cheese and then topped with cold smoked salmon, pickled red (purple) onions, fried capers, and fresh dill and chives.

My inspiration for this galette was this Martha Stewart recipe that takes bagel toppings and puts them on a big flatbread instead. I happened to have an extra frozen pie crust sheet from Trader Joe’s in my freezer, and thought I’d try the concept as a galette instead, and it turned out pretty dang awesome!

I find that with at least the TJ’s frozen pie crust, the dough completely falls apart when you try to unroll it, but do not be discouraged by this! I just ball the whole thing together and roll it out again and it is always still incredibly flaky and puffy when it bakes. I won’t be ditching my from-scratch galette pastry dough recipe any time soon (a galette with heavy fillings like fruit or vegetables would require something sturdier) but for light toppings like these, the storebought pie crust works in a pinch (or a bout of laziness). The result is something quite delicate and crispy—the opposite of a bagel but delicious with the smoked salmon and other bagel toppings nonetheless.

Awkwardly Vague instructions for the
Everything But the Bagel Galette

Ingredients for the base

1 sheet ready-made pie dough, room temp
5 oz Boursin cheese
4–5 slices fresh mozzarella
1 egg, beaten
everything seasoning

Ingredients for the Pickled Onions

1/4 large red onion, sliced lengthwise
~2 tbsp sugar
red wine vinegar
salt

Ingredients for the fried capers

capers
neutral oil

other toppings

lox or cold smoked salmon
chives, finely chopped
dill

Procedure

To make the pickled onions: Place onion slices in a small jar (as small as they will fit). Bring some water to a boil. Add sugar and a pinch of salt to the jar. Add boiling water to the jar until three-quarters of the height of the onions are submerged. Stir to dissolve the sugar. Add vinegar just until the onions are submerged. Stir everything together and refrigerate when cooled. Make this at least 1 hour beforehand, overnight recommended.

To make the fried capers: Drain capers and pat dry on paper towels as much as you can. Add enough oil in a small pan to match the height of the capers. Once oil it hot, carefully add the capers (they will likely splatter a bit). Fry until the capers are “bloomed” and the splattering sound is subdued, but before they turn brown. Drain on paper towels.

To make the galette base: Preheat oven to 450°F. On a floured surface, roll out the pie crust to a 14-inch circle. Transfer to a piece of parchment paper.

Spread Boursin cheese evenly in the middle, leaving an empty 1-inch border all the way around. Tear mozzarella and dot all over the filling area. Brush the border with beaten egg and fold small sections over the filling to form a galette-style crust. Brush the pleated crust thoroughly with egg, making sure to get it in all the folds and crannies. Sprinkle everything seasoning all over the crust. Slide parchment paper onto an inverted baking tray and bake for 20 minutes on the middle rack, rotating once halfway.

Slide the galette base onto your serving board and top with bagel toppings as desired.

February 2021 Favorites

dog_lioncostume.JPG

This month was emotionally challenging for me. Every day, I felt bombarded with articles about hate crimes against elderly Asian people. In my culture, we don’t call adults Mr. and Mrs. when we are young, we call them uncle or auntie, or the Chinese words for granduncle/grandauntie if they look hella old. Complete strangers are still uncles and aunties. Even when you are an adult, anyone who is obviously older than you is your auntie or uncle. So, when we see our elderly getting bullied—in some cases even being pushed to their deaths—because of anti-Asian xenophobia, it’s heartbreaking; it feels like the victim is a part of our collective family. It definitely put a dark cloud over Lunar New Year, which is normally our most festive time.

I’ve decided to use these monthly favorites posts as a time to also reflect on the month that has passed, and I couldn’t do that this month without touching upon the subject that was in my thoughts so much. I am grateful my parents are safe (they even got their first dose of the vaccine this month!) and that I am safe. But I know others who look like us haven’t been so lucky.

On a more optimistic note, I have started planting in my garden. For several years now, I have been planting tomatoes and veggies right before spring starts. I am starting early this year because I have nothing else to do and because SF has had a crazy mild winter—which feels all the more insane in contrast with the winter storms in the rest of the country. I am not an expert about when to plant so please don’t ask me questions. But I’ll probably share more about this topic next month.

Random Product Favorites

Vinyl Backdrop from Club Backdrops in Sandstone

toast_soldiers_kejriwal.JPG

I found myself reaching for this Club Backdrops Sandstone backdrop a lot this past month. It looks tan/sand colored on their site but with my edits it often ends up subtly peachy-pink. I try not to spend a lot on my backdrops; my earlier photos were shot with either a cheap-ass foamboard from the craft store or some abandoned wooden crates I salvaged from a parking lot. I just started investing in “nicer” props as of Black Friday last year but I am still really frugal about my backdrops. Club Backdrops has a great 3 for 2 deal so I bought three and this is the one I love the most. They are definitely not the most ideal; the material is stiff so it doesn’t lie flat without the corners being weighted down but they do wipe clean pretty nicely and the printing is nicer than vinyl backdrops I have purchased elsewhere.

Stoneware Planter by Opalhouse for Target

7302219E-00A1-4FF8-AB91-BF2281CDEC6A.jpg

Bought this little planter from Target and I just love how it is the same color as my skin—something that is Very rare to find as a tan Asian. They come in other different sizes and shades too! Mine is the 4-inch in “light brown”. There is a kind soul in my neighborhood who puts out a box of cuttings and seedlings outside of his house on Fridays, so I picked up this little bb pothos seedling from him. I hope I don’t kill it.

Oolong’s Lunar New Year Lion Dance Costume

dog_lioncostume1.JPG

The dog costume I never knew I needed until I saw it! I am not really into dressing up my dogs but Lunar New Year felt different this year and I decided to indulge. Seeing my dog Oolong bop around erratically while running around in this (because the hood went over her eyes and she couldn’t see where she was going!) really did remind me of the playfully jerky movements of a lion dance and it was just too funny. The costume was surprisingly detailed and durable feeling. You can get one for your dog or cat here**! Oolong is a shih tzu-yorkie-generic terrier mutt mix of about 13 pounds and I got her a size 16, which fits her length and torso perfectly. I found that reading the reviews was very helpful for determining what size to buy.

Favorite Rejects

This section is dedicated to memorializing the photos that won’t be making it to my feed.

mandarin-oranges.JPG

I snapped this as a really quick photo for my Insta stories but I ended up really liking it so I want to hold onto it here, too. Mandarin oranges/satsumas/tangerines are a really big part of Chinese New Year. Their name in Cantonese sounds the same as the word for gold, and plus they kind of resemble gold coins in appearance, so these are usually exchanged among friends as wishes for luck and prosperity.

big-flatbread.JPG

I might still post this on Instagram. I’m on the fence. Please share your opinion in the comments! I was inspired by Ethiopian and Eritrean family style meals, and how there is a giant piece of injeria at the bottom of the platter with all the stews on top. I wanted to apply that concept to a fluffier flatbread (I used a naan recipe here) with other delicious toppings and dips piled on top for a really hands-on meal, but I think it ended up being too much chaos the way I styled it. I love how the colors and textures turned out though, so maybe this will be rescued from its reject status someday.

mini-kikis-fish-pie.JPG

Another one that I am still very on the fence about. A while back my friend Sandy challenged me to make a pie that looked like the fish pie from the movie Kiki’s Delivery Service. I decided to make a mini salmon pot pie version, but I have never made an individual pot pie before and forgot to account for the major shrinkage of the crust dough after baking. I also underestimated how long this simple and cute fish design would take me relative to more elaborate pastry art I have done in the past so I was really stressing about losing the light from the sun and had to take it out for photos before it was the right shade of golden brown. I think my fish is pretty accurate to the movie, but I wish the photo was sharper and that the overall pie looked a little more polished. Let me know what you think in the comments—is it still insta-worthy?

other Random Favorites

Favorite Netflix Binge: American Horror Story: 1984. Definitely not my favorite season of AHS but in general I adore this show (if it is possible to adore something filled with truck-tons of gore) so much so this was still my favorite thing that I watched this month. The progression was similar to the prior season, Apocalypse, in that there are two very distinct acts. I didn’t find the characters as lovable or compelling this season and it was weird to have an AHS without Evan Peters. But the ‘80s fashion and music throwbacks were pretty rad. If you are an AHS fan, please let me know below! My favorite seasons are Murder House, Coven, and Hotel.

Favorite Video: This footage of an adorable Chinese baby and their makeshift dim sum cart.

Thanks for reading! Let me know in the comments what were the highlights of your February 2021!

Recipe: Ginger Scallion Garlic Oil

chineseducktacos.JPG

Ginger scallion oil is something I remember my mom making to serve with her chicken rice. I don’t want to call it Hainanese chicken rice because her version was a lot more casual and homestyle and she did not follow the precise poaching method for Hainanese chicken rice. But she would basically boil the whole chicken and cleaver it into smaller pieces for serving with chicken rice and the broth on the side. Occasionally she would make a ginger scallion oil sauce as a condiment and that make the meal so much more exciting. The sharp bite of raw ginger was cooked away but what remained was its fresh spicy flavor; that plus the scallions added just enough flavor boost to the boiled chicken without taking away from the fact that the dish was a celebration of simple flavors.

I tried making my mom’s recipe for her ginger scallion paste, which I, at some point in college, wrote on a little grocery list notepad paper and tucked into my notebook of other handwritten recipes I collected from my mom’s cookbook collection. For some reason, when I made this recipe it didn’t turn out how I remembered. The recipe said to fry the ginger until it was dry, and the result ended up being a bunch of fibrous clumps.

Eventually I experimented with another technique that I had learned while researching how to make chili oil, and encountered again when learning how to make simple sauces for biang biang noodles. In both cases, spices or aromatics are piled up in a bowl and then almost-smoking hot oil is poured on top to bloom them and bring their flavors to life. I tried this approach with the ginger scallion oil idea (adding garlic along the way because damn do I love garlic) and it totally gave me the consistency I wanted. Something you could drizzle over jook, spoon over a plate of chicken rice, or toss with noodles.

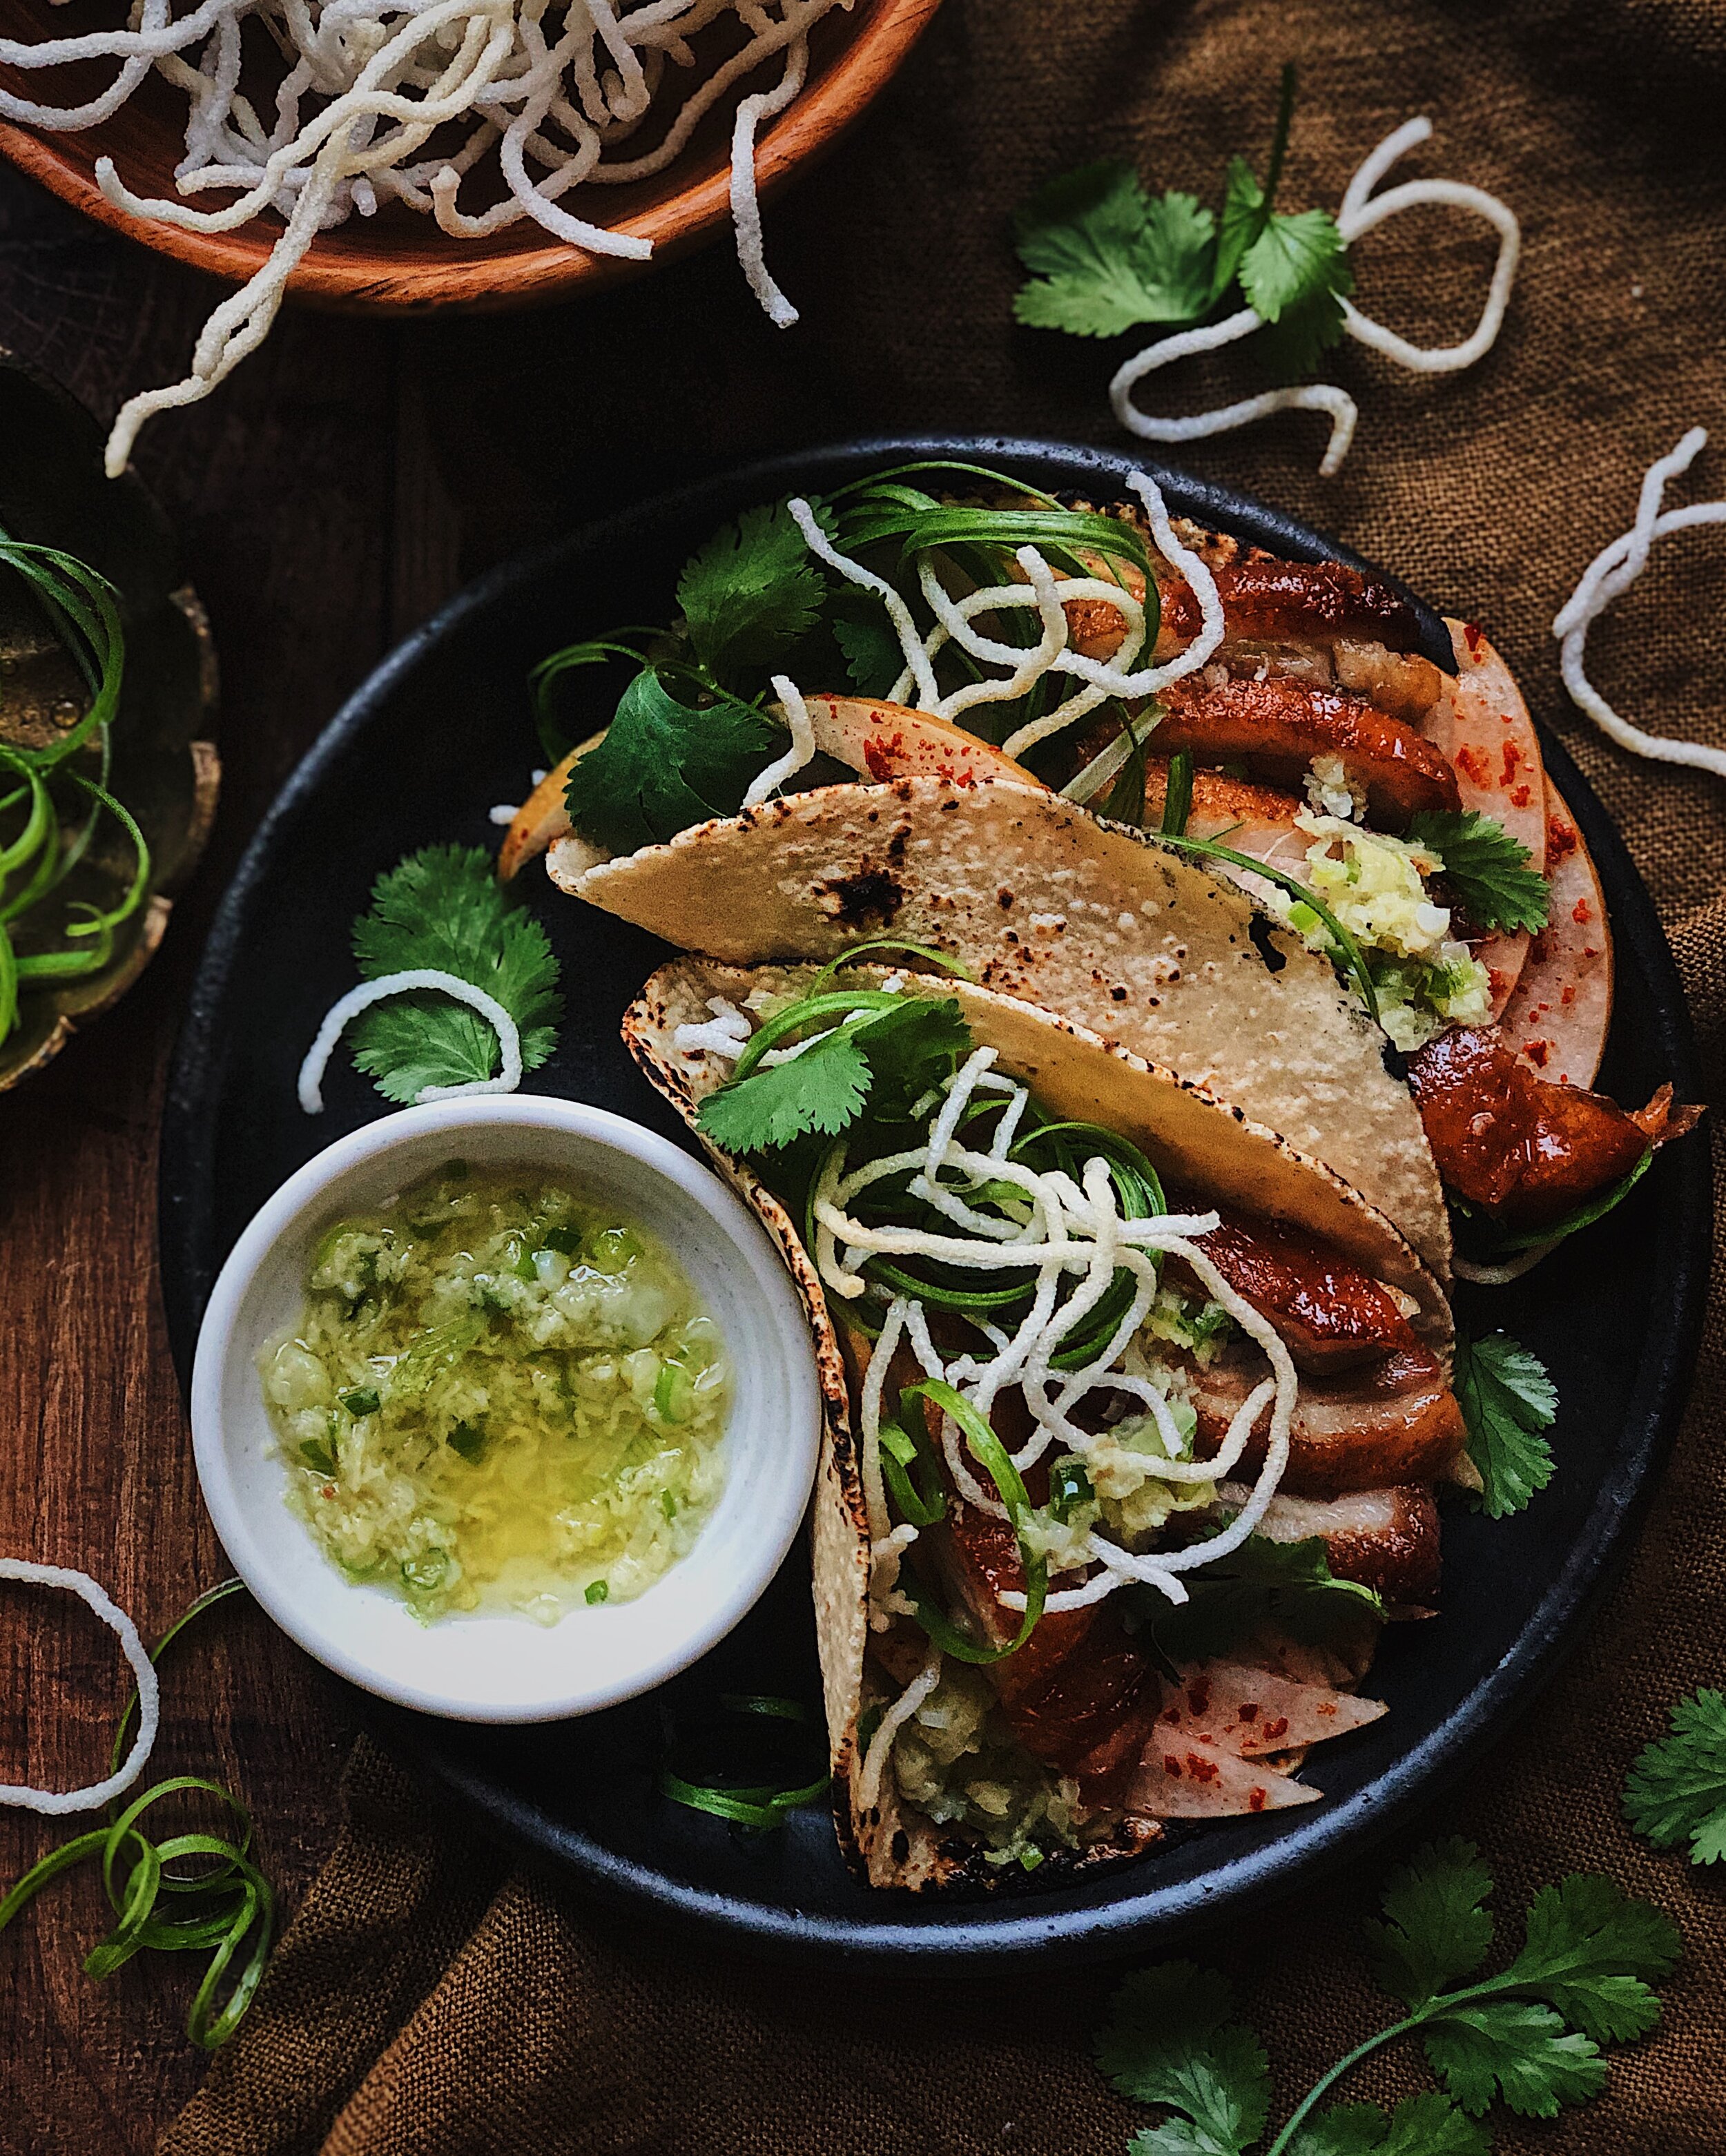
In the photo above, my ginger scallion garlic oil is an accompaniment to duck tacos I made from a roast duck that I bought at Yung Kee Restaurant in Oakland Chinatown. Other accompaniments are Asian pear slices tossed in sushi rice seasoning and gochugaru, crispy fried rice noodles, scallions, and cilantro.

How to Make Ginger Scallion Garlic Oil

Ingredients

a big fat 4-inch finger of ginger, peeled and grated*
3 scallions, thinly sliced
3–4 cloves garlic, minced or pressed
2 generous pinches coarse Kosher salt, or to taste
1/2 cup avocado oil, or some other neutral high smoke point oil

*Do not include the long fibers that get stuck to the grater. The texture of your grated ginger should look pulpy but not stringy.

Procedure

Place the ginger on a paper towel and gently squeeze out most of the liquid. You do not need to wring tightly, but squeeze until the ginger looks like a moist paste with no excess moisture.

Combine the ginger, scallions, garlic, and salt in a heat-safe bowl.

Heat the oil until it is almost smoking. (The oil is hot enough if you toss in a small piece of scallion and it sizzles up right away.) Carefully pour the hot oil over the aromatics (there will be some bubbling). When the sizzling stops, stir everything together. Make this at least 20 minutes in advance to allow time for the flavors to infuse into the oil. It keeps fine in the fridge for a few days.

Recipe: California Love Fried Chicken Bao

LilyMorello_FriedChickenBao_05.JPG

Hot chicken bao is a concept that I’d been experimenting with for some time now. It started with me wanting to take the components of a Nashville hot chicken sandwich (from the likes of Howlin’ Ray’s, for example) and stuff them all into fluffy, Chinese style steamed buns for no other particular reason than that a fully loaded bao is one of the best food formats. While the most famous version is probably the pork belly gua bao that are popular in Taiwan, these “lotus leaf” bao have become a popular receptacle for all kinds of fillings and I’ve personally also developed a compulsion to stuff all my favorite food combinations inside them (e.g. pastrami sandwiches, Korean-style egg drop breakfast toasts, spicy KFC). For a while, though, I was trapped in the headspace of wanting to perfectly recreate the very best restaurant-quality Nashville hot chicken sandwich where the only thing different was the bun…and that’s when I hit a big block. After all, I haven’t even been to Nashville before! How could I capture such an iconic food when the only place I’ve ever had it was in California?

And that’s when I realized, I needed to make it my own. Make it less about imitating something that already existed and more about the flavor combination that I wanted to capture inside these little bao. What were the ingredients that made sense to me?

LilyMorello_FriedChickenBao_01.JPG
LilyMorello_FriedChickenBao_04.JPG

One day, while I was looking at Spice Tribe’s pretty California Love bottle, it somehow clicked that this spice blend was exactly what I needed for my backburnered fried chicken bao idea. I didn’t grow up eating a lot of cayenne-heavy Southern spice blends (cayenne is what gives Nashville hot chicken its spicy heat) but the California Love blend felt a lot more familiar to me—probably because it was based on Spice Tribe founder Trent’s own upbringing in California. Though I must still give huge credit to every Nashville hot chicken joint I’ve ever ordered a sandwich from (Howlin’ Ray’s and Starbird are my faves) for the inspiration, the recipe now feels very me.

I really wanted these bao to celebrate how the diverse population of California has had a huge impact on how I create in the kitchen. These are the pieces that you’ll be bringing together to make my California Love Fried Chicken Bao recipe:

  • Lotus leaf bao: These can be found in the frozen section of an Asian supermarket. You want the ones that are folded, that you can stuff things into; I’ve seen them called “lotus leaf bao” but they probably won’t be labeled that in English. I keep them in my freezer until it is time to steam them and it does not take long in a bamboo steamer to transform them into fluffy pockets.

  • Fried chicken: I used a very simple technique for battering and frying the chicken, similar to the way I make Chinese-American takeout dishes like sweet and sour pork. You are not going to get a really thick crunchy crust like you would with Southern fried chicken because I thought that would overwhelm the delicately soft texture of the steamed bao; instead, expect a light yet crisp exterior.

  • The seasoning: The technique I used for applying seasoning to the chicken is taken directly from how Nashville hot chicken is made: a dry spice blend is mixed together and after frying the chicken, some of the hot oil is added to the spices; that seasoned oil paste is then brushed on to the fried chicken. However, instead of the cayenne-heavy seasoning used for Nashville hot chicken, I used Spice Tribe’s California Love all-purpose chile blend as the main component; I loved that it was a tribute to founder Trent’s own memories of growing up in California and cooking with his dad. The blend features California chilies and to me it celebrates the big presence of Mexican cuisine here. To that, I added Korean gochugaru for color and another chili component, but overall these are meant to be mild and approachable, not too spicy.

  • Cabbage slaw: Here, I once again tapped into Chinese-American cuisine for inspiration—the dressing for this is based on a “Chinese chicken salad” that my dad was really into at a Cantonese-American restaurant we frequented when I was a kid.

  • Sriracha mayo: A holy unity of practically every Asian-American kid’s two favorite condiments (sriracha + Japanese mayo) to form the ultimate sandwich spread.

  • Pickles: Because you can’t have a good fried chicken sandwich without pickles.

These satisfying fried chicken bao have a little bit of everything—a little sweetness and just a hint of spiciness in the seasoning blend, a little crunch from the pickles and the chicken batter, creaminess from the mayo, sweet-sour tang from the slaw—all hugged together by those fluffy, pillowy bao.

LilyMorello_FriedChickenBao_03.JPG
LilyMorello_FriedChickenBao_02.JPG

How to Make California Love Fried Chicken Bao

For the Slaw

4 tsp rice vinegar
1 tbsp honey
2 tsp sesame oil
1/2 tsp soy sauce
Pinch of kosher salt
1/2 small cabbage, finely shredded
1/8 red onion, thinly sliced

For the Chicken

3 boneless skinless chicken thighs
1 egg, beaten
2 tsp soy sauce
1/2 – 2/3 cup cornstarch
oil for frying

For the Chicken Seasoning

1 1/2 tsp Spice Tribe California Love blend
2 tbsp gochugaru*
1 tbsp brown sugar
1/2 tsp sugar
1 tsp kosher salt
1/3 cup hot frying oil

To assemble

8 frozen lotus leaf bao
1/4 cup Japanese mayo
4 tsp Sriracha (or to taste)
Dill pickle chips

*Note: If you want to make these more spicy, substitute in cayenne powder, to your taste.

Procedure

To make the slaw, whisk together rice vinegar, honey, sesame oil, soy sauce, and salt. Toss together with the cabbage and onions until everything is coated. Store in the refrigerator until ready to assemble the bao. (Can be made up to 4 hours in advance.)

Cut chicken thighs crosswise into 1 1/2-inch pieces. Beat together egg and soy sauce. Combine chicken pieces with egg and soy sauce mixture until everything is coated and allow to rest for 10 minutes.

In the meantime, in a dutch oven, heat enough oil to submerge the chicken pieces.

Pour 1/2 cup cornstarch into a rimmed plate. Remove one of the chicken pieces and allow the excess liquid to drip off, then dredge the chicken in the cornstarch until completely coated. Set aside and repeat until all the chicken is coated in cornstarch, adding more cornstarch to the plate if needed.

The oil is hot enough when you insert a wooden chopstick or spoon into the oil and small bubbles appear. Working in batches and adjusting the heat as needed, deep fry the chicken until golden brown and cooked, about 5–8 minutes.  Let fried chicken drain on a rack or paper towels.

While chicken is draining, set up a bamboo steamer lined with parchment paper and place the frozen bao inside, using pieces of parchment paper to keep them from touching. Steam the bao over a wok with simmering water until soft, about 5 minutes. (Or, if you do not have a bamboo steamer, wrap them in damp paper towels and microwave in 30-second increments until soft.)

Transfer chicken to a large tray. Combine all the dry seasoning ingredients in a heat-safe bowl. Then, add the frying oil while it is still hot. Stir together then brush the seasoning mixture onto the chicken until fully covered.

In a small bowl, mix together the Japanese mayo and the sriracha. 

To assemble, spread some sriracha mayo on the inside of a bao, then stuff with slaw, 1–2 pieces of chicken, and pickle chips. Repeat with the remaining ingredients.

Thank you so much to Spice Tribe for sponsoring this recipe! Check them out on Instagram here or visit their website to purchase high quality spices and unique small-batch spice blends.

Recipe: How I Make Char Siu

CharSiu_WontonMee.JPG

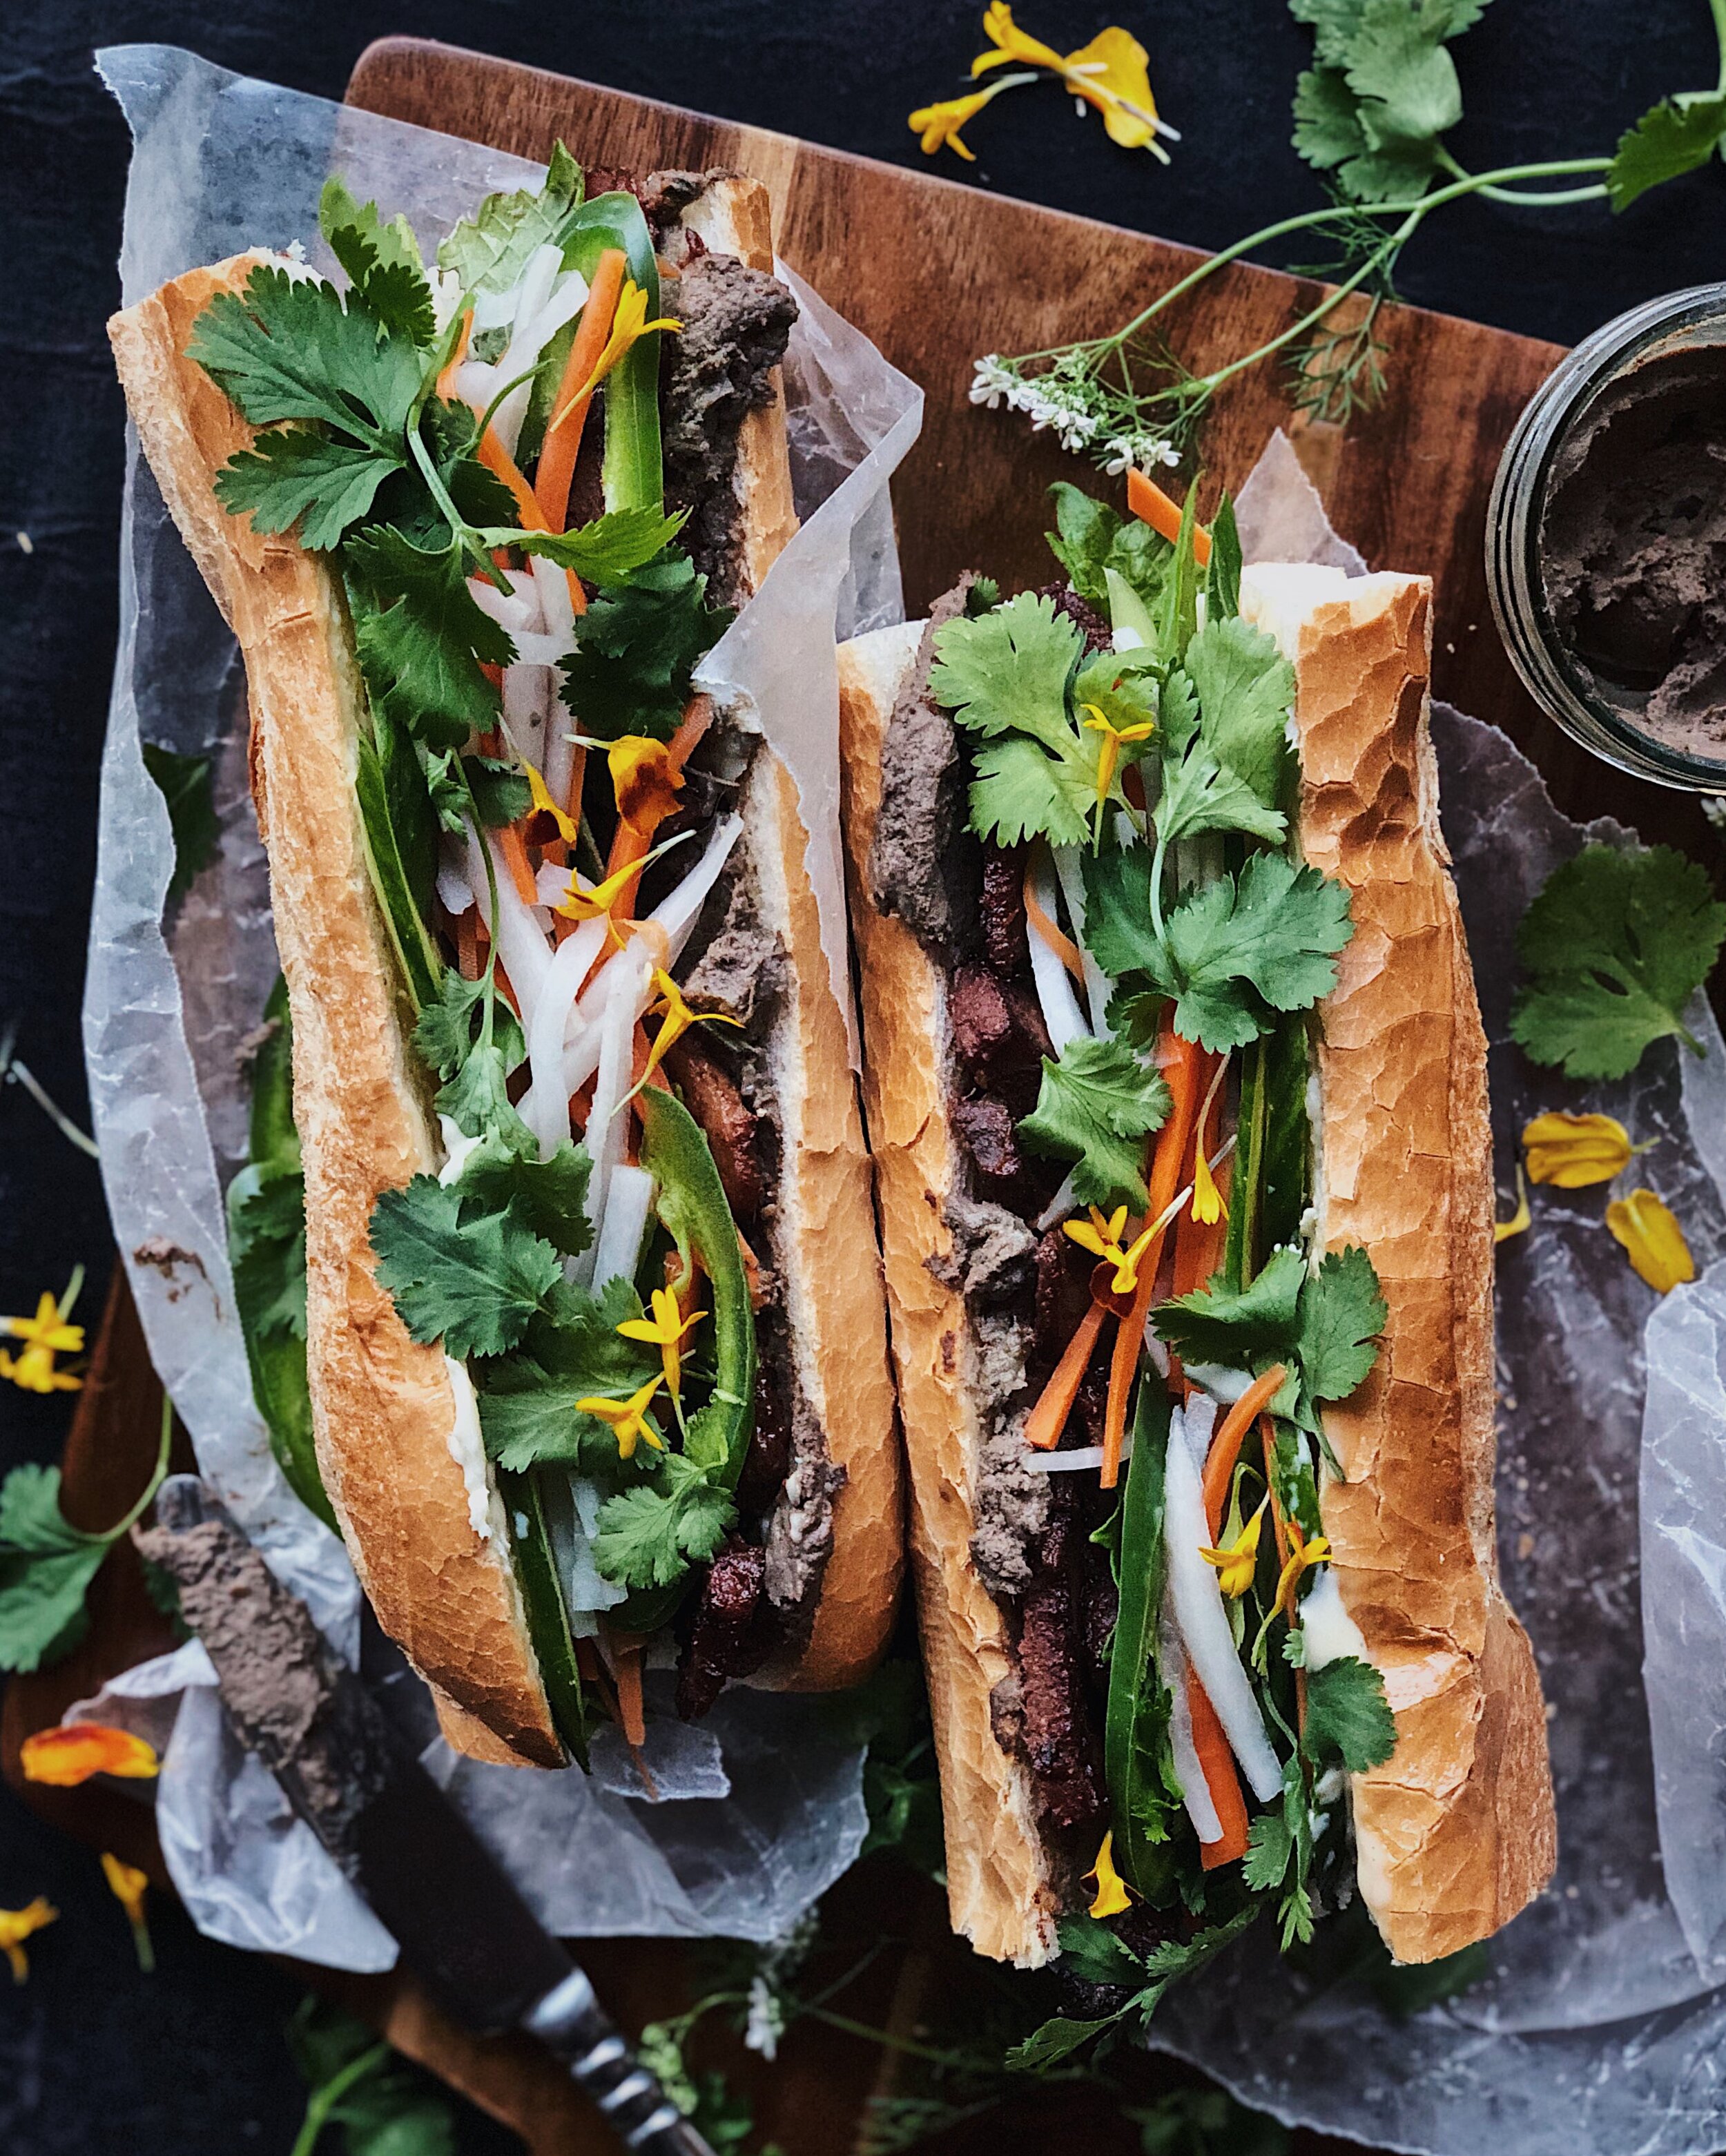
Char siu is a Cantonese BBQ classic! Most Americans probably know it from char siu bao/bbq pork buns, one of the more common dim sum items at Chinese-American restaurants. But char siu has so many other uses! In addition to the steamed rice + blanched vegetables combo at the BBQ joints in Hong Kong, you can cut it up and toss it into fried rice, stuff it into bánh mì, serve it up with fried eggs for breakfast, or make it for Chinese New Year in combination with my golden salted egg rice to represent red and gold—the most auspicious color combo! In Malaysia (where my parents are from) they are part of a popular hawker dish called kon loh wonton mee (dry mixed wonton noodles)—noodles are tossed in dark Southeast Asian style sweet caramel soy sauce/kecap manis and served with blanched veggies, boiled wontons, and pickled chilies. (My photo above is a variation on this dish.)

This recipe is my version of how to make char siu at home. It involves my favorite method of making marinade, which is to chuck everything in a blender and pour it in a bag; no chopping! While most of my recipes I consider to be pretty low-maintenance, I will say that the roasting process does require some love at the end to get that good layer of glaze going. That is why this recipe makes such a big quantity of meat; I like to make a big batch if I am going to go through the effort at all! After cooling, stash the extras in the fridge; I keep it in whole pieces and slice it up when I need it, then pan-fry the slices. It really loses its luster after a few days in the fridge and the sauce becomes a dull paste, but heating it up in a nonstick pan will really bring it back to life, I promise! All the photos of prepared dishes you see in this post were made from week-old char siu.

CharSiu1.JPG
CharSiu2.JPG
CharSiu3.JPG

Some notes about the ingredients:

What makes it red? Red fermented bean curd is what gives char siu is signature natural red color. You may encounter commercial versions of char siu that are very bright red; this is done with the use of food coloring. My version simply uses this more traditional ingredient to get a more mellow red, but it is a little tricky to find. In San Francisco’s Chinatown, I found it at ABC Supermarket and I have seen it in the big Asian grocery stores too. You can also order it on Amazon**, though it’s more expensive there. You can substitute with a little red food dye if you don’t want to purchase this special ingredient; the overall flavor will lose some of its depth of umami, but it will still generally taste like char siu.

What cut of pork is best? You are going to want to have at least some fattiness in your char siu because fat = flavor, and plus Cantonese BBQ is not at all about that lean meat life. I like to use pork belly, and use the resulting char siu as an alternative to bacon in my breakfast sandwiches. A lot of the grease renders out as the pork belly is roasting, and you are left with beautiful striated char siu that is moist and flavorsome. A well marbled piece of pork shoulder or Boston butt is another good option that will be less fatty but still stay moist when roasting. Since Spouse is not as into the super fatty cuts as I am, I make my recipe with half Boston butt and half pork belly.

Here are a couple more photos to give you some inspiration for what to do once you’ve made your batch of char siu! Recipe below!

CharSiu_GoldenRice.JPG
CharSiu_BanhMi.JPG

How to Make Char Siu (Cantonese-Style Sweet Red BBQ Pork)

Ingredients For the Marinade

4–5 pieces of red fermented tofu
2 tbsp liquid from the red fermented tofu
1/4 cup brown sugar
1/4 cup hoisin sauce
1 tbsp black vinegar
1 tbsp sesame oil
3 tbsp shao xing wine
1 finger of ginger, peeled
3 cloves of garlic
1/4 onion, peeled
1 tsp five spice powder
a couple dashes of white pepper
1 tsp smoked paprika (for color, optional)

You’ll also Need

2 1/2 – 3 lbs pork belly, marbled pork shoulder, or Boston butt
2 tbsp honey

Procedure

To make the marinade, combine all the ingredients for the marinade in a blender and blend until smooth.

Cut the pork into large strips, about 2–4 inches wide. If using pork belly, slice off the firm outer skin and discard (or use for something else). Place the pork in a large zip-top bag and pour in the marinade. Make sure all the surfaces are coming in contact with the marinade and seal the bag. Marinade overnight.

When ready to roast, place a rack in the middle of the oven and preheat to 420°F. Line a large baking tray with foil and place a small metal rack inside (I use the one from my toaster oven). Remove strips of pork from the bag and allow the excess marinade to drip off into a saucepot, then place on top of the small rack with as much space between the strips as possible. Pour the remaining marinade into the saucepot.

Roast the pork for 20 minutes, flip, and roast for another 20 minutes. In the meantime, add honey to the saucepot. Place pot on medium heat and cook until it starts to bubble, then turn heat down to low and simmer, stirring often, until a thick, maroon-colored sauce forms (about 5–7 minutes).

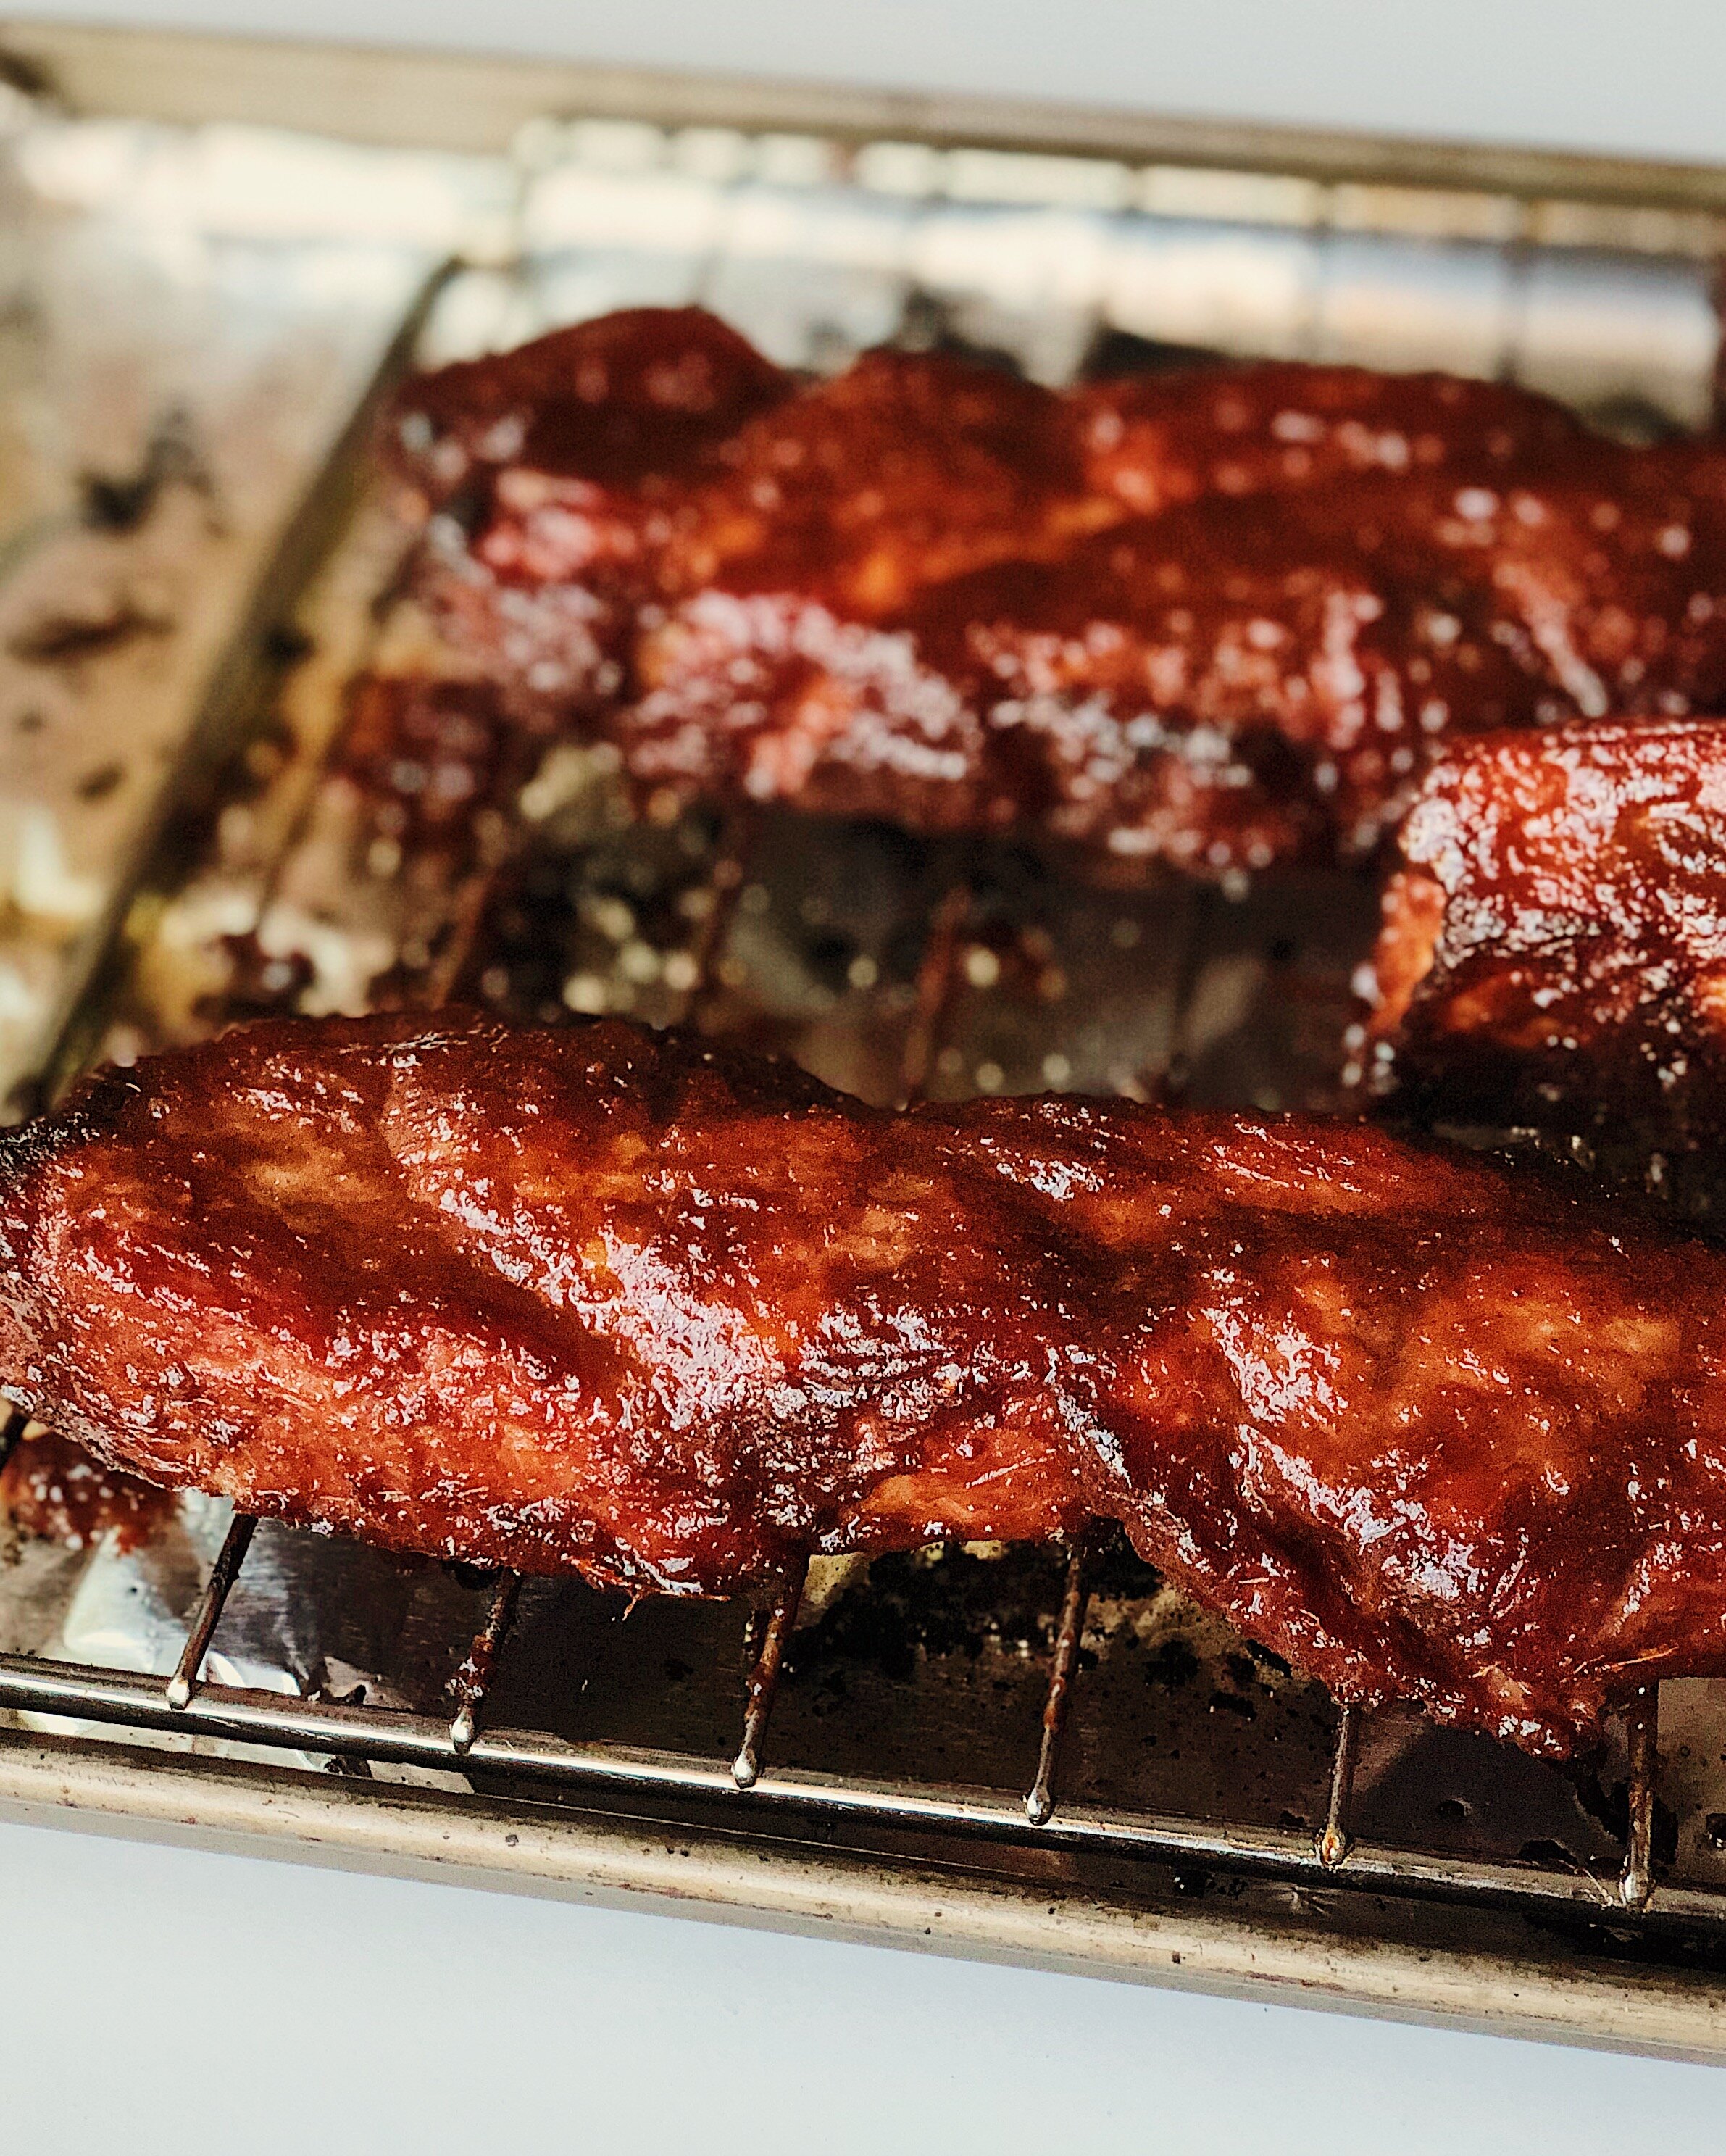
After the pork has roasted for a total of 40 minutes, take it out of the oven, flip, and brush on the sauce. Return to the oven for 3 minutes, flip, brush sauce on the other side, and roast for 3 minutes. Repeat this cycle 2 more times. In the end, each side should have been brushed with sauce 3 times, and put back in the oven for 3 minutes after each brushing.

Take pork out of the oven and allow to rest for 15 minutes before slicing.

Recipe: Golden Salted Egg Fried Rice

saltedegg_friedrice.JPG

I first learned about this technique for making golden fried rice from one of my favorite YouTube cooking channels, Aaron and Claire. Their version of golden rice is simply about coating the rice in raw egg yolk before frying to give it that namesake color. But because I am obsessed with salted egg yolk things, I decided to take that golden rice to the next level with my golden salted egg fried rice!

Unlike the fried rice that you get at Chinese-American takeout places, this fried rice recipe does not include veggies or meat to turn it into a whole meal. Instead, it is meant to be a flavorsome and visually stunning base that is best eaten with anything where you would normally eat plain rice. It is great with char siu as seen below! The eggy taste from both the raw and cured egg yolks is subtle, but combining these ingredients with the rice transforms it into a luxurious-feeling, salted carby base that then helps bring out the flavors of whatever you’re eating it with.

For those of you who are unfamiliar, salted egg yolk is simply an egg yolk that has been cured salt. It is quite a common salty umami flavor in Chinese food, and can be found coating vegetables in a stir fry or inside dim sum items like lo mai gai (sticky rice packets with chicken and Chinese sausage) or as the center of a mooncake. It has become quite a popular flavoring for packaged snacks like potato chips or fish skins. Unlike in European cooking, cheese is really not present at all in Chinese cooking, and I have seen the addition of salted egg yolk being compared to adding parmesan to a dish; though they do not taste the same at all, I get where this analogy is coming from because they both have a deep salty umami and a rich mouth feel.

The traditional way to make salted eggs is to cure whole duck eggs in their shells in a salt brine for an extended period, but lately I have seen a lot of recipes for separating out regular chicken egg yolks and burying them in a big bowl of salt for a few days. I always just buy the salted yolks ready to go in vacuum sealed packs from the Asian supermarket. If you are able to find those, this recipe will be super easy!

saltedegg_friedrice_charsiu.JPG

How to Make Golden Salted Egg Fried Rice

Ingredients

1 cup jasmine rice
1 1/8 cup water
3 egg yolks*
1 tbsp shao xing wine
1 tbsp fish sauce or soy sauce
2 tbsp ghee or neutral oil
2 salted egg yolks
salt, to taste

*If the color of your yolks are not very rich or saturated, add 1/2 tsp turmeric to compensate

Procedure

Make the rice the night before. Wash rice a few times, drain thoroughly, then add the water. Cook in a rice cooker, cool, and refrigerate overnight.

The next day: When ready to cook, transfer the cold rice to a large mixing bowl. Add shao xing wine and fish sauce (or soy sauce) and use the added liquids to help break up the rice until no clumps remain. Add the egg yolks and mix until each grain of rice is coated.

in another bowl, crumble the salted egg yolks into fine crumbs.

Heat up a wok on high. Add the ghee (or oil) then add the crumbled salted egg yolks. Stir until the mixture is completely foamy, then add the rice. Stir fry until the rice no longer feels sticky or wet. Add salt to taste.

Recipe: Jalapeño Popper Stuffed Soft Pretzels

JalapenoPopperPretzels1.JPG

I love jalapeño poppers and I love soft pretzels, so I thought, why not combine them into the ultimate stuffed gooey snack?

To my German friends and bretzen fans, sorry not sorry. These (like my pretzel buns which have the exact same dough base) have a texture which resembles something you’d more likely find at an American mall than an Oktoberfest tent. I like soft, fluffy doughy things. I also think the soft dough is necessary because you don’t want the molten cheese to simply squeeze out when you tear in to one of these babies.

stuffedpretzels1.JPG

I wasn’t going to share a recipe for these but then I posted a photo of the leftovers in my Insta stories and got multiple people asking me when the recipe is going to be out, so here we are. I fully admit that the process for rolling and stuffing the pretzels could use some visuals for better clarity; I will update this recipe the next time I make these with more illustrative aids. But I am hoping what I wrote below makes sense. You basically want to roll out the dough so that it is really tapered to a point on the ends, and much fatter in the middle—about a 1-inch diameter or even more. I often see recipes call for dough to be rolled into a “rope” or a “snake” but really you want these to resemble the shape of a long slug (minus the antennae, of course). You need enough volume in the middle two-thirds of your dough slug so you can roll it out flat, fill it with a line of filling, and pinch it closed. You don’t want the filling to leak out when boiling (though some melty spillage in the baking process is not a bad thing). You also don’t want the ends to be as fat as the middle because that will make it look clunky and awkward when you are twisting into a pretzel shape.

I have only tested it with crushed chicharrones for the coating, but I am quite confident it will work with regular panko. Next time I made these I will try it with panko to make sure the panko doesn’t brown too quickly, but in the meantime, just keep and eye on them as they are baking if you choose to go that route.

Finally, these are plenty cheesy and gooey on their own but if you want to dunk them in cheese sauce like I did, I will be the last to tell you that is not a good idea. I use this recipe from Serious Eats when I make cheese sauce.

stuffedpretzels2.JPG

How to Make Jalapeño Popper Stuffed Pretzels

(Makes 5 pretzels)

Ingredients for the Dough

3/4 cup warm water
1 tsp (slightly heaped) active dry yeast
1 tbsp honey
1 tbsp butter, melted and cooled
2 tsp brown sugar
1/2 tsp salt
2 cups AP flour, plus more for dusting
nonstick cooking spray

Jalapeño Popper Ingredients

5 oz cream cheese, softened
pickled jalapeños, chopped
~ 1 1/2 cups freshly grated mozzarella
crushed chicharrones or panko breadcrumbs

For the Water Bath

9 cups water
1/2 cup baking soda

Procedure

Combine warm water, yeast, and honey in the bowl of your stand mixer and stir gently. Allow yeast to bloom and foam up for 5 minutes.

Add butter, brown sugar, and salt, and stir together. Fit stand mixer with the dough hook and turn on to the lowest setting. Begin adding flour, 1/2 cup at a time, until a dough starts to come together. Use a rubber spatula to scrape everything together. If the dough is sticky, add a little bit more flour.

Turn the mixer to medium high and knead the dough for about 5 minutes until it feels smooth and bouncy. Turn the dough onto a clean worksurface and roll into a smooth ball. Grease the inside of the mixing bowl, and place the ball of dough back inside. Cover with a damp towel and allow to rest in a warm place for 20 minutes.

In the meantime, make the filling. Combine the cream cheese, pickled jalapeños, and mozzarella cheese into a homogenous mixture. (The amount of jalapeños and mozzarella cheese can be to your taste, but keep in mind it needs to fit inside the pretzels.) Set aside.

On a lightly-floured worksurface, divide the rested dough into 5 equal pieces and roll each piece into a ball. Then roll each into a long slug-like shape that is fatter in the middle and tapers off on the ends. These should be about 20–22 inches in length.

Then, take one of your long tapered pieces of dough and, using a small, lightly-floured rolling pin, roll out the middle two-thirds of the dough. The midpoint should measure about 3–3.5 inches when it is rolled out. Spread roughly one-fifth of the cream cheese mixture in a line along this rolled out section of dough, leaving some dough exposed above and below. Then overlap the exposed edges together over the filling and pinch together tightly, making sure the filling is sealed in well. You should end up with a long dough slug again, that is similar in size and shape to when you started. Twist this into a pretzel shape. Set aside and repeat with the other dough slugs.

In a large pot, combine water and baking soda for water bath and bring to a boil. Preheat oven to 425°F. Line 1 or 2 large baking trays with parchment paper.

Place each pretzel in the boiling water bath for 10 seconds on each side, then place on the parchment-lined tray. (I find it easiest to put them in face-down in the water first, flip, and then lift up with a spatula.) Give plenty of space in between, as they will puff up as they bake.

Pack on the panko breadcrumbs or crushed chicharrones onto the wet dough. Brush with additional water from the water bath if necessary for more adhesion.

Bake for about 15 minutes in the middle rack of the oven. Eat them as soon as you can manage without burning your fingers!

Orange Chicken Wings

orange_chicken_wings1.JPG

Sweet, sour, glossy, sticky wings! I’m sharing this as an idea for a fun Chinese New Year party idea (within your household) even though I am fully aware that “orange chicken” is a Chinese-American invention—not at all a traditional dish to serve at a new year celebration. However, there is so much rich history to the Chinese-American restaurant industry, so much to be said about the way Chinese immigrants adapted to make a living here, that I think the cuisine that developed is worth celebrating. Something especially unique about orange chicken that I learned from Chinese Cooking Demystified is that its orange sauce has also since somehow been adapted back to suit Chinese palates in China, and is now served on ribs in some areas in the south. That’s how special orange chicken is.

I also thought this would be a pretty good Chinese New Year dish because oranges are such a prominent part of the celebrations. I remember my parents exchanging oranges as gifts with their friends during Chinese New Year, as oranges—especially mandarin or satsuma oranges—are supposed to represent gold, wealth, and good fortune.

For Chinese-Americans like myself, this recipe should be super easy as the sauce really only requires 3 ingredients. Plum sauce and hoisin sauce are total staples in our pantries. But if you are someone who is not familiar with these ingredients, or maybe you know them from Chinese takeout but you have never purchased them yourself before—my hope is that you will be inspired to go to your local Chinatown if you have one and pick these ingredients up. You’ll find that they are incredibly delicious and versatile condiments, even straight out of the jar.

This isn’t a precise recipe below because I really don’t think it needs to be. Give that hoisin sauce and plum sauce a try first, and that will allow you to gauge how much you want each ingredient to contribute to your version. If you want more tang, use more plum sauce. If you want more deep umami, use more hoisin. They both have enough sweetness to make your wings super snackable and addictive, and really any combination of those three ingredients—freshly squeezed orange juice, plum sauce, and hoisin sauce—will be delicious on these delicately crusted, fried wings.

orange-chicken-wings2.JPG

Awkwardly Vague instructions for Orange Chicken Wings

Ingredients for the Wings

~ 18 party wings, a mix of drums and flats
salt
cornstarch
neutral oil, for frying

Ingredients for the Sauce

2 oranges
plum sauce
hoisin sauce
red pepper flakes (optional)

optional Garnishes

dried red chilies
sesame seeds, toasted
scallions, sliced

Procedure

Season wings on both sides with salt. Coat them thoroughly in a thin layer of cornstarch, making sure to get cornstarch into all crevices. Shake off excess and place in a single layer. Set aside.

Zest 1 of the oranges. Then juice 1.5 of the oranges, reserving half of the unzested orange. Cut that half orange into semicircles and set them aside for the garnish.

Deep fry the chicken wings (in batches, if necessary) and allow them to drain on a rack or paper towels while you prepare the sauce.

In a pan large enough to hold all the wings, add the orange juice and zest and bring to a simmer. Add a couple large dollops of plum sauce, a big squirt of hoisin sauce, and a couple pinches of red pepper flakes (if using). Stir everything together until homogenous. When the sauce starts to thicken and look syrupy, add the fried wings and toss to coat. Add red chilies and toss to combine.

Plate the wings and garnish with the orange slices. Top with sesame seeds and scallions.

Chicken Ramen with 40++ Cloves of Garlic

garlic_ramen.JPG

Ramen broth is one of those things that I think is less about strictly following a recipe, and more about following your heart. And my heart led me to this idea for turning the French classic “chicken and 40 cloves of garlic” into a ramen. So, be warned that what follows is just a loose guideline moreso than a recipe.

Ina Garten’s Chicken with Forty Cloves of Garlic was the first (only?) French “fancy” dish that I made regularly when I started cooking in college. Is it even fancy? It feels more like countryside/provençal vibes to me in hindsight but it felt very luxurious then. Back then, I also skipped the cognac and used two-buck Chuck for the white wine, which honestly still sounds perfectly good to me now. While other college kids were eating Top Ramen, I was ditching class and learning how to cook by watching hours and hours of the Food Network, seduced by the soothingness of Ina Garten’s voice. So, this recipe is a tribute to that time in my life.

How I even came up with the idea to turn this French chicken and garlic dish into ramen in the first place was when I came across Mandy Lee’s Vampire Slayer Ramen recipe, but I think you will find that these renditions of ramen are quite different from one another.

This awkwardly vague recipe should guide you to a very subtle, creamy broth that is naturally sweet from the braised garlic and some satisfying fall-of-the-bone wings that provide bites of umami as you slurp. As is a common practice with these creamy broths, I tried a version with Asian style unsweetened soy milk but did not notice it making much impact in taste or texture, so I left it out below. I kept the seasoning quite minimal, adding just enough salt to make the other flavors known, but you may find that a little drizzle of soy sauce might make things more in line with the saltier restaurant ramens you are used to.

One more thing I need to tell you about this, though, is that I experienced some pretty rowdy stomach noises in the 24 hours that followed. The kind that made me google “does garlic make you gassy”. (Spoiler alert: It does.) In my opinion, a small price to pay to indulge in a garlic lover’s noodle bowl dream. But you have been warned.

garlic-ramen.jpg

How to Make Chicken Ramen with 40++ Cloves of Garlic

Ingredients for the broth

6–8 party wings, flats recommended
salt
butter
40–50 cloves of garlic, peeled
1/2 onion
shao xing wine
24 oz high-quality bone broth
thyme
miscellaneous food scraps
soy sauce, to taste

For the Bowl

2 servings of fresh ramen noodles
5 cloves of garlic, thinly sliced
neutral oil
2 ramen eggs, plus a few spoons of marinade*
other garnishes, such as black garlic, seaweed snacks, sliced scallions, pea shoots (optional)

*I have found this recipe very helpful for making ramen eggs.

Procedure

To make the broth: Season wings all over with salt. In a large dutch oven, heat a generous knob of butter. Add chicken wings and brown on each side, lowering the heat as needed to avoid burning too quickly. Remove browned wings and add garlic and onion. Cook until they begin to caramelize, then deglaze the pot with a splash of shao xing wine. Add bone broth, a few sprigs of thyme, and whatever food scraps you have around for making stock (such as onion skins, carrot peels, bones, skin, etc). Return the wings to the pot. Cover and simmer on low until the wings are tender, then remove the wings and set aside.

Continue simmering the broth as desired, until the garlic cloves are mushy and it tastes naturally sweet from the aromatics. Remove thyme stems and any inedible food scraps. Transfer the remaining contents of the pot into a blender and carefully blend until completely smooth. (Please exercise caution when blending hot liquids, and allow the liquid to cool a bit first if you have time.) Return broth to the pot and season to taste. Keep warm on low heat while preparing the rest of the ramen bowls.

To make the wings: Bring some of the marinade from the ramen eggs to a simmer in a small pan. Add the cooked chicken wings and cook in the marinade, flipping occasionally, until the wings look flavorfully glazed and most or all of the marinade has evaporated.

To make the fried garlic chips: Spread the thinly sliced garlic out evenly in a small pan and add enough oil to cover. Fry on medium low to low heat until the garlic starts to turn golden brown (watch carefully). Remove pieces as they brown and transfer to a paper towel. Reserve the garlic-infused oil when the frying is complete.

To assemble: Cook noodles and divide between 2 bowls. Top with wings and egg, then pour in the broth from the side. Garnish with garlic chips and any other toppings. Drizzle some garlic-infused oil over the top.

January 2021 Favorites

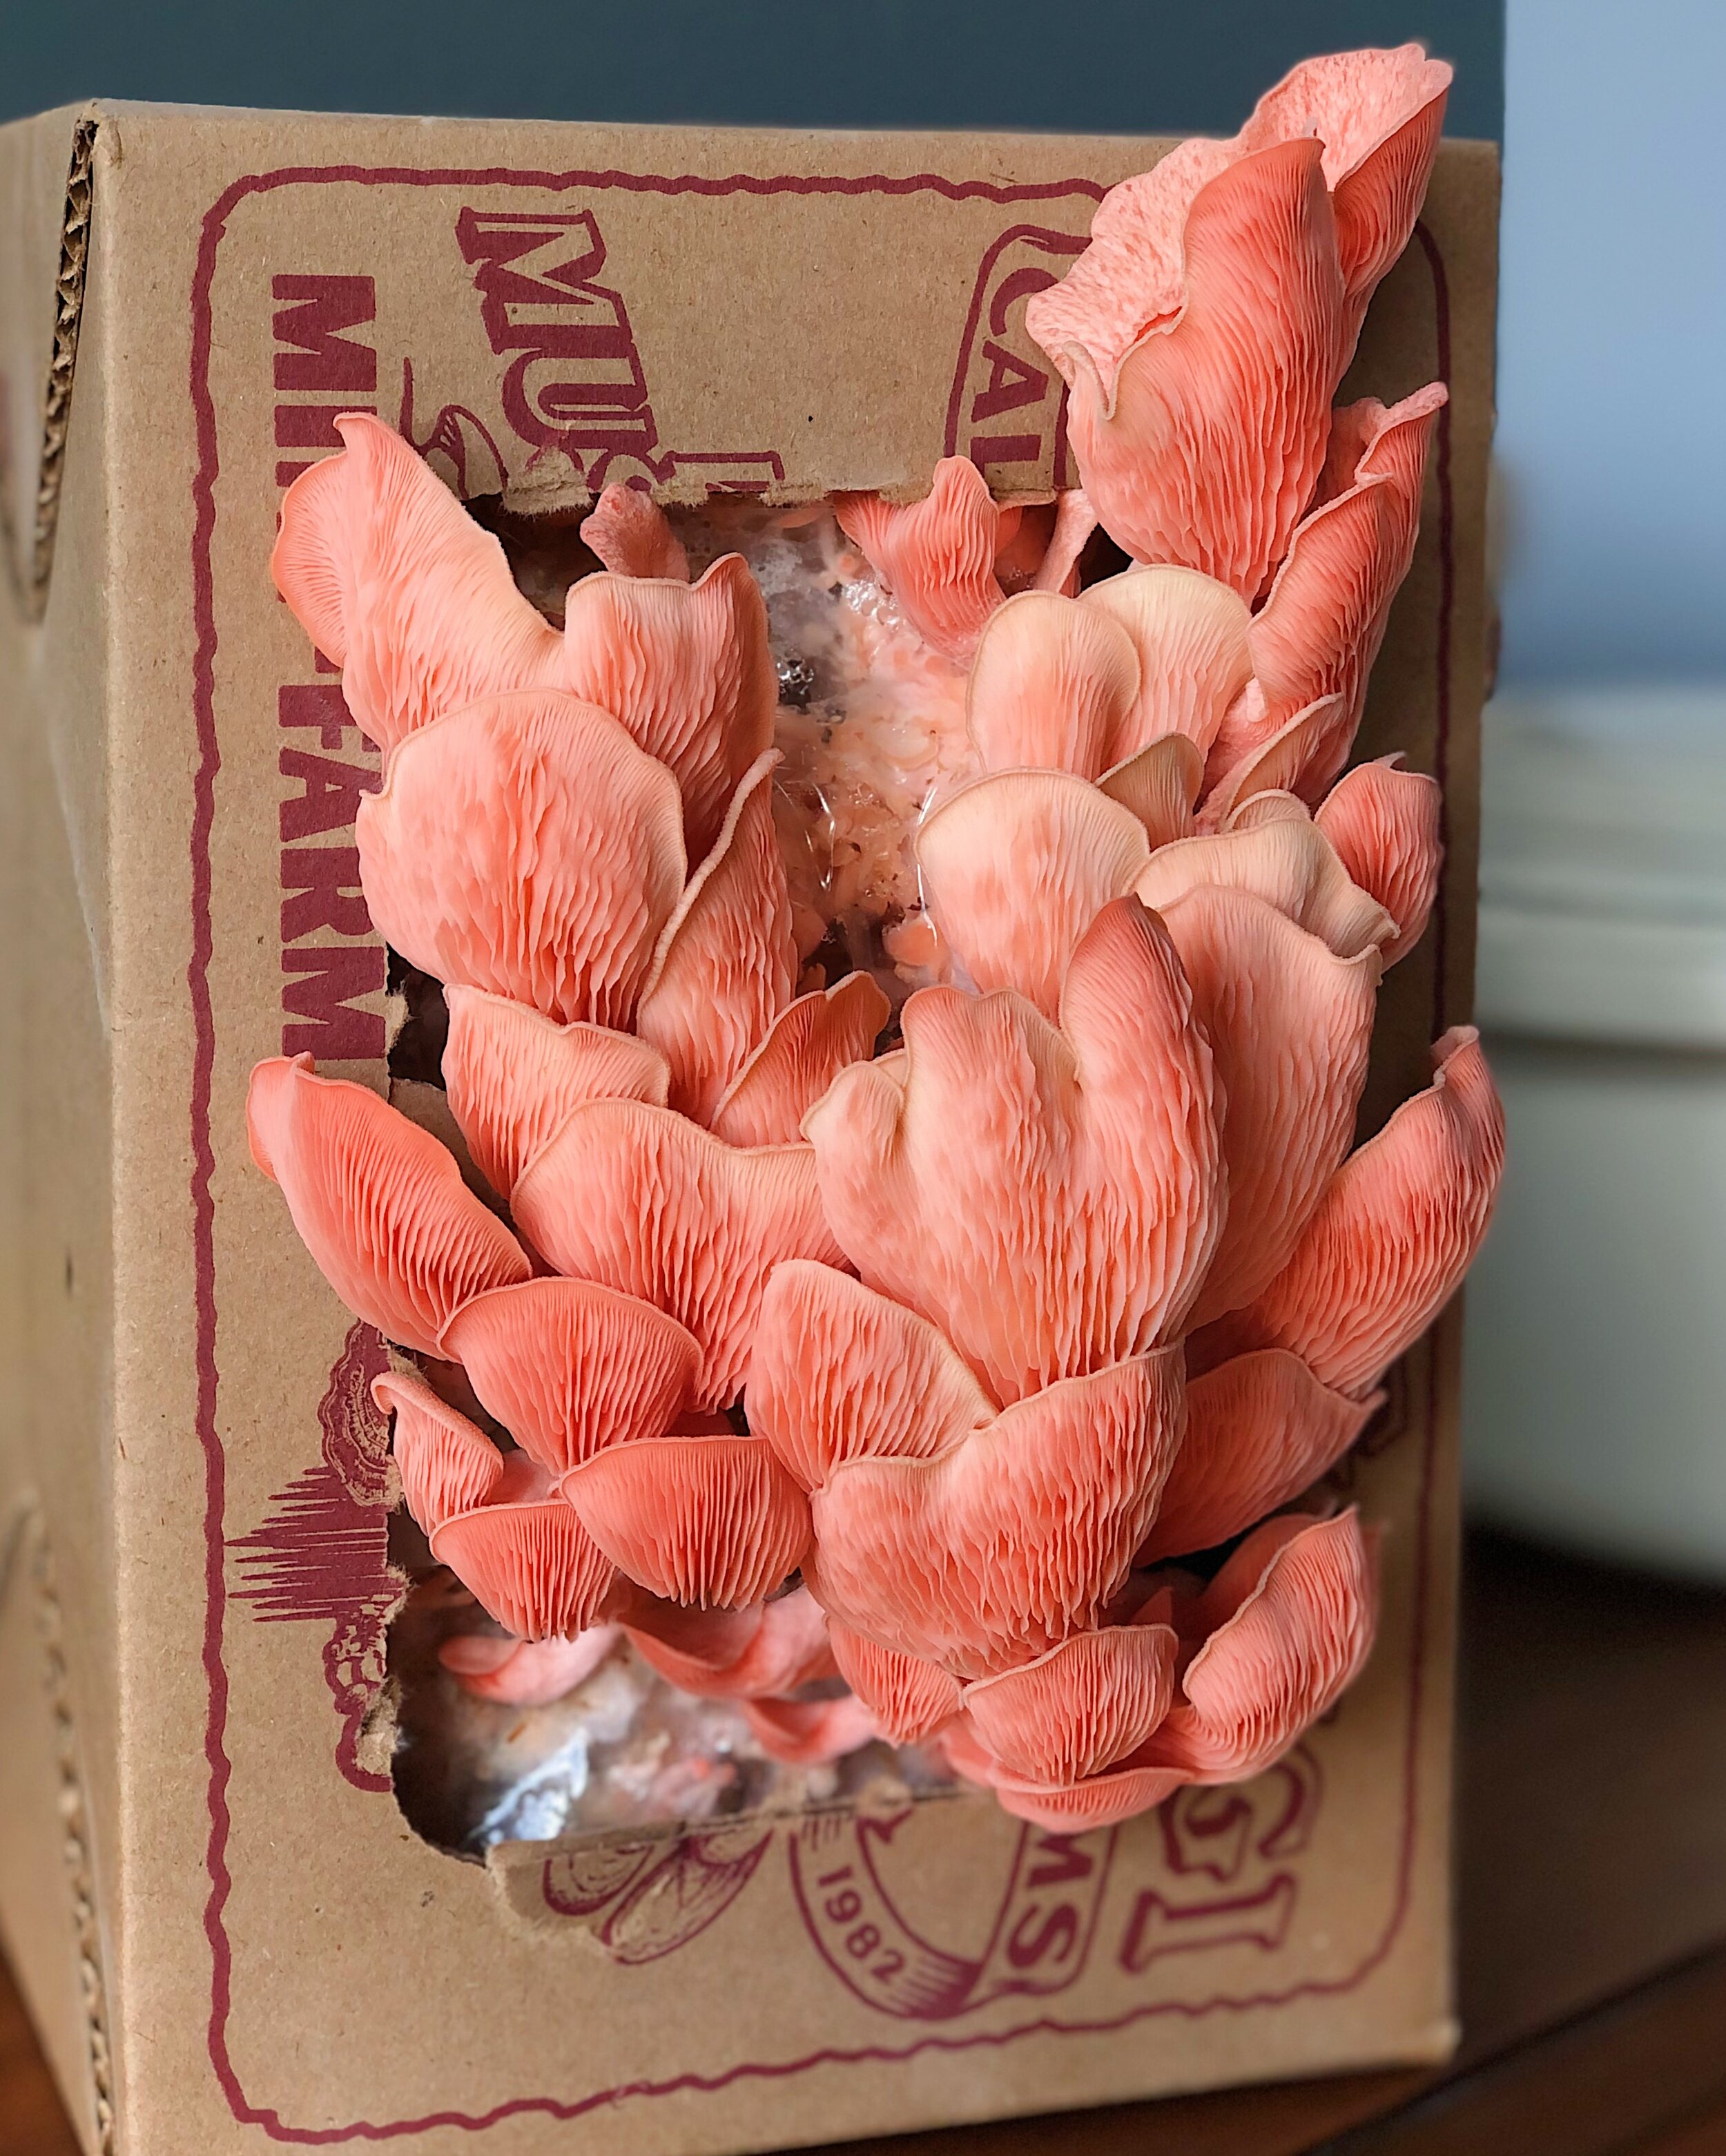
pinkmushrooms.JPG

I got some lovely positive feedback from my 2020 Favorites post, so will try to make this a regular monthly thing. I’m starting out strong by actually getting this post done in a timely manner, but we will see how it goes for the rest of the year!

I spent this past January mostly at home due to the latest lockdown, really leaving the house only for grocery shopping and picking up takeout. I shot Lunar New Year ideas and recipes that I’m excited to share with you guys. I binged watched the latest season of Great British Bake-Off, which I had very mixed feelings about. I had a lot of exciting preliminary talks with potential clients and partners. And I breathed a big sigh of relief on Inauguration Day. We actually got some decent days of rain here in San Francisco, which allowed me to feel productive, since I can shoot more on rainy days. Overall, not a bad month at all, and I continue to be grateful for my uneventful life and my health.

Here are some things that I loved over the course of this past month.

Food and Cooking Favorites

Pink Oyster Mushroom Mini Farm from Far West Fungi

pink-mushroom-mini-farm.JPG

If you’re reading my blog, then you probably already saw in my Instagram stories how obsessed I am with this pink oyster mushroom mini farm from Far West Fungi. It was by far the most exciting thing happening in my January. I picked mine up from their Ferry Building shop for $25 and I was able to grow the prettiest mushrooms I have ever seen in my life in a matter of days. The image directly above shows what the little growing kit looked like after 6 days and the image at the top of this post shows them when I harvested on Day 9 (I harvested them a day later than I should have). Maintenance for these mushroom babies is super simple—just follow the instructions that come with the kit (as simple as cutting slits in the plastic wrapping to make holes for the mushrooms to grow through and cutting air holes in a plastic bag), keep the farm inside the provided plastic bag in indirect sunlight, and gently mist the inside of the bag daily. The farm is expected to grow at least 3 mini crops of mushrooms like this. Considering the amount of happiness and entertainment I got out of it with even the first crop—it made me excited to spring out of bed in the morning to see how much they grew overnight— I think it is totally worth the price, which is less than two movie tickets (back when that was a thing)! They have other mushroom varieties too, but of course I am very happy with the pink one!

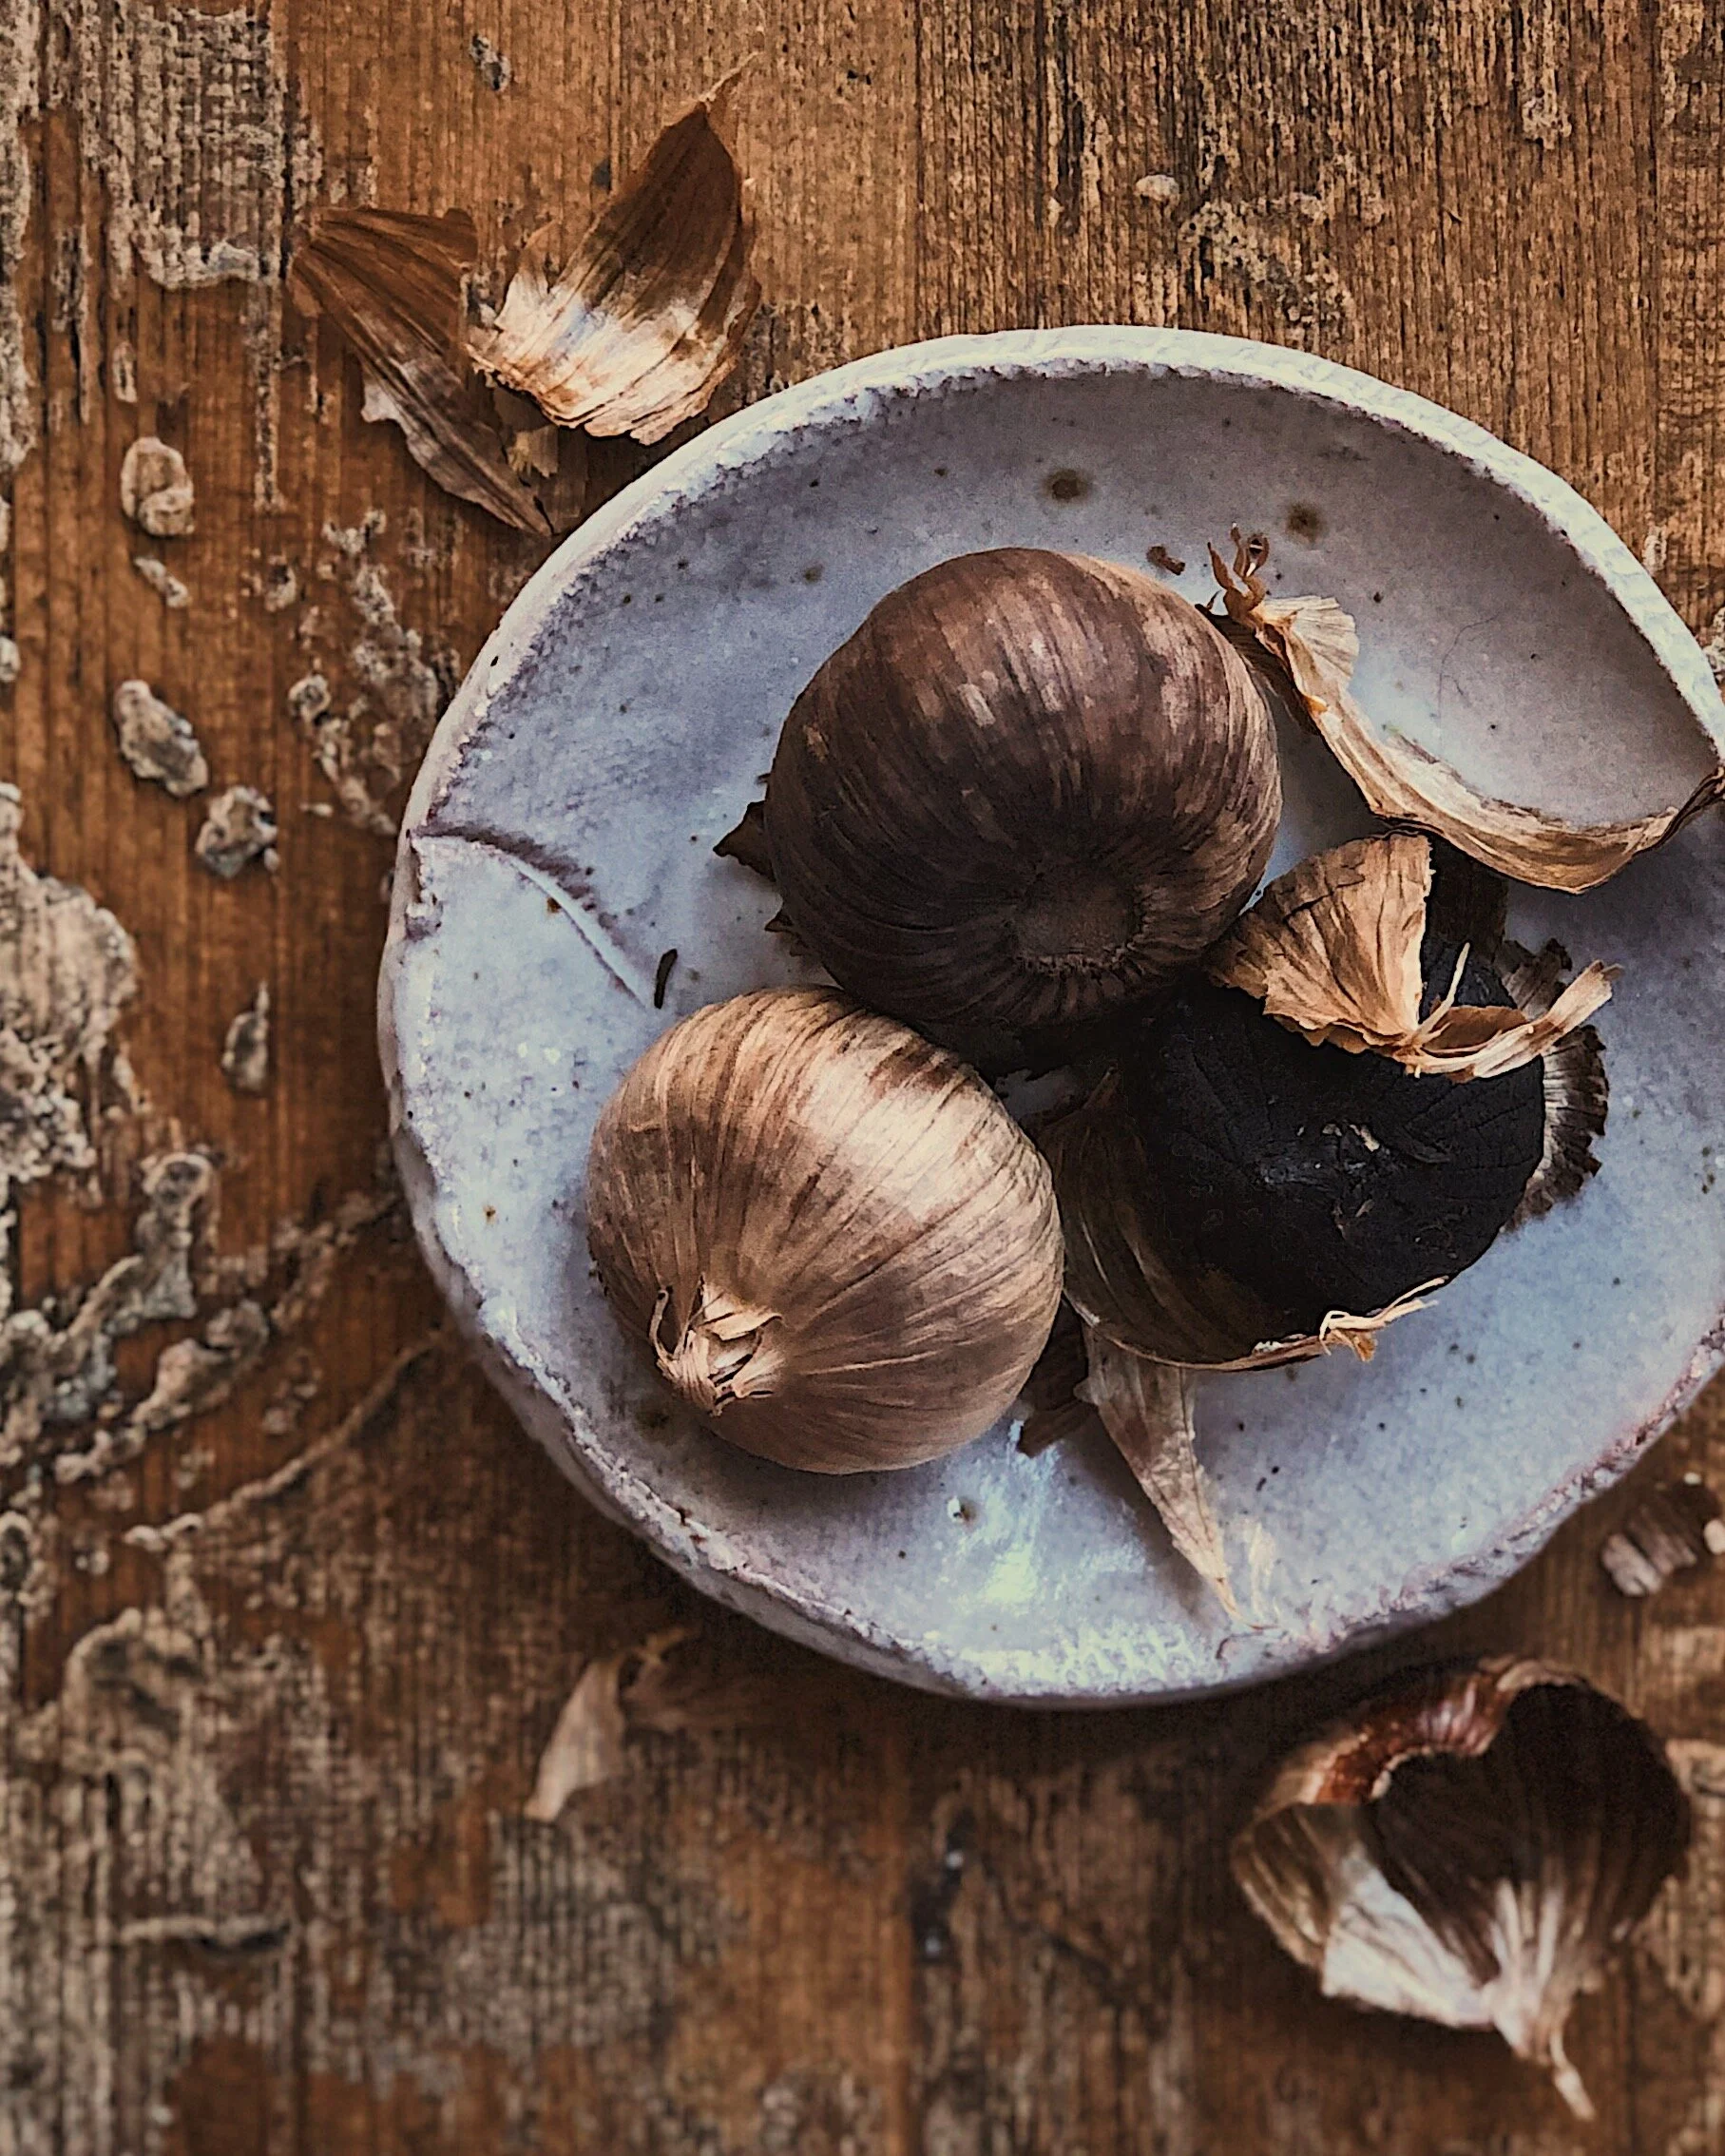
Black Garlic

blackgarlic.JPG

I have already written many loving tributes to black garlic on Instagram because it has been one of my favorite ingredients as of late. I am a big garlic lover in general but black garlic is a different flavor entirely. It is made by caramelizing garlic in a limited temperature range over a very long amount of time until all the sharpness of raw garlic is gone and what remains is a dark, soft, sticky deliciousness that is naturally sweet, similar to very slowly caramelized onions. I get mine from local Korean markets like The K Market and my mind was blown when I first peeled back the papery brown skin to see that the entire bulb was one giant clove! I love mashing it up and then blending it into creamy things like mashed potatoes and cream cheese. So freaking good!

Miso Butter from Churn

churn_misobutter.JPG

I think butter in general is pretty high up there on the list of Lifetime Favorites, but this month I was blown away by this miso flavored butter by Churn. [Full disclosure, I received this as an obligation-free gifted sample from Churn.] When I learned about Churn’s flavored butter products, I thought of course flavored butter would be awesome, but I was skeptical about what would set them apart from making my own compound butter at home. This miso flavor truly stood out as more than the sum of its parts—a moreish spread that is creamy with a rich special umami. I struggle with making miso flavored things myself because there are so many types of miso and they are all so nuanced and I never know which to use or how much. But the ratios and flavor combinations in this miso butter are just perfect. Spreading this butter on some good bread is incredible already but I’ve also melted it into some mushrooms and ramen, and each was made more divine because of it.

Favorite Rejects

These photos won’t be making it into my Instagram feed but I thought they were worth memorializing anyway.

pinkmooncakes.JPG

I tried making pink mooncakes using powdered freeze dried raspberries for coloring but they just did not bake up well for a number of reasons: 1) I learned from others afterwards that freeze dried fruit does not retail color well in baking. Someone suggested beetroot powder might be a little better; 2) Alkaline water. A common ingredient in normal mooncakes to produce a signature golden brown exterior, but I temporary omitted from my brain that alkaline + acidic fruit = color change; 3) My overall shoddy eggwash job—this was just a straight up fail on my part.

friedchickensandwich.JPG

I made this pretty damn delicious sandwich out of leftover fried chicken from Voodoo Love. Will probably write more about them another time because their Creole Nouveaux menu is amazing. But for now, I shoved some of their giant chicken pieces into cheesy everything buns that I made myself by adapting this recipe by Ariel Lee. Shoved in some little gems lettuce, pickles, pickled red onions, and a spicy-sweet mayo I made with honey and and Sichuan chili oil as well. Snapped this really quick photo with no intentions of it ever going on my feed before shoving this in my face hole.

lionsmanebenedict.JPG

I saw my friend Hanna make faux crab cakes from lions mane mushrooms and decided to give it a try. I have nothing against real crab cakes but I am a sucker for these weird plant-based hacks anyway, motivated by curiosity more than anything. And they turned out quite good! You basically shred up the lions mane mushrooms into a texture that really does resemble crab meat and just use them as you would in your favorite crab cake recipe.

Local Favorites

XLB and SJB from Dumpling Home

dumpling_home_sf.JPG

My favorite place for soup dumplings in the city is Dumpling Home. It’s a fairly new place that opened up in the brief time that indoor dining was allowed but I’ve only experienced multiple rounds of takeout. Their xiao long bao have super thin skins and look at all those tiny pleats! I wouldn’t say there is an insane amount of soup in them but there is certainly a substantial amount and I love that they are full of flavor. Their pan fried juicy pork bao (their version of sheng jian bao) are indeed very juicy, so much so that Spouse got bao juices all over his shirt the first time he bit into one. Their other items have been hit or miss, but their XLBs and SJBs are definitely worth a try if you live in the area! I love their numb & spicy pork, beef, and crab & pork XLB options. The numb & spicy pork is my fave, though they are pretty inconsistent in how spicy they are—the first few times I ordered they were not spicy at all, and in my most recent order they really packed a punch! They are always consistently delicious though!

Mr. Pickles Sandwiches

The sandwiches from Mr. Pickles are so good that Spouse and I ordered them twice in one week! There is nothing fancy about them whatsoever, but they just make reliably good, perfectly toasted deli sandwiches that are magically so so tasty and satisfying. I love that they have sourdough rolls that are easy to bite into without slicing open my gums, and how I can somehow taste a faint hint of propane from their toasting process (maybe that last part is not for everyone, but to me it adds to the toasty flavor!). Another thing I love about their bread is that when I bite into it, the sandwich fillings don’t immediately slide out—that means it’s the perfect texture and density! Mr. Pickles shops seem to be all over the Bay Area, but the one that I always pick up from is the one on 20th and Van Ness that is closest to my house; it seems to have its own website separate from the others and its own questionable pickle mascot…so I am not sure if the others ones in the chain will provide the same experience. My go-to order: a custom sandwich on a sourdough roll with pastrami, provolone, mayo, mustard, lettuce, tomatoes, pickles, pesto, pepperoncini, hot & sweet peppers, and oil & vinegar.

other Random Favorites

Favorite Netflix Binge: Carmen SanDiego, Season 4. I love this whole series actually but I binged its final season over the course of a couple nights in January. While that wasn’t its strongest season IMO, I do think it resolved things with the protagonist fairly well. Overall, what made me adore the series was seeing places around the world depicted in its somehow both retro and modern art style; the honestly compelling reimagining of the famous thief as a woke, complex do-gooder returning historical artifacts to their rightful countries; and the all-around badass Latina protagonist.

Favorite YouTube Video: This “One Day More” Les Miz parody by James Corden released the day before Inauguration Day. I have probably watched it 10 times now, and have most of the lyrics memorized.

Thanks for reading! Let me know in the comments what were the highlights of your January 2021!

How to Make Malaysian-Style Half-Boiled Eggs

malaysian_breakfast.JPG

Malaysian half-boiled eggs were the most iconic preparation of my childhood. American kids probably grew up more familiar with scrambled or hard boiled eggs, but I didn’t realize that half-boiled eggs were basically unheard of outside of Southeast Asia until much later in life.

What are half-boiled eggs? Poached inside their shells in a hot water bath, half-boiled eggs are like a more humble onsen or sous vide egg. This recipe will produce eggs where there is a thin layer of set whites that you can scoop out of the inside of the shells; some other softer, barely set whites; and an extremely runny yolk.

Pictured above are elements of a typical kopitiam/Malaysian coffeeshop breakfast: A couple of half-boiled eggs scooped into a bowl and topped with soy sauce and white pepper, and some kaya toast for dipping. When I was a kid, my parents and I used regular American sliced bread for dipping.

But now as an adult, I have been trying to spread the glory of Malaysian half-boiled eggs by sharing many ways in which they can be enjoyed. They are great for dipping toast soldiers if you put them on an egg holder and gently saber off the top, or they are lovely with noodles or jook or anywhere where you’d enjoy an onsen egg. They are basically the most forgiving and easiest way to make a nice runny egg!

toastsoldiers.JPG
katetoast.jpg

How to Make Malaysian-Style Half-Boiled Eggs

Ingredients

1–2 eggs

Procedure

Bring a small pot of water to a rolling boil. Gently lower the egg(s) into the pot and shut off the heat. Let the egg(s) cook in the hot water for 8 minutes. Remove from the pot and place in an ice bath to stop the cooking.

Disclaimer: consuming raw or undercooked meats, poultry, seafood, shellfish, or eggs may increase your risk of foodborne illness, especially if you have certain medical conditions. Eat at your own risk and don’t sue me, bro.

Shortcut Beef Rendang Sauce for Biang Biang Noodles

RendangNoodles1.JPG

Lunar New Year is coming up, and for the occasion, we Chinese folks eat long noodles to symbolize longevity. Well, there is no longer type of noodle than a biang biang noodle! In some restaurants, bowls of biang biang noodles are served up where the entire dish comprises of one super long noodle. I’m not THAT good at noodle stretching yet, but I am pretty proud of how long I can get the biang biang noodles I make at home, and I believe you can make those super long noodles at home too! You can find my easy recipe for how to make them here!

Even though biang biang noodles famously come from the Xi’an area of China, they are a glorious blank canvas for any sort of sauce. For this batch of biang biang noodles, I was in the mood for something inspired by the Malaysian flavors that are a big part of my heritage. Malaysian curries and stews are so loaded with flavor—usually a mix of chilies, spices, lemongrass, and coconut—and the wide, chewy noodles always go great balanced with punchy flavors like these. For this fusion dish, I took inspiration from fellow Malaysian-Chinese food enthusiast Jun Loh and his Rendang Rigatoni. Rendang is an iconic Malaysian stewed beef dish, simmered in coconut milk until the solids separate from the oil and get caramelized and sticky, acting as glue to encase the tender pieces of meat with spices. It’s usually eaten with rice. If you’ve seen my goulash-inspired spaghetti and meatballs recipe, though, you’ll know that I love converting beef stew gravies into pasta sauces, so Jun’s idea of turning rendang into a twist on bolognese really spoke to me. I’ve made Jun’s recipe before and it was awesome, a combination of two of my great loves (pasta and Malaysian food).

When I make the noodles from scratch, though, I tend to get lazy with the sauces. So, much like my version of cumin lamb noodles, this vague sauce recipe leans heavily on a storebought paste to make easy work of getting those rendang flavors. I like using this rendang paste; I can find it at most large Asian supermarkets in my area. Give it a taste and decide how much of it you want to use. For sauces like this, listening to your tastebuds is more important than following an exact recipe. The ingredients described below go great together and are tried and true combinations in Malaysian cooking, so you really can’t go wrong throwing them together in different quantities. Don’t expect a very “wet” sauce though; much like how rendang is thick and paste-like, you should aim for something that just coats the noodles and doesn’t weigh them down.

I admit that this noodle dish isn’t the prettiest, so especially if you are serving it for Lunar New Year, I recommend you make some pickled red chilies to go on top! In Malaysia, pickled green chilies are served as an accompaniment to wonton mee, but I like to pickle red Fresno chilies (especially when I grow them in my backyard in warmer months). I always keep a jar in my fridge, made loosely based on this recipe.

RendangNoodles2.JPG

Awkwardly Vague instructions for Beef Rendang Noodles

Ingredients

3/4 lb ground beef
1/4 onion, finely diced
2 cinnamon sticks
lots of chopped garlic
1 tsp cumin
1 tbsp Chinese or Korean chili flakes
pinch of salt
~ 1/2 cup Malaysian rendang curry paste (like this one)
1/2 cup coconut cream
1/2 pandan leaf, finely shredded (optional)
juice from 1 lime
coconut oil
Thai basil, for garnish
cilantro, for garnish
pickled red chilies
raw hand-pulled noodles

Procedure

Prepare your large pot of boiling water for the noodles.

In a wok, heat oil and stirfry onions. Add cinnamon stick and stirfry until fragrant. Add beef and garlic. Season with cumin, chili flakes, and salt. Continue to stirfry until beef looks just about cooked. Add curry paste and stir to combine. Mix in coconut cream and pandan leaf. Mix in lime juice. Simmer on low.

Cook biang biang noodles as described in the noodle recipe.

Add cooked noodles directly on top of sauce mixture. Toss to coat the noodles and add extra salt if necessary, to taste.

Garnish with Thai basil and cilantro. If desired, add pickled red chilies on top.

Recipe: Spaghetti and Meatballs Paprikash

LilyMorello_SpagMeatballsPaprika_01b.JPG

When I was growing up, having spaghetti for dinner was the ultimate treat. There was nothing fancy involved at all—just dry boxed pasta, sauce directly from a jar, and copious amounts of that powdered parmesan from the green can—but it was just so different from the Chinese home cooking that was the norm in my household, that the joy I felt on those nights is probably akin to the level of joy that most kids felt when getting to go to Disneyland. I even remember my dad joking at some point that I would marry an Italian person because my love for pasta was so strong (which somehow actually ended up coming to fruition—hence, why this Malaysian-Chinese-American girl sports an Italian last name at the top of this website).

Those beloved spaghetti nights didn’t even involve meatballs, so growing up, the fabled “spaghetti and meatballs” seemed like something that only existed in cartoons. And despite it not being a tangible entity in my childhood, as an adult, I can’t help but attach the stigma of spaghetti and meatballs being a kid’s dish. However, I think I have come up with a different version of spaghetti and meatballs, fit for an adult making up for lost time.

LilyMorello_SpagMeatballsPaprika_04.JPG

Since paprika goes gorgeously with tomatoes, I decided to use this as my key to making a really special version of spaghetti and meatballs. I associate paprika with a couple of really awesome tomatoey beefy dishes out there. Goulash, native to Hungary, but adapted to various other cuisines, is a true celebration of paprika; the old Hungarian origins were a soup/stew in which herdsmen relied on the beauty of sweet paprika to bring flavor to the beef, but modern versions have since been enhanced with the addition of tomatoes. I love the Viennese derivative, a thick dark gravy of paprika and tomato paste, sweetened by caramelized onions, that clings to its fellow plate inhabitants. I also thought of the meatballs that get served as Spanish tapas, so snackable in part because of their tomato sauce flavored with smoky paprika. These dishes were all points of inspiration for my spaghetti and meatballs.

The end result is a smoky, sweet, thick tomato sauce—somewhat resembling a gravy—that coats every meatball and spaghetti strand that gets tossed in it. The meatballs are light and bouncy to balance with the dense sauce. I based my sauce recipe mostly on the Viennese version of goulash, but I used Spice Tribe’s lovely Spanish Pimentón de la Vera to bring a more smoky umami flavor. This gorgeously fragrant paprika is one of my favorites from Spice Tribe’s single origin line because a little sprinkle on top of anything really transforms the aroma of any dish and makes my mouth water before I even take the first bite. But here, I really let it be the star, resulting in a sweet, smokey, rich version of spaghetti and meatballs—universes away from those old childhood days of longing for the tomato sauce from the jar.

LilyMorello_SpagMeatballsPaprika_03.JPG

I’m calling this recipe my “Spaghetti and Meatballs Paprikash”. Paprikash is derived from the Hungarian word for paprika and is used to describe those paprika-based Hungarian stews that seem to be the origin of all the goulashes around the world that followed. Though there is really not much Hungarian at all about this pasta dish, the name is meant to be a nod to what are possibly some of the oldest paprika-appreciation meals.

LilyMorello_SpagMeatballsPaprika_02.JPG

How to Make Spaghetti & Meatballs Paprikash

Ingredients for the Meatballs

1/2 cup panko breadcrumbs
1 egg
1 tbsp milk
1 lb ground beef
2 cloves garlic, minced
1/2 tsp Spice Tribe Pimentón de la Vera
2 tbsp parsley, chopped
1/2 tsp salt
neutral cooking oil

Ingredients for the Sauce

3 tbsp butter
2 large yellow onions, thinly sliced
4 cloves garlic, minced
2 tsp caraway seeds, toasted and ground
2 tbsp fresh marjoram, finely chopped
3 tbsp tomato paste
3 tbsp Spice Tribe Pimentón de la Vera
2 tbsp red wine vinegar
1 tbsp worcestershire sauce
1 tbsp sugar
1 cup high-quality bone broth
1 cup beef broth
1 14-oz can crushed tomatoes
salt, to taste

For the Final Dish

1 lb dry spaghetti
salt
fresh marjoram or parsley, for garnish
grated parmesan cheese (optional)

Procedure

To make the meatball mixture, beat together the egg and milk in a small bowl, then add the panko breadcrumbs. Allow the panko to soak up the moisture while prepping the other ingredients. In a separate mixing bowl, combine ground beef, garlic, Spice Tribe Pimentón de la Vera paprika, parsley, and salt. Fold together or mix with hands to combine, then add the panko mixture and mix again just until homogenous. Chill in the refrigerator while you start the sauce.

For the sauce, combine butter, onions, and a couple generous pinches of salt in a large dutch oven set on medium heat. Cook, stirring regularly with a wooden spoon, until the tips of the onions start to brown, about 5–7 minutes. Lower the heat to medium-low and cook until all of the onions are soft and completely golden brown, about 20–25 minutes more. 

Add garlic, caraway, marjoram, and tomato paste; stir together and allow these new ingredients to become fragrant, about 1–2 minutes. Then add Spice Tribe Pimentón de la Vera paprika, vinegar, worcestershire sauce, and sugar. Scrape off anything stuck to the bottom of the pot, then add bone broth. 

Turn the heat back up to medium and cook, stirring, until the mixture holds together and is thick enough to leave a clean trail when the spoon glides against the bottom of the pot. Turn off the heat and carefully transfer the mixture to a blender. Add half of the beef broth to help cool the mixture and blend until smooth (please exercise caution when blending hot liquids).

Return the mixture to the pot and add the remaining beef broth, plus crushed tomatoes. Simmer with the lid slightly ajar on low for 30–45 minutes until the sauce starts to thicken and cling to the spoon.

In the meantime, roll the chilled meatball mixture into 1-inch balls (about 18–20 balls). Heat a small amount of oil in a nonstick skillet, and add the meatballs. Sauté until the meatballs are slightly browned all around their exterior. Transfer the meatballs to the sauce and discard the rendered fat. Bury the meatballs in the sauce and continue to cook, covered, on low until the meatballs are cooked through and the sauce reaches the consistency of thick gravy, about 15 more minutes.

While the meatballs finish cooking in the sauce, bring a large pot of water to a boil. Salt generously and cook spaghetti according to package instructions. Add cooked pasta directly to the sauce and toss everything together. Garnish with fresh herbs, and serve with freshly grated cheese, if desired.

Thank you so much to Spice Tribe for sponsoring this recipe! Check them out on Instagram here or visit their website to purchase high quality spices and unique small-batch spice blends.

Recipe: Mala Chili Oil Fried Egg

chilioilfriedeggbagel.jpeg

Lately, I have been really into frying eggs in Sichuan pepper chili oil. Why fry an egg in regular, flavorless oil when you can have a fried egg whose every crag and crispy edge is filled with a hint of something numbing spicy?

The inspiration for this was a video I saw of a hawker stall in Malaysia that serves up eggs fried in sambal. (Sambal is a term used in Southeast Asia to refer to various chili sauces and pastes, typically made with pulverized fresh red chilies of some sort.) I’ve tried making this a couple of times but couldn’t get it to look aesthetic enough. It was also horribly messy (and sometimes slightly painful) because the bits of chili and aromatics in the sambal would splatter everywhere once the oil was hot. But it was from this concept that I thought of the idea of frying my eggs in something other than plain ol’ oil. I realized that if I made an infused oil but strained out all the spices, it would essentially be like using regular oil to fry an egg, with no particles to splatter crazily out of the pan.

My mala chili oil fried egg is shown above with a black garlic and scallion cream cheese and the classic Lao Gan Ma chili crisp**, on an everything bagel.

How to Make a Mala Chili Oil Fried Egg

Ingredients For the chili oil

2 tbsp coarse Chinese or Korean chili flakes
4 tsp pink Sichuan pepper
2 star anise
1/2 cup high smoke point neutral oil

You’ll also Need

1 egg (or more)
coarse kosher salt

Procedure

Add chili flakes to a heat-safe bowl. In a small saucepot, combine oil, Sichuan pepper, and star anise. Heat on medium-low heat until the lighter interior parts of the peppercorn husks begin to turn brown, about 4 minutes. Turn off the heat and wait for the pepper to turn fully dark brown, about 1 more minute. Carefully pour oil through a fine mesh strainer over the chili flakes. Mix together and transfer to a jar when cooled. Allow the chili to infuse with the oil overnight for best results. Then, use this chili oil to fry eggs, or as a base for a dumpling or noodle sauce!

To fry the egg: Skim 1 tablespoon of clear oil from the top of the jar (or pass the contents through a strainer). It is important to only use the oil as any other solids will splatter out of the pan when frying.

Heat the oil in a small nonstick pan, then add the egg (I like to crack the egg into a small bowl first). Spoon some of the hot chili oil over the egg whites to help them cook, and/or cook egg to your preference! Hit it with a little sprinkle of salt (or a drizzle of LGM chili crisp!).

Recipe: Dan Dan Dumplings

DanDanDumplings1.JPG

I love to experiment with taking the components of an existing dish and reimagining them in the form of a dumpling filling. If there’s a tried and true combination of ingredients already, then stuffing all of those flavors together into a one-bite dumpling format for most efficient delivery to the tastebuds will obviously result in something awesome. The trouble is that it’s hard to really celebrate those brilliant fillings in photo form. (Or, at least I personally struggle with that.) Dumplings are plenty cute-looking whole, but what makes them delicious is hidden inside.

But I finally had an idea for a dish-within-a-dumpling combo that I thought was worth photographing, because the sauce is just as important and sexy-looking as the dumplings. Presenting: Dan Dan Dumplings.

This idea builds off of this existing recipe that I developed for Bibigo USA, as a moreish way to serve their frozen mandu. I am super obsessed with Sichuan pepper and mala (numbing-spicy) foods and as part of that recipe, I developed my own version of mala chili oil! If you have never experienced them before, Sichuan pepper husks are super unique in that they contain a molecule that causes a tingling sensation on your tongue. It is not a burning heat, like eating a spicy chili, but rather a numbing sensation like when your foot “falls asleep”. I know it sounds a little unsettling when put that way, but it is honestly a delightful experience when eating in conjunction with flavorful, spicy foods. The combination of Sichuan pepper and spicy chilies is known in Chinese cuisine as mala, which translates to numbing-spicy.

chilioilingredients.JPG

Dan dan noodles have become an iconic mala dish associated with Sichuan cuisine in Chinese-American restaurants, and they are the inspiration for these dumplings. Dan dan refers to the carrying pole that OG street food vendors would use to transport their ingredients as they walked around. Since I’m not carrying my ingredients around on a pole, technically these aren’t “dan dan dumplings”, but I am gonna call them that because they are meant to be the dumpling version of dan dan mian. The dish usually has 3 major components: 1) an oily sauce that is a little numbing, nutty (from sesame paste), and spicy; 2) bouncy noodles; 3) a topping made of ground pork and preserved greens and sometimes a blanched Chinese vegetable. Instead of wok-frying the ground pork mixture, I stuffed it inside the dumpling wrappers, ditched the noodles, and went heavy on the chili oil in the sauce, in a similar vein to chili oil wontons.

I used the recipes for dan dan noodles by Woks of Life and Omnivore’s Cookbook as references for developing this dumpling recipe. One slight road bump that I ran into when replicating the flavors of dan dan noodles was the type of pickled vegetable used in the pork mixture. Both reference recipes call for a specific Sichuan-style preserved vegetable called sui mi ya cai. After staring at the shelves of pickled vegetable packets for quite some time at my local Asian supermarket, one of the uncles working at the store offered to help, but said they didn’t have it. This “preserved mustard green (chili)” is what I used instead.

DanDanDumplings4.JPG
DanDanDumplings2.JPG
DanDanDumplings3.JPG

Because the chili oil sauce is such a key component to this dish, I wanted to use a dumpling fold that would allow the sauce to really stick to the dumplings. What better way to accomplish this than to turn the dumplings themselves into little cups? Apparently this is known as the “rose bud” dumpling fold, but I received overwhelming feedback that this fold is quite reminiscent of the hats from The Handmaid’s Tale. It is super easy—just place a little scoop of filling on one half of the dumpling wrapper, fold in half and seal with some water, then overlap the two sides of the semicircle. You can see a video of how to do it here.

I obviously went very heavy on the chili oil in these photos. You can add it to your taste, but I was quite happy eating these as they were.

DanDanDumplings5.JPG

How to Make Dan Dan Dumplings

Ingredients For the chili oil

2 tbsp coarse Chinese or Korean chili flakes
2 cloves garlic, minced
1 scallion, thinly sliced
4 tsp pink Sichuan pepper
2 star anise
1/2 tsp salt
1/2 cup high smoke point neutral oil

Ingredients for the Dumplings

1/2 lb ground pork
2 tsp hoisin sauce
2 tsp shaoxing wine
1 tsp kecap manis (or 1/2 tsp dark soy and 1/2 tsp brown sugar)
1/2 tsp five spice powder
1/4 tsp ginger powder
a pinch of toasted and ground Sichuan pepper (optional)
1 2.5 oz packet spicy preserved mustard greens
about 24–26 dumpling wrappers

Ingredients for the Sauce

4 tsp Chinese sesame paste, stirred
2 tsp honey
1 tbsp soy sauce
2 tbsp black vinegar

For Garnish

1 scallion, sliced
1–2 tbsp roasted unsalted peanuts, chopped
cilantro (optional)

Procedure

In a heat-safe bowl, combine chili flakes, garlic, scallions, and salt. In a small saucepot, combine oil, Sichuan pepper, and star anise. Heat on medium-low heat until the lighter interior parts of the peppercorn husks begin to turn brown, about 4 minutes. Turn off the heat and wait for the pepper to turn fully dark brown, about 1 more minute. Carefully pour oil through a fine mesh strainer over the ingredients in the bowl. Stir everything in the bowl together and allow to sit for at least 10 minutes (more is recommended) to let the flavors integrate and the garlic cook through.

To make the dumpling filling, combine the ground pork, hoisin sauce, shaoxing wine, kecap manis, five spice, powdered ginger, and ground Sichuan pepper (if using) in a bowl until mixed evenly. Fold in the preserved mustard greens. Stuff inside dumpling wrappers and seal shut as desired (see notes above for rose bud fold). Place folded dumplings on a tray dusted with flour to prevent sticking.

In a separate bowl, whisk together sesame paste and honey. Whisk in soy sauce and black vinegar at a gradual drizzle to prevent the sesame paste from clumping.

Bring a large pot of water to boil, then carefully add the dumplings. Remove them as they float to the surface and transfer them to a bowl or tray with a little bit of oil.

Add about 2 tablespoons of the hot cooking water to the sesame sauce and whisk to combine. Then add 2 tablespoons of the chili oil and whisk again.

To serve, spread a generous layer or the sesame sauce in the bottom of each bowl. (You may still have a little bit left over.) Divide the dumplings into each bowl, then drizzle chili oil over the dumplings to taste. (You may still have some chili oil left over too, but I didn’t because I like it numby and spicy!) Garnish, and then mix dumplings in the sauce and oil before devouring.

My Basic Jook Recipe

porkbellycongee.JPG

There are plenty of recipes out there for rice porridge, commonly known as congee, or what my Cantonese family calls jook. I am mostly recording this basic jook recipe down for myself, because I know how I like to make it but I sometimes forget things like: How much was the right amount for our 2-person household? How much water did I start off with? How far in advance of dinner do I need to start it, again…? Getting old sucks, and one of the worst things about it for me so far has been forgetting all the simple little things that used to be so easy for me to recall.

To me, a good basic jook has a silky feel to it. Something that goes down easy without a lot of chewing but isn’t a completely homogenous puree either. Some people like theirs as more like a soupy water with cooked rice floating in it, but that’s not for me. I also like making sure that there is a pleasant mild flavor to it when eating it all on its own, even though a variety of toppings is an absolute must for eating jook in my household. Pickled vegetables, white pepper, and soy sauce where the most common toppings from my childhood. But instead of those, I really went all-out in the photo above to lure you in— And it worked, right?

The jook in the photo features red braised pork belly that I made using Omnivore’s Cookbook/Maggie Zhu’s recipe here. There’s also a poached egg, radish shoots, pea shoots, chopped scallions, crushed chicharrones, and some slices of red Fresno chili. I also served it with a side of you char kueh/youtiao/Chinese donut, which I buy at the Asian supermarket and always keep stashed in my freezer. The best part of eating jook is tossing in a few slices of the fried dough, letting them get soggy, and then eating a big scoop of the soggy donut and jook all at once.

How I Make Basic Jook/Congee

(Makes 2 dinner portions)

Ingredients

1/2 cup jasmine rice
2 cups bone broth
2-4 cups water
2 inches ginger, peeled
2 tbsp shaoxing wine
2 tbsp fish sauce
salt

Procedure

Combine rice, bone broth, and 2 cups of water in a large pot and turn heat on high. Finely grate ginger directly into the pot so it catches all the juice. Add shaoxing wine and fish sauce. Stir everything together.

Bring to a boil and then reduce heat to low. Cover and simmer for 1 hour, stirring occasionally to make sure nothing sticks to the bottom. If jook looks too dry, add water 1/2 cup at a time along the way. Continue simmering until jook reaches desired consistency. Season to taste.

Serve with yummy accompaniments.

Need a faster recipe? Check out my shortcut Chicken Jook with Ginger-Scallion Oil recipe, using storebought cooked rice and rotisserie chicken (sponsored recipe).

Regrets About My Kitchen Renovation

I mentioned in my Instagram stories the other day that there were a couple of things I regret about my kitchen renovation 8 years ago. A few people asked for me to share my reflections on the experience, so they don’t make the same mistakes. It’s all super minor things, but I’ve collected my thoughts here in case it is helpful for anyone considering a kitchen remodel.

8C453864-7130-4FFE-96BC-E9CFF405AAAC.jpg

We bought our house back in 2012. When we had started looking at homes the year prior, real estate was pretty reasonably priced in the Bay Area compared to how things are nowadays. Prices started to rise during that year of house hunting, so by the time we managed to nail something down, it was nowhere near perfect and we didn’t have much budget left for renovations. The one thing we knew we HAD to change was the kitchen, which we hated. The footprint of the kitchen was so tiny that there was basically nowhere to stand in it when the oven was open; it certainly couldn’t have fit more than one person actively cooking at once. (“If we didn’t renovate that kitchen, we’d be divorced by now,” we still joke.) We ended up hiring a contractor to knock down the wall that divided the kitchen and dining room, and gut the entire thing.

Things I regret:

  • Not getting electrical outlets installed in the kitchen island. The extra electrical work would have required our contractor to apply for more permits with the city, so we passed on this idea and had our small kitchen island placed on caster wheels instead. Since I use the island as my main work surface for all my prep, it would have been nice to also be able to use small appliances on it.

  • Choosing an overmount sink verses mounting it under the countertop. We opted for a drop-in sink (like this) that has a thin metal lip extending over the countertop to hold it in place. Crumbs sure have a way of getting wedged under this lip when we are trying to wipe down the countertops; very annoying!

  • Not getting an ice maker installed in our freezer. Would have been convenient for all those iced home cafe drinks I made this past year!

  • Inspecting things more carefully each day while the work was in progress. For the most part, we really liked our contractor. He was friendly, communicated well, and made some great suggestions along the way. But there are little missed details (weirdly aligned cabinet legs, crooked light fixture) that we didn’t notice until after the project was over.

Here are some before, during, and after photos, in case you’re curious!

66609_10101946813521903_1612234202_n.jpg
531419_10101767528650223_1988979383_n.jpg
530734_10101802442048493_561334800_n.jpg
480306_10101946813736473_631140447_n.jpg
554944_10101946813696553_358258544_n.jpg